background image

Resolution

You can adjust the resolution at which your
DECTfax Plus sends documents.
There are three settings:

Resolution

Use with

Normal

Documents which do not

(Default)

contain fine detail eg

a page of text

Fine

Documents which include

small characters or drawings

Photo

Documents which include

pictures. Colours will be

shown in shades of grey.

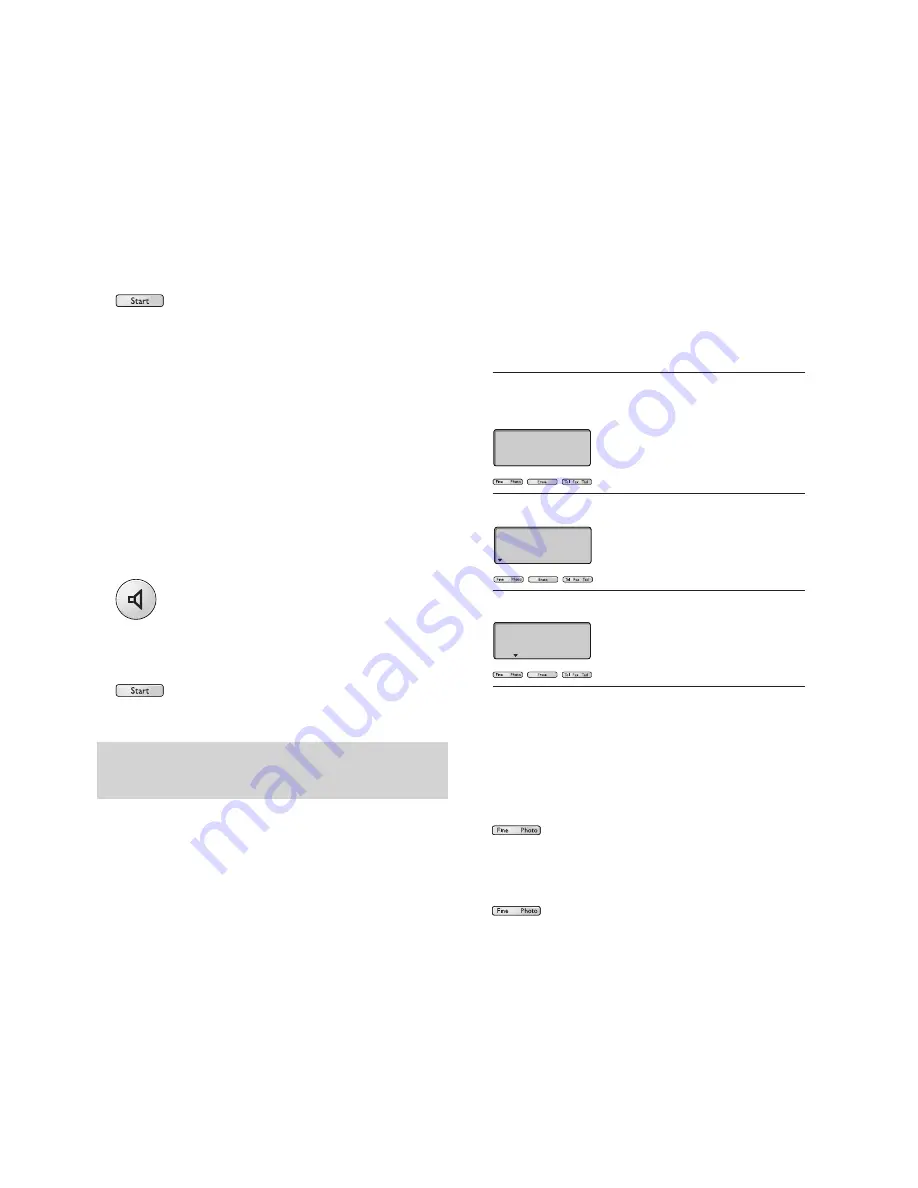
To adjust the resolution

1

Place the document in the document feeder.

2

Press 

Fine Photo

. An arrow will appear in

the display positioned above the word 

FINE

.

3

Press 

Fine Photo

again to toggle between

the settings 

FINE

PHOTO

and 

NORMAL

Using your fax machine

17

4

Press 

Start

. The display shows 

MEM PG 1

,

then 

CALLED NUMBER

and begins to send the

document.

If the number dialled is engaged, your
DECTfax Plus will automatically redial the
number, after a few minutes. You can redial the
number yourself by pressing the 

Start

button.

With call monitoring

1

Place the document to be sent in the sheet
feeder.

2

Press the 

Hands Free 

button. The display

shows 

HANDS FREE. 

You will hear the

dialling tone.

3

Dial the number you require.

4

Press 

Start

to start sending the fax..

If there is an answering machine at the other end,

press 

Start

towards the end of the outgoing message.

Summary of Contents for DECTfax Plus

Page 1: ...BT DECTfax Plus Fax machine and digital telephone system User guide ...

Page 2: ...this page for an At a glance guide to your DECTfax Plus This equipment is not designed for making telephone calls when the power fails Alternative arrangements should be made for access to emergency services ...

Page 3: ......

Page 4: ...eceive internal external calls Recall button For use with switchboards and select services and inserts a pause within a stored telephone number Clr button Enables you to exit the current function and edit numbers and buttons Used to access the memory scroll through the directory and change phone settings Cover release button Press to open the keypad cover Redial button Stores multiple numbers up t...

Page 5: ...dspeaker volume button Increases the ringer volume and the loudspeaker volume Hands free button Used to make calls through the loudspeaker without using the handset Redial button Automatic redial of the last number dialled Recall button Inserts a pause within a telephone number when dialling an external line through an internal switchboard Memory button Used to store and dial numbers in the memory...

Page 6: ......

Page 7: ...5 ...

Page 8: ...notes These are shown in grey boxes At a glance 3 Introduction 7 Setting up 8 Using your fax machine 16 Using your handset 27 Using the answering machine 34 Using mailboxes 39 Using additional handsets 42 Additional features 46 Help 51 Technical information 54 Index 56 In this guide ...

Page 9: ...e of the machine Purchase price For warranty purposes proof of purchase is required so please keep your receipt Equipment Check your BT DECTfax Plus is complete when you unpack it You should have BT DECTfax Plus machine Print ribbon Smartcard ink ribbon gauge Power adaptor Telephone cable Radio module DECT handset Handset charger Paper The print ribbon supplied with your BT DECTfax Plus is only a ...

Page 10: ...use 1 Installing the print ribbon and smartcard The print ribbon and the smartcard work together and the fax will not work without the smartcard The print ribbon prints onto paper and the smartcard monitors how much ribbon has been used Warning Use only print ribbons that match the supplier s specifications Using other types may result in damage to the main machine and invalidate the manufacturer ...

Page 11: ...UGE Setting up 9 ÀÀ ÀÀ ÀÀ ÀÀ ÀÀ ÀÀ ÀÀ ÀÀ ÀÀ ÀÀ ÀÀ ÀÀ 4 Remove the clear securing band by pulling the coloured tab For the starter ribbon that comes with the new machine remove the foam packing piece 5 Gently pull the smaller spool towards you and place it in its housing there are two slots that hold it in place 6 To install the smartcard remove the green cover by pressing on the arrow and sliding ...

Page 12: ...Plus to the telephone line and mains power 1 Plug the telephone line cord into the socket on the side of the machine and connect the other end into the telephone wall socket 2 Plug the power adaptor into the side of the machine 3 Plug the mains power cable into the power adaptor then plug the lead from the power adaptor into a convenient mains socket When the mains power is switched on the display...

Page 13: ...low a b eg 50 charge 5 Inserting the output paper 1 Open the sheet feeder flap by lifting it up at the side 2 Lift the paper support bar 3 Insert up to 30 sheets of paper between the paper guides and adjust the left paper guide a to the width of the paper Press the clip b and allow the paper to fall down into position IMPORTANT The new handset may not be charged It takes up to 12 hours to charge c...

Page 14: ... of operating your fax machine To print out a list of all the functions of the DECTfax Plus which allows you to see them at a glance along with the function codes to carry them out see Printing out the functions list on page 47 There are a number of buttons which are used to access the functions of your DECTfax Plus Button What it s used for Accesses the function menus Confirms an entry or option ...

Page 15: ...you are calling To enter your own telephone fax number 1 Press OK Menu then 2 then 2 The display shows 22 NUMBER Press OK Menu 2 Use the keypad to enter your own number up to a maximum of 20 digits To enter a space use the button to enter a use the button on the alphabetic keypad 3 Press OK Menu to confirm the entry Entering your name You can add your name such as the name of your company to be pr...

Page 16: ...nu to confirm the entry Network and dial settings Your BT DECTfax Plus has been preset to work on a direct exchange line or PSTN There is no need to alter this setting unless you will be using the machine on an internal network or PABX If this is the case To change the network setting 1 Press OK Menu then 2 then 4 The display shows 24 NETWORK Press OK 2 Press the and Ä buttons to scroll through th...

Page 17: ...and fax and phone fax and answering machine Tel mode When set to Tel mode the display shows All calls must be answered manually If the call is a fax you will hear beeps from the other fax machine wait a few seconds and the basestation will automatically switch to fax receive mode If it does not press then 7 on your handset to activate fax receive mode Tel Fax mode When set to Tel Fax mode the disp...

Page 18: ...y placed 3 Dial the fax number you require You can dial manually or use the DECTfax Plus directory see page 21 WARNING Do not put paper into the machine if it has paper clips staples or any metal attachment it is wet with ink paste or correcting fluid it is too thick or too thin and flimsy it has sellotape or other paper stuck on it You can delete digits using the button a The document feeder will...

Page 19: ...Press Fine Photo again to toggle between the settings FINE PHOTO and NORMAL Using your fax machine 17 4 Press Start The display shows MEM PG 1 then CALLED NUMBER and begins to send the document If the number dialled is engaged your DECTfax Plus will automatically redial the number after a few minutes You can redial the number yourself by pressing the Start button With call monitoring 1 Place the d...

Page 20: ...mber the display shows three options use the Ä button to see the third MEMORY PAPER FEEDER and TYPE MESSAGE If you have entered more than one fax number the display shows two options MEMORY and TYPE MESSAGE If you choose MEMORY the fax that you are sending will be scanned and sent from memory 7 If you choose PAPER FEEDER the fax will be held in the paper feeder until the DECTfax Plus is ready to t...

Page 21: ...memory up to 20 Slerexe pages and printed out at a later date The default setting is for memory receive to be switched on To switch off memory receive When memory receive is off you must ensure paper is in the sheet feeder 1 Press OK Menu then 3 then 6 The display shows 36 RX IN MEM 2 Press OK Menu The display shows two options YES Incoming faxes are stored in the memory even if there is paper in ...

Page 22: ...reduced size If you have created any mailboxes before printing you will be asked to enter a mialbox number 4 Enter the mailbox number you want to print from or enter 0 to print from the main memory 5 Press OK Menu to confirm the setting and the stored faxes are printed in reduced size Fax memory full When there are too many faxes in the memory the machine can no longer store any additional faxes T...

Page 23: ...splay the first name beginning YO 3 To send a fax press Start and the fax will automatically be sent to the required number 4 To make a hands free call press the Hands Free button Using the directory to store and dial numbers Your DECTfax Plus can store up to 50 names and numbers in its directory You can then quickly dial a number from the directory after entering its memory number or letter To st...

Page 24: ...To print out a list of names and numbers stored in the directory Press OK Menu then 1 then 2 then Start To edit entries in the directory 1 To edit an entry press OK Menu then 1 then 3 The display shows 13 MODIFY 2 Press OK Menu The display shows MODIFY and the last name in the directory Use the and Ä buttons to scroll through the entries until you reach the name you want to alter then use the butt...

Page 25: ...tically be sent If you choose MEMORY the display will show SINGLE POLLING Press the button to Using your fax machine 23 3 Use the and Ä buttons to scroll through the options Press OK Menu to confirm your choice Activity Reports The DECTfax Plus will record details of the last 30 fax transactions To manually request fax details Press OK Menu then 5 then 2 then OK Menu Polling Polling is an operatio...

Page 26: ...want to poll the document from If you want to poll from more than one number press the button The display shows CALLED PARTY 2 You can enter up to Using your fax machine 24 six numbers using the button to go to the next entry 4 For immediate polling press Start Your DECTfax Plus calls the other machine 5 To set your machine to poll at a specified time press OK Menu enter the polling time and press...

Page 27: ...s to scroll through the jobs Press OK Menu to select the job to be modified 2 Press OK Menu A list showing the characteristics of each job will print out To cancel a timed job 1 Press OK Menu then 6 then 3 The display shows 63 CANCEL JOB 2 Press OK Menu The different types of timed jobs displayed are TX Delayed send job DOC Document to be polled by another machine POL Timed polling job 3 Use the a...

Page 28: ... timed job 1 Place paper in the printer sheet feeder 2 Press OK Menu then 6 then 4 The display shows 64 PRINT DOC 3 Press OK to bring up the list of timed jobs 4 Use the and Ä buttons to scroll through the jobs and press Start to print the selected job M N O 6 1 It can be helpful to print out a document in order to check it ...

Page 29: ...nd receiving calls When making a call your handset must be in radio contact with the base station the display will show the handset s registration number for example 1 To make a call 1 If the handset is not switched on press the On Off button 2 Press the Talk button The display shows the Talk icon The base unit display shows HANDSET ON LINE 3 Listen for a dialling tone and then dial the number you...

Page 30: ...lways press the TALK button to receive and finish the call in mode 1 you simply lift the handset to receive the call and replace it to finish the call To choose the mode 1 Press OK The display shows F function Then press 8 The display shows F8 and the current mode setting 0 or 1 2 Use the or the button to change the mode 3 Press OK to confirm your choice The handset beeps Earpiece volume To adjust...

Page 31: ...or the button to scroll through the numbers stored 3 When you see the number you want to call press the Talk button and the number will dial automatically Ring melody and volume You can choose from five ring melodies To change the ring melody 1 Press OK then 3 The display will show a number from 1 to 5 and at the same time play that melody 2 Use the or the button to move from melody to melody 3 Pr...

Page 32: ...each the phone number you require 1 If you are on a PABX exchange switchboard you may need to have a pause in the stored number Use the R button for this The pause is shown on the display as 0 0 eg Using your handset 30 To switch off the ring tone 1 Press OK then 1 2 By pressing the or the button you can switch the ring tone off or on When it is off the display shows the RINGER OFF icon 3 Press OK...

Page 33: ... display the reference number 1 Press the or the button 2 Enter the reference number you require for example 07 3 Press the Talk button and the number will dial automatically To dial a number from the base station directory 1 Press the i button on the handset 2 Use the and buttons to scroll through the telephone numbers until you see the one you want Names will not be displayed at the handset 3 Pr...

Page 34: ...or switch the tones off 4 Press OK to confirm your choice Call timer After you have finished a call you can check the length of the call To check the duration of a call 1 When you have finished a call press the Clr button The display shows the length of the call in hours minutes and seconds The display will return to normal after a few seconds 2 To clear the call duration press the Clr button agai...

Page 35: ...33 ...

Page 36: ...en 4 then 5 The display shows 45 ANS MODE 2 Press OK Menu The display shows 451 RECORD UNIT and 452 ANSWER ONLY 3 Use the and buttons to change between the options To set Answer and record select 451 RECORD UNIT To set Answer only select 452 ANSWER ONLY 4 Press OK Menu to select the option To switch the answering machine on and off Press the Tel Fax Tad button until the display shows the answering...

Page 37: ...he Talk button on the handset to stop recording The base station replays the recorded message before returning to standby To record an outgoing message for Answer only mode This message can be up to 90 seconds long 1 At the base station Press OK Menu then 4 then 1 The display shows 41 RECORD OGM 2 Press OK Menu The display shows 411 OGM and 412 SIMPLE OGM 3 Press the button to select 412 SIMPLE OG...

Page 38: ... are played first To skip back and forward through your messages During playback you can use the and buttons to move backwards and forwards through your messages Press once to skip to the next message Press twice or more to skip forward through your messages Press once to go back to the start of the current message Press twice or more to skip backwards through your messages To delete single messag...

Page 39: ...e replayed as incoming messages To record a memo 1 At the base station Press OK Menu then 4 then 3 The display shows 43 RECORD MEMO 2 Press OK Menu The display shows PLEASE OFF HOOK RECORD MEMO 3 At the handset Press the Talk button and start speaking to record your outgoing message The display on the base station shows RECORD and the recording time left in seconds 4 Press the Talk button on the h...

Page 40: ...sage Restart listening to a message Skip to the previous message After listening to your messages Press To Replay all messages Delete all messages Record a new outgoing message Stop recording the outgoing message Listen to your outgoing message Switch on the answering machine Switch off the answering machine To finish operating the answering machine press the TALK button JK L 5 M N O 6 G H I 4 G H...

Page 41: ...enu the display shows PLEASE OFF HOOK OGM This facility allows up to five people to have their own individual addresses at which they can receive fax or voice messages To create a mailbox 1 Press OK Menu then 7 then 1 The display shows 71 CREATE 2 Press OK Menu Enter a mailbox number between 1 and 5 3 Press OK Menu The display shows 711 MAILBOX CODE This is a security code which you set to restric...

Page 42: ...CANCEL 2 Press OK Menu Enter the number of the mailbox you want to delete When deleting a mailbox you don t need to enter its security code 3 Press OK 4 Press OK Menu to confirm your choice To deposit faxes or messages in a mailbox 1 Your machine must be in Tel Fax mode or Tad mode see Setting the receive mode page 15 2 The person calling you dials your number and after your DECTfax Plus has answe...

Page 43: ...Menu Enter the fax number you want to send to followed by their mailbox number followed W X Y Z 9 Using mailboxes 41 by the start time and transaction type memory paper feeder or alpha key as for a delayed send followed by the number of pages 3 Press Start and the message will be sent Polling from a remote mailbox You can retrieve a document from the mailbox of a compatible fax machine that has si...

Page 44: ... the code at the base station to make it possible to register a handset to the base only with your authorisation If you want to keep the code as 0000 then you can register handsets using the simple method If you want to change the code or register a handset to more than one base station handsets must be registered using the customised method The simple method Use this method if you have only one b...

Page 45: ...ss OK and the display will show the available handset numbers 1 4 7 Press the number you want on the keypad the display will show this number to indicate that the handset is registered To change the handset security code 1 Press OK Menu then 8 then 7 2 Press OK Menu The display shows OLD CODE then Enter the old code This should be 0000 if it has not already been changed 3 The display shows NEW COD...

Page 46: ...nsferring calls To transfer a call from the base station to a handset You can make or receive a call at the base station and transfer it to a handset 1 At the base station press OK Menu then Transfer The base station display will show HANDSET NUMBER 3 Enter the number 1 4 of the handset you want to transfer the call to That handset will ring 4 At the handset when the handset rings press the Talk b...

Page 47: ...ow HANDSET NUMBER 2 On the keypad enter the handset number 1 4 that you want to contact If you want to contact all the handsets at the same time press the button The display will show FIND HANDSET 3 The base station will beep and the handset s you are contacting will ring 4 At the handset being contacted the display will show a flashing INTERCOM icon and the handset will ring Call Monitor When usi...

Page 48: ...ter the four digit code 3 Press OK Menu to confirm your entry Remote access of your fax machine You can retrieve faxes from your DECTfax Plus from another fax machine 1 From another fax machine dial your phone number 2 Press the button during the announcement 3 Enter your four digit security code Any voice messages you have will be played followed by a series of beeps 4 At the end of the message s...

Page 49: ...wering machine You can access your voice messages stored in your DECTfax Plus from another telephone 1 From another telephone dial your number 2 Press the button during the announcement 3 Enter your four digit security code Your voice messages are played back to you followed by a series of beeps Remote access of your mailbox es You can retrieve fax and voice messages stored in your DECTfax Plus ma...

Page 50: ...shows 54 SETTINGS 2 Press OK Menu The machine set up configuration will print out Alarm You can set your DECTfax Plus to act as an alarm To set the alarm 1 Press OK Menu then 8 then 1 The display shows 81 ALARM 2 Press OK Menu The display shows START 3 Press OK Menu again The display shows SET HOUR and flashes the current time next to the time to be set 4 Set the time using the keypad 5 Press OK M...

Page 51: ...ING CALL NUMBER ONLY alternating with NUMBER NAME Number INCOMING CALL withheld alternating with WITHHELD Number INCOMING CALL 111111111111 unavailable alternating with UNAVAILABLE Operator INCOMING CALL 111111111111 alternating with UNAVAILABLE International INCOMING CALL 111111111111 alternating with UNAVAILABLE Payphone INCOMING CALL NUMBER alternating with NUMBER Ringback INCOMING CALL NUMBER ...

Page 52: ...he list 3 To call a number from the stored list press the Hands free button while the number is displayed 4 To fax to a number from the list press Start while the number is displayed To review the list from the handset 1 Press the i button then Redial The display shows details of the last call 2 Use the and Ä keys to scroll through the list 3 To call a number from the stored list press the Talk bu...

Page 53: ...k and dial settings in the Setting up chapter The TEL icon is flashing re activate the ringing tone see the section headed Setting the ringing tone in the Setting up chapter The mains may be down Check that the telephone line cord is properly connected Open the cover and clean the scanning sub assembly located opposite the white roller using a soft but not fluffy cloth dipped in surgical spirit Af...

Page 54: ...e station ringing is not switched off Check that the dialing mode Voice or Decimal Frequencies is compatible with your PABX Check that you have inserted pauses after the 0 or 9 in your memorised numbers if your line is connected to a PABX Allow your handset to discharge completely and then put it on charge for at least 5 hours You should perform this operation about every two months in order to in...

Page 55: ...t marketing calls from organisations with which you have a contractual relationship To register for the TPS BT customers should ring 0800 398893 Transmission report codes The activity reports and send reports detail the outcome of each transaction In the event of an error they will use one of the following codes Code Meaning and action 1 No answer try again later 3 Call interrupted by user pressin...

Page 56: ...ket arrangements provided with these direct exchange lines To compatible switchboards You may NOT connect it To shared service party lines The connection to the telecommunication system must be unplugged before the earth is disconnected The connection to the telecommunication system must not be hardwired This apparatus may be used on telecommunications systems employing loop disconnect or MF signa...

Page 57: ...ts after making connections between circuits 2 Interconnection directly or by way of other apparatus of ports marked Safety Warning See instructions for use with ports marked or not so marked may produce hazardous conditions on the network Advice should be obtained from a competent engineer before such a connection is made 3 When you operate this equipment the electrical mains socket should be nea...

Page 58: ...14 Directory changing numbers 30 dialling numbers 31 dialling from base station 31 fax from base station 48 handset 30 storing numbers 21 30 Document feeder 16 Document support bar 16 Duration of call 32 Fax number entering your own 13 Fax preference scheme 53 Faxes monitoring 17 printing 20 receiving 19 remote access 46 sending 16 Functions list printing 47 Handset 26 Answering mode 28 Directory ...

Page 59: ...stalling 8 purchasing new 8 security 8 Printing a fax 20 Radio module 10 Receive mode 15 Receiving faxes 19 Redial 29 Registering handsets 32 Remote access 46 Reports send 23 settings 48 activity 23 report codes 53 Resolution 4 17 Ringer delay 54 melody 14 29 volume 29 switching on off 30 Secrecy 29 Send reports 22 Smart card installing 9 Switchboards 55 Technical information 54 Tel mode 15 Tel Fa...

Page 60: ...are subject to availability and may be modified from time to time Services and equipment are provided subject to British Telecommunications plc s respective standard conditions of contract Nothing in this publication forms any part of any contract Touchtone is a registered trade mark of British Telecommunications plc in the UK British Telecommunications plc 1998 Registered Office 81 Newgate Street...

Reviews: