Check that the package contains the following before using the printer.
Installing the Rechargeable Li-ion Battery
1.
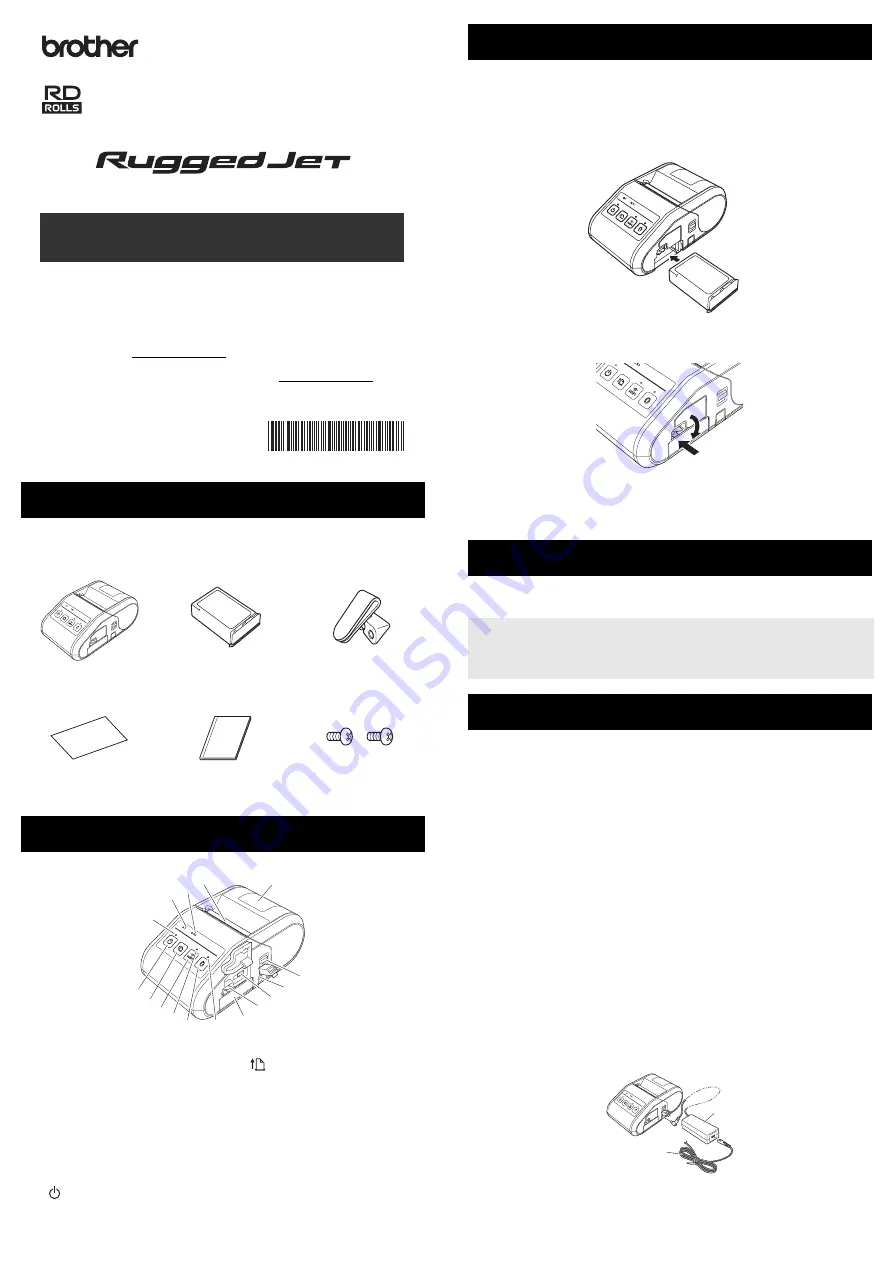
Make sure that the battery latch is lifted up, and then insert the battery
into the battery compartment with the battery cover attached to the
battery. Make sure that the terminal end of the battery is facing inward.
2.
With the battery inserted and while pushing the battery lightly into the
cavity, lower the battery latch until it clicks locking the battery in place.
Removing the Rechargeable Li-ion Battery
While pushing the battery lightly, lift the battery latch to unlock the battery, and
then remove the battery.
On: Press and hold the Power button until the POWER indicator is lit in green.
Off: Press and hold the Power button until the STATUS indicator is lit in red.
1.
Make sure that the rechargeable Li-ion battery is installed in the printer.
2.
Use the AC adapter and AC power cord to connect the printer to an AC
power outlet (see Connecting to an AC Power Outlet (Optional)), or use
the car adapter to connect the printer to a DC power outlet (see
Connecting to a DC Power Outlet (Optional)).
3.
The battery indicator light is orange when the battery is charging.
When the rechargeable Li-ion battery is fully charged, the battery
indicator light turns off. Disconnect the AC adapter or car adapter from
the DC connector.
For details, see the Online User’s Guide.
Connecting to an AC Power Outlet (Optional)
Connect the printer to a nearby AC power outlet to charge the rechargeable
battery.
1.
Connect the AC adapter to the printer.
2.
Connect the AC power cord to the AC adapter.
3.
Connect the AC power cord to a nearby AC power outlet (100 -
240 VAC, 50 - 60 Hz).
Unpacking the RJ-3050/3050Ai
Printer
Rechargeable Li-ion
Battery
Belt clip
User’s Guide
Product Safety Guide
Phillips screw
General Description
1
Battery compartment
2
Battery latch
3
Mini-USB port
4
DC connector
5
Cover open lever
6
RD Roll compartment cover
7
Paper outlet
8
Battery indicator
9
STATUS indicator
10 POWER indicator
11
(Power) button
(To turn the printer on/off)
12
(Feed) button
(To feed the paper or print the
printer settings)
13 Wi-Fi button
14 Wi-Fi indicator
15 Bluetooth button
(To communicate with your
Bluetooth-equipped
computer/adapter or your
network access point/router)
16 Bluetooth indicator
English
Español
Thank you for purchasing the Brother RuggedJet RJ-3050/3050Ai mobile printer.
Read the included User’s Guide and Product Safety Guide, before using the
printer. For detailed operation instructions, see the Online User's Guide (Brother
Solutions Center at support.brother.com). We suggest that you keep these
documents in a handy place for future reference. To download the latest
manuals, please visit the Brother Solutions Center (support.brother.com),
where you can also download the latest drivers and utilities for your printer, read
FAQs and troubleshooting tips or learn about special printing solutions.
Printed in China
D00HXL001
RJ-3050/3050Ai
User’s Guide
1
2
3
4
5
6
7
8
9
11
12
13
15
10
16
14
Using the Rechargeable Li-ion Battery
Turning the Printer On or Off
NOTE
Do NOT remove the battery or power to turn off the printer until the
STATUS indicator goes off .
Recharging the Li-ion Battery
1
AC adapter
2
AC power cord
1
2


