1
2
3
4
5
6
7
8
31
L
ABE
L
P
RI
NT
ING
Printing a Label
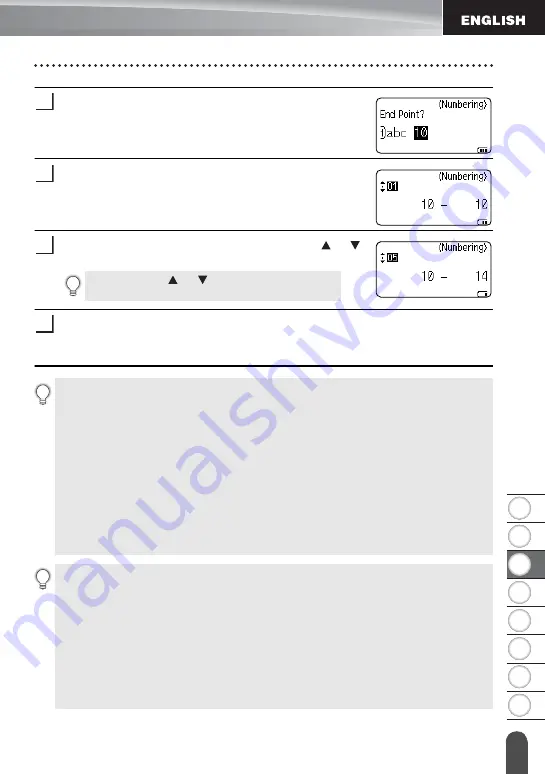
Move the cursor to the first character to be incremented in
the numbering sequence and press the
OK
or
Enter
key.
Move the cursor to the last character to be incremented in
the numbering sequence and press the
OK
or
Enter
key.
The number of labels to be printed is displayed.
Select the number of labels to be printed using the or
key, or type the number using the number key.
Press the
OK
or
Enter
key.
The labels are printed.
As each label is printed the number of copies printed is shown.
4
5
Hold down the or key to quickly adjust the
number of copies.
6
7
• Press the
Esc
key to return to the previous step.
• The figures shown on the screen during printing indicate the "count / number of
copies".
• Pressing the
Space
key when selecting the number of copies resets the value to 01,
the default.
• Auto-numbering can also be applied to bar codes. When a bar code contains an auto-
numbering sequence, no other fields in the label can contain an auto-numbering
sequence.
• The auto-number portion of the label is incremented after each label is printed.
• Only one auto-numbering sequence can be used in a label.
• Any symbols or other non-alphanumeric characters in the auto-numbering sequence
are ignored.
• An auto-numbering sequence can only contain a maximum of five characters.
• Letters and numbers increase as shown below:
0
1...9
0
...
A
B...Z
A
...
a
b...z
a
...
A0
A1...A9
B0
...
Spaces (shown as underscores "_" in the example below) can be used to adjust the spacing
between characters or to control the number of digits that are printed.
_9
10...99
00
...
_Z
AA...ZZ
AA
...
1_9
2_0...9_9
0_0
...
Summary of Contents for P-touch H500
Page 62: ......


