Brother MFC-760 Owner'S Manual Download Page 70

61

S E T U P   R E C E I V E

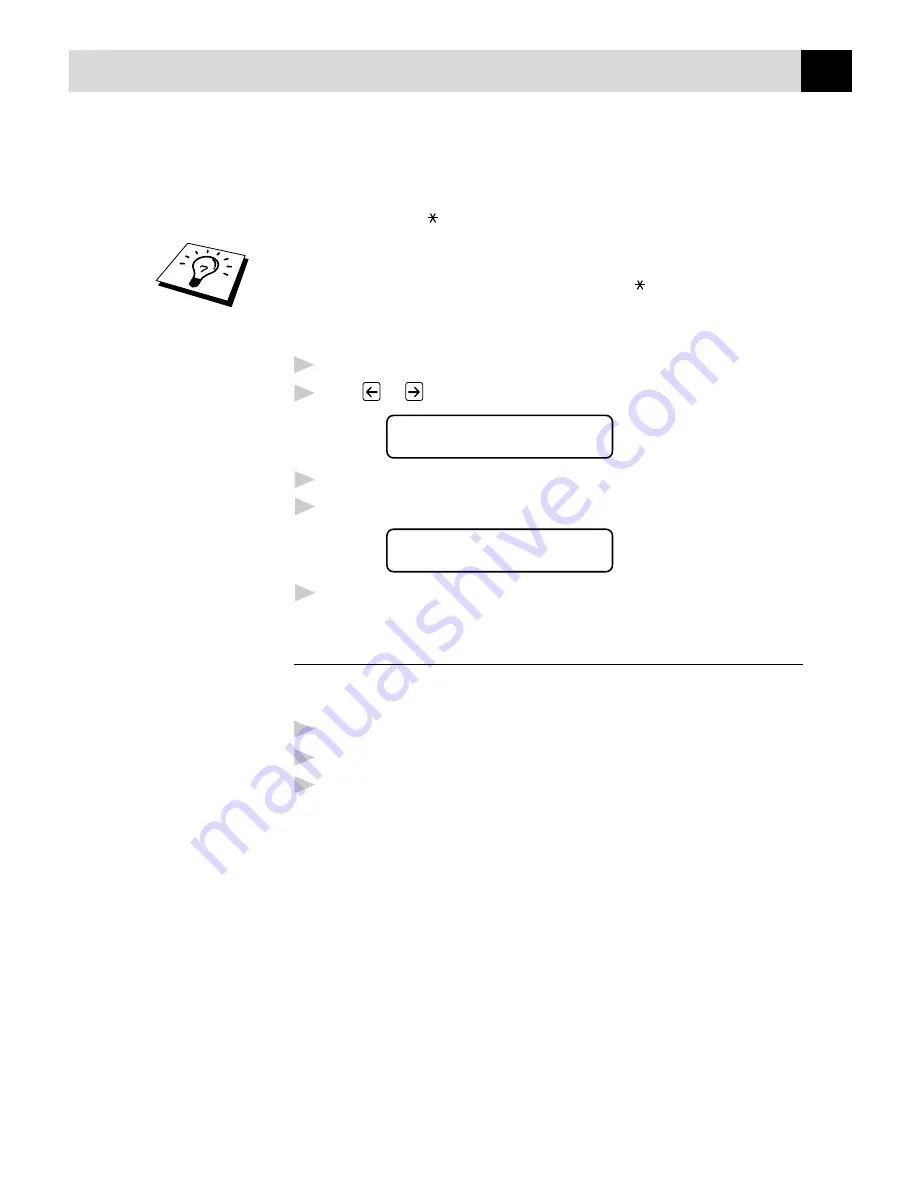
Changing Remote Codes

Remote Codes might not work with some telephone systems. The preset
Activation Code is   

5


1

.

If you are always disconnected when accessing your external TAD

remotely, try changing the Activation Code from   

5


1

 to 

#


#


#

.

To change Remote Codes

1

Press 

Menu

,

 1

,

 2

,

 4

.

2

Press 

 or 

 to select ON (or OFF).

REMOTE ACT.:ON

3

Press 

Set

 when the screen displays the setting you want.

4

Enter a new Remote Activation Code, then press 

Set

.

ACT.CODE:*51

5

Press 

Stop

 to exit.

Printing a Fax from Memory

If you have fax storage ON for remote retrieval, you can still print a fax
from the machine’s memory when you are at your machine:

1

Press 

Menu

1

7

4

.

2

Press 

Start

.

3

After all the data saved in the memory is printed out. Press 

Stop

.

See

“Setting Fax

Storage”

chap. 9

Summary of Contents for MFC-760

Page 1: ...MFC 760 OWNER S MANUAL ...

Page 2: ...nd telephony in most European countries However since there are still network differences between countries other features such as caller ID will only work in the specific country for which this product was produced If you experience any difficulties when connecting this product please contact your nearest Brother Office or supplier as detailed in the warranty documentation for this product ...

Page 3: ...lephone number 0161 931 2258 or Fax number 0161 931 2218 Description Item Ink Cartridge black LC02BK Ink Cartridge cyan blue LC02C Ink Cartridge magenta red LC02M Ink Cartridge yellow LC02Y 360 dpi High Quality Coated Paper 200 sheets BP36CA 720 dpi High Quality Coated Paper 200 sheets BP72CA Glossy Paper 20 sheets BPGLA Transparancies Ink Jet compatible Print Head HD002 Brother Coated Paper is In...

Page 4: ...ng the MFC to work with a PABX 18 Ringer Equivalence Number REN 18 Using Extension Telephones 19 Connecting an External Telephone Answering Device TAD 20 Sequence 20 Connections 20 Outgoing Message OGM of External TAD 21 Connecting an External Telephone 21 Setting Up the MFC and Computer to Work Together 22 Before You Begin 22 Connecting the MFC to Your Computer 22 Computer Requirements 23 Install...

Page 5: ...ls 42 Setting the Beeper Volume 43 PABX and TRANSFER 43 Setting PABX 43 Setting the Clock Change 44 Setting the Speaker Volume 44 Setting the Ring Volume 44 Memory Storage 44 6 Setup Send Before You Begin 45 Sending Faxes Using Multiple Settings 45 Faxing from the Document Feeder 46 ADF Automatic Document Feeder 46 Faxing from the Scanner Glass 47 Scan Fax 47 Resolution 48 Contrast 48 Automatic Tr...

Page 6: ...s 60 Operation from an External or Extension Telephone 60 Changing Remote Codes 61 To change Remote Codes 61 Printing a Fax from Memory 61 BT Call Sign For U K Only 62 Set the BT Call Sign 62 Polling 63 Secure Polling 63 Setup for Polling Receive 63 Setup for Polling Receive with Secure Code 64 Setup Delayed Polling Receive 64 Sequential Polling 65 Setting PC Interface Mode 66 8 Quick Dial Numbers...

Page 7: ...ransmission Verification Xmit Report 82 Journal Period 82 11 Copy Operations Basic Copy Operations 83 Copying One Page 83 Making Multiple Copies Using the ADF 84 Multiple Copies Using the Scanner Glass 84 Making Enlarged or Reduced Copies Temporary Setting 86 Copy Quality Temporary Settings 86 Using the Copy Quality Key 87 Using the Paper Type Key 87 Using the Brightness Key 88 Copy Quality Defaul...

Page 8: ... 108 Choosing the Right Kind of Paper 108 Multi Purpose Paper Cassette 108 Loading Paper in Multi Purpose Paper Cassette 109 Adjusting for Thick Paper and Envelopes 109 Manual Feed Slot 110 Setup for Envelopes 111 Simultaneous Printing Fax 111 Printer Operation Keys 112 On Off Line Key 112 Reset Key 112 Print Priority Key 112 Ink Management Key 112 Turning Off Bi directional Printing 113 For Windo...

Page 9: ...l Printing 125 Packing and Shipping the MFC 126 Regular Maintenance 129 Cleaning the Scanner 129 Cleaning the MFC Printer Platen 130 Cleaning the Pick up Roller 130 Replacing the Ink Cartridges 131 16 Specifications Product Description 135 Fax Specifications 135 Printer Specifications 136 Printing 136 Controller 137 Print Media 137 Compilation and Publication Notice 138 Trademarks 138 Glossary 139...

Page 10: ...es to read this manual Additionally your MFC has a Help Key for assistance Press Help to print a list of basic operational steps and functions Finding Information All chapter headings and subheadings are listed in the Table of Contents You will also be able to find information about a specific feature or function by checking the Index at the back of this manual Also throughout this manual you will...

Page 11: ... for about 40 seconds after dialling During that time the sending machine must begin the handshake with the receiving machine Each time you use automatic procedures to send a fax you are sending CNG tones over the phone line You will soon learn to listen for these soft beeps each time you answer a phone on your MFC line so you can know if you are about to receive a fax message The receiving fax re...

Page 12: ...xternal telephone answering device TAD on your MFC line your TAD will determine the number of rings before the call is answered Pay special attention to the directions in the Installation chapter for connecting a TAD or answering machine to your MFC ECM Error Correction Mode The Error Correction Mode ECM is a way for the MFC to check the integrity of a fax transmission while it is in progress ECM ...

Page 13: ...l Display LCD displays messages to help you set and operate your MFC 6 Ink Empty Indicator Flashes when ink cartridge is low and stays lit when ink is empty 7 Resolution Indicator Lights These LED show the resolution mode you selected 8 Resolution Sets the resolution when you send a fax 9 Programming Keys Menu Lets you access the function and programming mode Right Arrow Verify Moves the LCD curso...

Page 14: ...ily change the paper type setting for Copy and Video Printing modes Brightness Lets you temporarily adjust the brightness of the whole image to be lighter or darker Enlarge Reduce Lets you reduce or enlarge copies depending on the ratio you select 25 to 400 Copy Quality Use this key to temporarily change the quality for Copy and Video Printing modes Mono Copy Makes a black and white or single colo...

Page 15: ...6 C H A P T E R O N E ...

Page 16: ...er Coated Paper Ink Jet Paper Brother Colour Suite 1 CD ROM Ink Cartridges Telephone Line Cord Power Cord Bi directional Parallel Cable 2 C H A P T E R T W O MFC Setup and Connections Whenever you transport the MFC use the packing materials that came with your MFC and pack the MFC correctly ...

Page 17: ...our MFC to electrical outlets controlled by wall switches or automatic timers as disruption of power can wipe out information in the unit s memory Do not connect your MFC to electrical outlets on the same circuit as large appliances or other equipment that might disrupt the power supply Avoid interference sources such as speakers or the base units of cordless phones Ensure the airflow from the fan...

Page 18: ...can hold up to 250 sheets of paper 75 g m2 1 Remove the paper cassette lift up and pull out 2 Remove the cassette cover 3 Adjust the cassette to the letter A4 LTR or legal position for the size of paper you are using To adjust the cassette to legal size press the button on the left and pull out the front part of the cassette Button Legal Position A4 LTR Position ...

Page 19: ... adjusters at the front and right to fit around it Do not place paper above the maximum paper height line or paper may jam Maximum Height Line Paper Adjusters 5 Replace the cassette cover 6 Slide the paper cassette into the MFC until it locks into place 7 Pull out the paper output tray Paper Output Tray ...

Page 20: ... Cover Release Button B The blue scanner lock lever is on the back left under side of the scanner cover Push the lever up to unlock the scanner Unlock Lock Scanner Lock Lever Caution If CHECK SCAN LOCK appears on the LCD immediately release the scanner lock lever If you see MACHINE ERROR AF or AE stop operation and contact your Brother dealer for service Caution Operating the MFC before you instal...

Page 21: ...thus presenting a shock hazard The wires in the mains lead of this appliance are coloured in accordance with the following code Green and yellow Earth Blue Neutral Brown Live As the wires in the mains lead of this apparatus may not correspond with the coloured markings identifying the terminals in your plug proceed as follows The wire which is coloured green and yellow must be connected to the ter...

Page 22: ...ct yourself by disconnecting the telephone line first and then the power cord Installing the Ink Cartridges Check that you turned on the power by plugging in the power cord and that the paper cassette is loaded with paper and installed in the MFC SET CARTRIDGES OFFLINE PLS OPEN COVER OFFLINE Caution Close the document cover before you open the scanner cover 2 Press the scanner cover release button...

Page 23: ...at you install the ink cartridges from left to right in this order Black Yellow Cyan Magenta Keep the yellow shipping cover in a safe place You will need it in the future when you replace the print head 5 Open the Black ink cartridge bag and remove the ink cartridge 6 Carefully remove the sealing tape from the side of the ink cartridge Be sure to peel the tape from the side of the cartridge in the...

Page 24: ...he cartridge or the removed tape Opening Peel in the direction away from you 7 Each colour has its own correct position Insert the Black ink cartridge matching the colour of the cartridge covers Please be careful not to push down the cartridge sensor shown in the right side of the illustration when inserting a cartridge Cartridge Sensor 8 Repeat Steps 5 7 to install each colour ink cartridge ...

Page 25: ...tomatically for each colour so the MFC can warn you with an error message when ink is running low Make sure paper is loaded in the cassette then press Start within 1 minute When the MFC completes the cleaning cycle the MFC starts printing the test sheet 12 Only during initial ink cartridge installation the screen shows PRINT OK 1 YES 2 NO Check the print quality of the test sheet If it is not good...

Page 26: ...re you start printing because the colours were mixed Once you open an ink cartridge install it in the MFC and use it up within six months of installation Use unopened ink cartridge by the expiry date printed on the cartridge box DO NOT refill the ink cartridges Attempting to use refilled cartridges may cause damage to the print head and will void your product warranty If the INK EMPTY XXXX error m...

Page 27: ...one dialling telephone service Ringer Equivalence Number REN This equipment has a REN value of 1 A BT line has a bell ringing capacity or REN of 4 This means that adding downstream connected extension telephones and or extension bells to a total REN of greater than 4 may cause a reduction in the bell volume In extreme cases it may cause the auto answer facility of the machine to fail Therefore up ...

Page 28: ... extension devices are connected downstream of your machine in a master slave configuration In such a configuration this machine can always detect whether a telephone is in use thus it will not attempt to seize the line during that time This is known as telephone off hook detection The inadvisable configuration is shown in figure 1 below and the recommended master slave configuration is shown in f...

Page 29: ...FC cannot hear CNG tones until the TAD has answered the call and with four rings there are only 8 10 seconds of CNG tones left for the fax handshake Make sure you carefully follow instructions in this manual for recording your outgoing message We do not recommend using the toll saver feature on your external answering machine if it exceeds 4 rings Do not connect a TAD elsewhere on the same phone l...

Page 30: ... of automatic transmissions before they stop 3 End your 20 second message by giving your Remote Activation Code for people sending manual faxes For example After the beep leave a message or send a fax manually by pressing 51 and Start Connecting an ExternalTelephone Although your MFC does not have a handset you can connect a separate telephone to your MFC as shown below External Telephone Extensio...

Page 31: ...efore connecting the parallel interface cable 3 Make sure your computer is unplugged from electrical power before you connect the interface cable Connecting the MFC toYour Computer 1 Connect the interface cable to the parallel interface port on the left side of the MFC and secure with the wire clips 2 Connect the interface cable to the printer port of your computer and secure with the two screws T...

Page 32: ...ware is provided to optimize the use of your MFC The software can run in Windows 95 98 and NT Workstation Version 4 0 Printer Driver The Printer driver creates the print data from applications controls transmission and makes settings for printing It is necessary to install the MFC 760 printer driver into your PC for printing Scanner Driver The MFC 760 scanner driver is TWAIN compliant You can use ...

Page 33: ...pplied on a single CD An Auto Install program will guide you through most of the installation process 1 Make sure that your MFC is connected to your computer and that the MFC is plugged in 2 Turn your computer on and start Windows NOTE For Windows 95 If Add New Hardware Wizard appears select Do not install a driver and click OK OR If Update Device Driver Wizard appears click Next to bypass each sc...

Page 34: ...ORNER OF YOUR SCREEN 4 From the Auto Installer select your preferred language by double clicking on it with your mouse 5 The MFC 760 is a parallel colour inkjet device so select this option again by double clicking 6 Select STEP 1 and install the Brother Resource Manager You can either install the software now or make floppies to install the software on another PC without a CD ROM Drive Follow the...

Page 35: ...stalling the MFC 760 Maintenance Utility for DOS Before you install the program make sure you have the following hardware and software to install the program DOS Version 3 3 or later Monitor EGA VGA or compatible Option Mouse the mouse driver must be installed You can also operate the program with the keyboard Follow these steps to install the remote printer console program 1 Make sure your machin...

Page 36: ... installed the program by typing the floppy disk directory name C CD directory name 2 Type MFC71DOS and press the Enter key C directory name MFC71DOS The main screen will appear on your computer screen NOTE Make sure that you select the correct paper size in this utility program before printing Paper alignment is not compatible with Epson printers you cannot get the correct print output unless you...

Page 37: ...28 C H A P T E R T W O ...

Page 38: ...aper transparencies and glossy paper be sure to select the correct media in the Quality Colour tab in the printer driver When using glossy paper or transparencies avoid stacking by removing each page after copying or printing About Brother Paper Brother paper is manufactured specifically for this MFC to provide you with optimum print quality Quality Coated Paper for 360 dpi Colour Ink Jet printing...

Page 39: ...rs may stain your next document Use only recommended transparencies for ink jet printer Paper Specifications for Cassette and Manual Slot When used as a printer the MFC can handle paper that has the following specifications But please note that you can receive fax messages only on A4 cut sheet Paper Type Paper Size Cassette Capacity Cut Sheet A4 Letter Executive 250 Sheets of 75 g m2 Legal 100 She...

Page 40: ...you are using The figures below show the unprintable areas on cut sheets and envelopes Cut Sheet Envelopes unprintable area A A C D C D B B Paper Type Paper Size A B C D Fax 3 95mm Mono Copy 3mm 11mm 3 95mm Letter Legal Colour Copy 6 25mm Printer 3mm 11mm 3 95mm 8 75mm Cut Sheet Fax 2mm 2mm Mono Copy 3mm 11mm A4 Colour Copy 3 4mm 3 4mm Printer 3mm 11mm 3 4mm 3 4mm Executive Printer 3mm 11mm 3 4mm ...

Page 41: ...r and envelopes Extremely shiny or highly textured paper and envelopes Envelopes with clasps Envelopes of baggy construction Envelopes not sharply creased Embossed envelopes Paper and envelopes already printed with a laser printer Envelopes preprinted on the inside Paper and envelopes that cannot be arranged uniformly when stacked ...

Page 42: ...nctions OR press 2 for Printer Functions OR press 3 for Copy Functions OR press 4 for Video Functions When you enter the Function Mode your MFC displays a list of Level One Functions from which you can choose These function options appear one after the other on the display Select an option by pressing Set when the option appears on the LCD You can scroll more quickly through options by pressing Wh...

Page 43: ... Owner s Manual To help you understand the function selections options and settings that are available use the Function Selection Table below 1 INITIAL SETUP Function Description Factory Set Chapter 1 TONE PULSE Selects the dialling mode TONE 5 2 DATE TIME Enter date and time for LCD 01 01 2000 00 00 5 display and to print on transmissions 3 STATION ID Program the name and fax 5 number to appear o...

Page 44: ...TANDARD 7 receive a fax from it 8 PC INTERFACE Turn on if PC is connected to ON 7 MFC for PC receiving of fax messages 3 SETUP SEND Function Description Factory Set Chapter 1 COVERPG SETUP Automatically sends a OFF 6 programmable cover page or prints a sample cover page 2 COVERPAGE NOTE Program customized message 6 for fax cover page 3 CONTRAST Change the lightness or AUTO 6 darkness of a fax you ...

Page 45: ...of OFF 10 transmission after each document is sent 2 JOURNAL Lists information about the last JOURNAL OFF 10 50 incoming and outgoing faxes 3 QUICK DIAL Lists names and numbers stored 10 in One Touch and Speed Dial memory in numerical order 4 TEL INDEX Alphabetical lists of stored numbers 5 SYSTEM SETUP Lists various system settings 10 6 MEMORY STATUS Lists information about 10 memory use 1 Fax Fu...

Page 46: ...1 or Photo copy quality 3 COLOUR ADJUST Adjust the amount of Red 11 Green or Blue in copies 4 BRIGHTNESS Adjust the brightness 11 5 CONTRAST Adjust the contrast 11 6 ONE COLOUR Select a single colour to use OFF Black 11 instead of Black when you use Mono Copy key 3 Copy Functions 4 Video Functions Function Description Factory Set Chapter 1 PAPER TYPE Identify the type of paper in PLAIN 12 the cass...

Page 47: ...38 C H A P T E R F O U R ...

Page 48: ...ou want 4 Press Stop to exit Although this equipment can use either Pulse or Tone signalling only the performance of the Tone signalling is subject to regulatory requirements for correct operation It is therefore strongly recommended that the equipment is set to use the Tone signalling for access to public or private emergency services The Tone signalling also provides faster call set up Setting t...

Page 49: ...ER TIME XX XX 8 Enter the time in 24 hour format for example enter 15 25 for 3 25 PM 9 Press Set 10 Press Stop The screen now displays the date and time you set and displays it whenever the MFC is in stand by mode Setting the Station ID You can store your name fax number and telephone number to be printed on the fax Cover Page on all fax pages that you send The telephone number you entered is used...

Page 50: ...ur telephone number TEL 4 Enter your telephone number up to 20 digits If your telephone number and fax number are the same enter the same number again The screen displays your entry 5 Press Set The screen prompts you to enter your name or your company name NAME 6 Use the dial pad to enter your name up to 20 characters You can use the following chart to help you enter letters 7 Press Set to confirm...

Page 51: ...N O 6 M 7 P Q R S 7 8 T U V 8 T 9 W X Y Z 9 Inserting Spaces If you want to enter a blank space press twice Making Corrections If you entered a letter incorrectly and want to change it press to move the cursor after the last correct letter Then press Clear all letters above and to the right of the cursor are deleted Re enter the correct text and or digits You can also back up and type over incorre...

Page 52: ...ecall only TBR PBXs normally can work with this for gaining access to an outside line or for transfering a call to another extension The feature works when the R key is pressed Setting PABX If your MFC is connected to a PABX system set PBX ON If not set OFF 1 Press Menu 1 1 7 The screen displays PBX OFF SELECT SET 2 Press or to select ON or OFF 3 Press Set when the screen displays your selection 4...

Page 53: ...Press Menu 1 1 5 2 Press or to select your volume setting OFF LOW MED or HIGH 3 Press Set when the screen displays your selection 4 Press Stop to exit Setting the RingVolume You can select how loud or if the MFC rings 1 Press Menu 1 1 6 2 Press or to select OFF LOW MED or HIGH 3 Press Set when the screen displays your selection 4 Press Stop to exit Memory Storage In the event of a power failure al...

Page 54: ... add a cover page and select a comment set the contrast or resolution send using overseas mode or delayed transmission polling transmission or real time transmission After each function is accepted the display will ask if you want to enter other settings ACCEPTED NEXT 1 YES 2 NO Press 1 if you want to select additional settings The display returns to the SETUP SEND menu OR Press 2 if you are finis...

Page 55: ... paper or paper with staples paper clips paste or tape attached DO NOT use cardboard newspaper or fabric To fax this kind of document see Scan Fax Make sure documents written with ink are completely dry Documents to be faxed must be from 14 7 to 21 6 cm wide and from 12 7 to 35 6 cm long Insert documents face up top edge first Adjust the paper guides to fit the width of your document Stagger the p...

Page 56: ...ines on the left center the document face down on the scanner glass 3 Close the document cover If the document is a book or is thick do not slam the cover or press on it 4 Dial the fax number then press Start The MFC starts scanning the first page 5 To send a single page go to Step 7 OR To send multiple pages go to Step 6 MEMORY 01 100 SET NEXT PAGE START TO DIAL 6 Place the next page on the scann...

Page 57: ...all print or artwork transmits slower than Fine resolution Only the S Fine light is ON Photo Use when document has varying shades of grey slow transmission time Both Fine and S Fine lights are ON Contrast If your document is very light or very dark you might want to set the contrast accordingly Use LIGHT to send a light document Use DARK to send a dark document 1 Insert the document face up in the...

Page 58: ...MORY FULL message while scanning the first page of a fax press Stop to cancel a scan If you get a MEMORY FULL message while scanning in a subsequent page you ll have the option to press Start to transmit the pages scanned so far or to press Stop to cancel the operation The number of documents you can scan into memory varies with the data they contain RealTimeTransmission When memory is full the MF...

Page 59: ...ERPG SETUP set to ON Function menu 1 3 1 the number of pages remains blank You can select a comment to include on your cover page or you can select 1 NOTE OFF if you do not wish to include a comment 1 NOTE OFF 2 PLEASE CALL 3 URGENT 4 CONFIDENTIAL As well as using one of the comments above you can also enter up to two customized messages each 27 characters long Use the chart of Entering Text in ch...

Page 60: ... pages you are sending Enter 00 to leave the number of pages blank If you make a mistake press to back up and re enter the number of pages 9 Press Set 10 Press 1 if you want to select additional settings The display returns to the SETUP SEND menu OR Press 2 if you are finished choosing settings and go to Step 11 11 Enter the fax number 12 Press Start Always Send Cover Page Make sure Station ID is ...

Page 61: ...e and attach it to your fax 1 Press Menu 1 3 1 2 Press or to select PRINT SAMPLE 3 Press Set when the screen displays your selection 4 Press Start Your MFC prints a copy of your cover page COVER PAGE TO FROM FAX TEL PAGE S TO FOLLOW COMMENT Cover Page Message You can set up two custom comments ComposingYour Own Comments 1 Press Menu 1 3 2 The screen displays 2 COVERPAGE NOTE 2 Use or to choose pos...

Page 62: ...nished choosing settings and go to Step 6 6 Enter the fax number you re calling 7 Press Start DelayedTransmission Timer You can use this function to send a fax up to 24 hours later Insert the document in the feeder or on the scanner glass 2 Press Menu 1 3 6 3 Enter the time you want the fax to be sent in 24 hour format for example enter 19 45 for 7 45 PM 4 Press Set MFC will start scanning documen...

Page 63: ...ings The display returns to the SETUP SEND menu OR Press 2 if you are finished have chosen your settings and go to Step 5 5 Enter the fax number you re calling and press Start If you want to copy a document using multiple resolutions press Mono Copy and Colour Copy in Step 5 Setup for PollingTransmit Polling Transmit is when you set up your MFC to wait with a document so another fax machine can re...

Page 64: ...ng the documents 6 Press 1 if you want to select additional settings The display returns to the SETUP SEND menu OR Press 2 if you are finished choosing settings and go to Step 7 7 Press Start You can use Secure Polling only with another Brother fax machine Cancelling a JobWhile Scanning the Document You can cancel a job while you are scanning it into memory by pressing Stop Checking Job Status You...

Page 65: ...B WAITING 4 REMAINING JOBS 2 If you have more than two jobs waiting use or to select the job you want to cancel Press Set when the screen displays your selection OR If you have only one job waiting go to Step 3 3 Press 1 to cancel OR Press 2 to exit without cancelling To cancel another job return to Step 2 4 Press Stop to exit If the MFC is busy press Stop then follow Steps 2 through 4 to cancel a...

Page 66: ...d fax line answers every call as a You cannot receive a fax voice call but you can call out from an external or extension telephone EXT TEL TAD If you connect an external Use this mode if you telephone to your MFC receive very few faxes you control the phone line and must answer every call yourself If an external TAD Use this mode if you telephone answering have an answering device is connected to...

Page 67: ...on t have to press Start when you answer a fax call and hear calling beeps Just hold the handset and wait for several seconds When you see RECEIVING on the fax screen or when you hear chirps through the handset of an extension phone connected to another wall socket just replace the handset and your machine does the rest Selecting ON allows the machine to receive fax calls automatically even if you...

Page 68: ...coming documents to fit on one page of recording paper you can do so only as long as the original document is not longer than 35 cm If the original is longer than 35 cm the data will not be reduced and will carry over to print on a second page When you use Auto Reduction and you receive an incoming document that is smaller than your recording paper no reduction will take place and you will get the...

Page 69: ... phone you can make your MFC take over by using the Activation Code When you press the Activation Code 5 1 the MFC starts to receive a fax If you answer a call at an extension or an external phone and no one is on the line assume you re receiving a fax At an extension phone press 5 1 wait for fax receiving tones chirps then hang up At an external phone press 5 1 and wait for the phone to be discon...

Page 70: ...s Menu 1 2 4 2 Press or to select ON or OFF REMOTE ACT ON 3 Press Set when the screen displays the setting you want 4 Enter a new Remote Activation Code then press Set ACT CODE 51 5 Press Stop to exit Printing a Fax from Memory If you have fax storage ON for remote retrieval you can still print a fax from the machine s memory when you are at your machine 1 Press Menu 1 7 4 2 Press Start 3 After al...

Page 71: ...ign compatible distinctive ringing function allowing you to dedicate a second phone number on the same phone line just for receiving faxes You can switch it off temporarily then turn it back on When you get a new fax number make sure you reset this function To have your external TAD answer only the main number the machine must be in Manual Mode In FAX mode the machine will answer all numbers on th...

Page 72: ...g Secure Polling is a way to keep your documents and others from falling into the wrong hands while the MFC are set up for polling You can use Secure Polling only with another Brother fax machine Your four digit ID number must be entered on the fax machine that polls for your documents Setup for Polling Receive Polling Receive is when you call another fax machine to receive a fax from it 1 Press M...

Page 73: ...he same as the security code of the fax machine you are polling 5 Press Set The screen prompts you to enter the fax number you want to poll and then to press Start ENTER FAX NO THEN PRESS START 6 Press Start Setup Delayed Polling Receive You can set your MFC to begin Polling Receive at a later time 1 Press Menu 1 2 7 The screen displays POLLING STANDARD SELECT SET 2 Press or to choose TIMER 3 Pres...

Page 74: ...fy several destinations in Step 5 Afterwards a Sequential Polling Report will be printed 1 Press Menu 1 2 7 The screen displays POLLING STANDARD 2 Press or to choose STANDARD SECURE or TIMER 3 Press Set when the screen displays the setting you want 4 If you selected STANDARD the screen prompts you to enter the fax number you want to poll and then to press Start ENTER FAX NO ONLINE THEN PRESS START...

Page 75: ...e If you connect your MFC to your PC you can receive faxes into your PC After completing all setup for Multi Function Link Unimessage Pro for Fax you can select PC Interface Mode ON OFF for routing incoming faxes 1 Press Menu 1 2 8 8 PC INTERFACE 2 Press or to select ON or OFF 3 Press Set when the screen displays your selection 4 Press Stop to exit ...

Page 76: ...d keys They are the 8 keys numbers 1 16 located to the left side of the dial pad One Touch Dial Numbers 9 16 are accessed by holding down Shift while you press the appropriate One Touch key 1 Press Menu 1 5 1 2 Press the One Touch Dial key where you want to store a number The screen displays the location you selected 3 Enter a number up to 20 digits 4 Press Set The screen prompts you to enter a na...

Page 77: ...you dial by pressing only three keys There are 100 Speed Dial locations Even if you lose electrical power numbers stored in memory will not be lost 1 Press Menu 1 5 2 The screen prompts you to enter a location SPEED DIAL 2 Use the dial pad to enter a two digit location 00 99 3 Press Set The screen displays your entry then prompts you to enter the number you re storing 05 ENTER SET 4 Enter the numb...

Page 78: ...ess 2 to exit without making a change 2 Enter a new number If you want to erase the number press Clear when the cursor is to the far left of the digits If you want to change a digit use or to position the cursor under the digit you want to change then enter it 3 Follow the directions in Storing One Touch Dial or Speed Dial Numbers Setting Groups for Broadcasting Groups allow you to send the same f...

Page 79: ...e Group enter them as if you were dialling For example for One Touch Dial key 05 press One Touch Dial key 05 For Speed Dial location 09 press Speed Dial then press 0 9 on the dial pad The LCD shows 05 09 G01 05 09_ 5 Press Set The screen prompts you to enter a name NAME ENTER SET 6 Use the dial pad and the chart of Entering Text in chap 5 to enter a name for the group for example NEW CLIENTS 7 Pre...

Page 80: ...1 Insert the document s in the feeder or on the scanner glass 2 Press the One Touch key of the location you want to call 3 Press Start If you try to use a One Touch or Speed Dial location with no number stored in it you hear a warning sound and screen displays NOT ASSIGNED The display returns to normal after 2 seconds Speed Dialling 1 Insert the document s in the feeder or on the scanner glass 2 P...

Page 81: ...rily change a number you can substitute part of the number with manual dialling using the dial pad So if you press One Touch 01 and press 7001 using the dial pad you can dial 555 7001 Using access codes is easy Sometimes you may want to choose from the among several long distance carriers when you make a call rates may vary depending upon the time and destination To take advantage of low rates you...

Page 82: ... pad Example Group number 3 Press Broadcast You will be prompted to press the next number 4 Enter the next number Example Speed Dial 5 Press Broadcast 6 Enter the next fax number Example Manual dialling using the dial pad 7 Press Start Your MFC will read the documents into memory and then start sending faxes to all the numbers you entered To stop the broadcasting in progress press Stop The display...

Page 83: ...74 C H A P T E R E I G H T ...

Page 84: ...to select ON or OFF 3 Press Set when the screen displays your selection 4 Press Stop to exit If there are faxes in memory when you turn the Fax Storage OFF the screen prompts you to erase any faxes in memory ERASE ALL DOC 1 YES 2 NO If you press 1 all fax data is erased and Fax Storage is turned OFF If the fax data in the memory has not been printed it will be printed first and then erased If you ...

Page 85: ...prompts you to enter the number of the fax machine where faxes will be forwarded FWD ENTER SET 4 Enter the forwarding number up to 20 digits 5 Press Set 6 Press Stop to exit You can also dial into your machine from a remote location to switch this feature on or to change the number you want your faxes forwarding to Changing the Remote Access Code Enter your Remote Access Code when the fax machine ...

Page 86: ...er your Remote Access Code The factory setting is 159 3 The fax machine signals the kinds of messages received 1 long beep Fax message s No long beep No messages 4 The fax machine prompts you with two short beeps to enter a command If you wait longer than 30 seconds to enter a command the machine hangs up If you enter an invalid command the machine beeps three times 5 Press 9 0 to reset the machin...

Page 87: ...ve a Fax Press 9 6 then to Print a Memory Status List Press 1 then enter the number of remote fax machine and the After the beep hang up and wait Retrieve all faxes Press 2 then enter the number of remote fax machine and the After the beep hang up and wait Erase all fax messages Press 3 If the data stored in the memory has not been printed before it will be printed first and then erased Check the ...

Page 88: ...our fax machine beep hang up and wait Your fax machine calls the remote fax machine Your fax machine then sends the Memory Status List to the fax machine that you are calling from Retrieving Fax Messages 1 Dial your fax machine s number 2 When you hear the beep immediately enter your Remote Access Code The factory setting is 1 5 9 3 As soon as you hear two short beeps use the dial pad to press 9 6...

Page 89: ...bers However if you want to store a pause press Also if your fax machine is connected to a PABX you can press first before the fax machine s number The works as well as R key 5 To retrieve the Memory Status List when you hear two short beeps use the dial pad to press 9 6 1 6 Use the dial pad to enter the number of the remote fax machine up to 20 digits and then press 7 After you hear your fax mach...

Page 90: ...eive 3 QUICK DIAL Lists names and numbers stored in One Touch and Speed Dial memory in numerical order 4 TEL INDEX Quick Dial list above alphabetically 5 SYSTEM SETUP Lists settings for INITIAL SETUP SETUP RECEIVE SETUP SEND PRINT REPORT REMOTE FAX OPT and MISCELLANEOUS 6 MEMORY STATUS Lists summary information and amount of occupied memory To Print a Report 1 Press Menu 1 6 2 Enter the number see...

Page 91: ...r to select ON or OFF 3 Press Set 4 Press Stop to exit When the MFC is idle you can print the Transmission Verification Report by pressing Verify when you wish to confirm the last transmission was successful or not Journal Period You can set the MFC to print activity reports at specific intervals 1 3 6 12 24 hours 2 4 or 7 days If you set the interval to OFF you can print the report by following t...

Page 92: ... pull on the paper while copying is in progress This function is available for A4 size paper only For other sizes of paper this function does not work Basic Copy Operations Copying One Page 1 Insert the document in the feeder or on the scanner glass 2 Press Mono Copy or Colour Copy to copy 3 Press Mono Copy or Colour Copy again Make sure it s the same key you pressed in Step 2 The screen displays ...

Page 93: ... 3 8 for 38 copies 4 Press or to select SORT or STACK and press Set MULTI COPY STACK ONLINE MULTI COPY SORT ONLINE If you get a MEMORY FULL message you may be able to make multiple copies if you first print incoming faxes in memory and restore the memory to 100 Multiple Copies Using the Scanner Glass You can make multiple copies using the scanner glass When you use Mono Copy or Colour Copy you can...

Page 94: ... OR Press or to select SORT and press Set then go to Step 6 MULTI COPY STACK ONLINE MULTI COPY SORT ONLINE 6 Place the next page to be copied on the scanner glass and press Set SET NEXT SCAN ONLINE COPY TO END ONLINE 7 Press Mono Copy or Colour Copy again You must press the same key you pressed in Step 2 If you get a MEMORY FULL message you may be able to make multiple copies if you first print in...

Page 95: ...e dial pad to enter an enlargement or reduction ratio between 25 and 400 For example press 5 3 to enter 53 4 Press Mono Copy or Colour Copy 5 Using the dial pad enter the number of copies and press Set OR Keep the default 01 6 For multiple copies you can select SORT or STACK by pressing Only for multiple copies 7 Press Set Copy Quality Temporary Settings You can quickly improve the copy quality by...

Page 96: ...ghest resolution and slowest speed 1 Place the document in the feeder or on the scanner glass 2 Press Copy Quality The screen displays the default setting for example QUALITY HIGH ONLINE SELECT SET ONLINE 3 Press or to select copy quality resolution QUALITY NORMAL QUALITY HIGH QUALITY PHOTO QUALITY DRAFT 4 When the screen displays your selection press Set Using the PaperType Key If you use premium...

Page 97: ...g before making a copy 1 Insert the document in the feeder or on the scanner glass 2 Press Brightness 3 Press to make a darker copy OR Press to make a lighter copy 4 Press Set when the screen displays your setting Copy Quality Default Settings Changing Default Settings Press Menu 3 to change default settings for Copy mode These settings will remain until you change them again by pressing Menu Adju...

Page 98: ...ALITY DRAFT COLOUR RED COLOUR GREEN COLOUR BLUE R 2 QUALITY QUALITY PHOTO 3 COLOUR ADJUST 4 BRIGHTNESS 5 CONTRAST 6 ONE COLOUR B G COLOUR OFF COLOUR RED COLOUR GREEN COLOUR BLUE COLOUR CYAN COLOUR MAGENTA COLOUR YELLOW is factory default QUALITY HIGH FACTORY DEFAULT SETTINGS 1 PAPER TYPE PLAIN 2 QUALITY HIGH 3 COLOUR ADJUST R G B 4 BRIGHTNESS 5 CONTRAST 6 ONE COLOUR OFF Black ...

Page 99: ... BP72CA select INK JET then select 360DPI or 720DPI If you use non Brother ink jet paper select INK JET then select OTHER If you did not select INK JET skip to Step 7 For information on ordering Brother paper see the page before the Table of Contents 5 Press or to select 360DPI 720DPI or OTHER 6 Press Set 7 Press Stop to exit The MFC ejects paper onto the top of the paper cassette cover with the p...

Page 100: ... PHOTO 3 Press Set when the screen displays your selection 4 Press Stop to exit This feature is available only for colour copying Colour Adjustment 1 Press Menu 3 3 2 Press or to select RED GREEN or BLUE 3 Press Set R Light Dark B G 4 Press or to adjust the degree of colour 5 Press Set 6 Return to Step 2 to select the next colour OR Press Stop to exit ...

Page 101: ... This feature is available only for colour copying 1 Press Menu 3 5 2 Press to decrease contrast OR Press to increase contrast 3 When the screen displays your setting press Set 4 Press Stop to exit Selecting a Single Colour One Colour For black and white originals you can select a single colour instead of black as the default to be used when you press Mono Copy OFF is the setting for Black 1 Press...

Page 102: ...rst page of your document press Stop to cancel the job and restart to make a single copy If you were scanning a subsequent page press Mono Copy or Colour Copy to print the pages already scanned OR Press Stop to cancel You ll need to clear some fax messages to make some additional memory available before you can continue To gain extra memory you can turn off Fax Storage see chapter 9 OR Print fax m...

Page 103: ...ng are examples of documents which should not be copied Paper money Bonds or other certificates of indebtedness Certificates of Deposit Armed Forces Service or Draft papers Passports Postage stamps cancelled or uncancelled Immigration papers Welfare documents Cheques or Drafts drawn by Governmental Agencies Identification Documents badges or insignias Licences and Certificates of Title to motor ve...

Page 104: ...arted With no documents in the feeder plug the cable from your video camera s Video Out jack into the MFC s RCA pin jack Play the video Some camcorders digital cameras video games or VCRs do not correctly conform with PAL standards On these machine you might not be able to capture video signals correctly This function is available for A4 size paper only For other sizes of paper this function does ...

Page 105: ...t work if you have too much in memory ColourVideo Printing 1 With no documents in the feeder plug the cable from your video camera s Video Out jack into the MFC s RCA pin jack 2 Play the video When the MFC begins receiving the video signals the MFC screen displays VIDEO PRESS COPY CAPTURE READY 3 Press Colour Copy when you see the picture you want to capture and print 4 Using the dial pad enter th...

Page 106: ...g the Copy Quality Key Your MFC allows you to customize the quality of your video copies by letting you select the video print quality and paper type You might want to try different combinations of settings to see which best suits your needs The settings are temporary 1 Make sure there is no document in the feeder Plug the cable from your video camera s Out jack into the MFC s RCA pin jack 2 Press...

Page 107: ...SELECT SET ONLINE 3 Press or to select paper type and press Set PAPER PLAIN PAPER INK JET PAPER GLOSSY PAPER TRNSPRNCY If you are using Brother coated paper for 360 dpi BP36CL or 720 dpi BP72CL select INK JET then select 360DPI or 720DPI If you are using non Brother ink jet paper select OTHER 4 Press Mono Copy or Colour Copy to begin printing Using the Brightness Key You can choose the brightness ...

Page 108: ... adjust video printing settings as shown in the following chart Press or to move through the selection for each setting Press Set to save your selection QUALITY NORMAL 1 PAPER TYPE Press Menu and 4 PAPER PLAIN QUALITY HIGH PAPER INK JET PAPER GLOSSY PAPER TRNSPRNCY INK JET 360DPI INK JET 720DPI INK JET OTHER SIZE 14 6X10 8 SIZE 10X7 6 SIZE 6X 10X7 6 2 QUALITY VIDEO STILL VIDEO MOVING 3 VIDEO TYPE ...

Page 109: ... When the screen displays your selection press Set 5 Press Stop to exit SettingVideo Printing Quality 1 Press Menu 4 2 The screen displays 2 QUALITY 2 Press or to select a quality QUALITY NORMAL QUALITY HIGH 3 Press Set when the screen displays your selection 4 Press Stop to exit SettingVideoType Before you turn on the video signal you must set the MFC to receive either a moving or a still image Y...

Page 110: ...ep If you don t have enough memory to process the selected video image the print quality may be poor even for a still frame Setting Print Size 1 Press Menu 4 4 2 Press or to select print size SIZE 14 6 X 10 8 SIZE 10 X 7 6 SIZE 6 X 10 X 7 6 3 Press Set when the screen displays your selection 4 Press Stop to exit Printed Position 14 6cm x 10 8cm 5 75 x 4 25 10cm x 7 6cm 4 x 3 6 x 10cm x 7 6cm 6 x 4...

Page 111: ...ress or to adjust the degree of colour 5 Press Set 6 Return to Step 2 to select the next colour OR Press Stop to exit Video Printing Brightness You can choose the brightness setting before making a copy 1 Press Menu 4 6 2 Press to make a darker copy OR Press to make a lighter copy 3 Press Set when the screen displays your setting 4 Press Stop to exit ...

Page 112: ...nnectingYourVideo Equipment Before you can begin to capture a video frame you must first connect your video equipment to the MFC To connect your video equipment 1 Connect your video cable into the jack on your video equipment labelled VIDEO OUT 2 Connect the RCA male plug on the other end of the video cable into the RCA female jack on the front of the MFC Capturing An Image You can access Multi Fu...

Page 113: ...ment to the MFC 2 From Brother MFL Unimessage Pro fax viewer select Acquire image from the File menu Multi Function Link Pro s Twain dialogue box will appear 3 In the Multi Function Link Pro Setup Twain dialogue box click the Video Capture button The Video Capture dialogue box will appear ...

Page 114: ...nch of the image file to be created 1280 x 960 is the best quality The image file will be large and take more space on your PC 750 x 562 640 x 480 is suitable for most images 320 x 240 8 Turn on your video equipment and start running the video 9 When you see the frame you want to capture click the Pause button The frame will be displayed in the viewer screen section of Multi Function Link Pro s Vi...

Page 115: ...106 C H A P T E R T W E L V E ...

Page 116: ... at 720 dpi Printing at 720 dpi resolution on special coated paper or glossy paper gives you high resolution output Brilliant 4 Colour Output at 1440 dpi Printing at 1440 dpi resolution on special coated paper or glossy paper gives you highest resolution output Low Running Cost Whenever you run out of a particular colour ink you will replace only the cartridge that s empty Suitable Uses You can pr...

Page 117: ...ed plain paper coated paper glossy paper transparencies envelopes and organizer paper K L When the MFC receives data from your computer it begins the print process by loading paper from the multi purpose paper cassette 1 Select the print command from your PC 2 Your PC sends a print command and data to the MFC The screen displays the date and time and RECEIVING DATA 3 If there are more pages the MF...

Page 118: ...t 2 Remove any paper from the paper cassette and fan the stack of paper before loading Load the paper stack with the print coated side face down Slide the paper guide Make sure the paper is stacked below the maximum paper height line You can load up to 250 sheets of 75g m2 plain paper 3 Close the paper cassette cover and reinstall the cassette Adjusting for Thick Paper and Envelopes If the paper i...

Page 119: ...the Manual Feed Slot is printed first even when there is paper in the multi purpose paper cassette If you want to print more than one page using the Manual Feed Slot on your PC in the printer driver Properties Paper tab select manual feed 1 Place the paper on top of the paper cassette with the print side face down 2 Align the paper against the right paper guide and slide it into the manual feed sl...

Page 120: ... side face down Right Paper Guide Manual Feed Slot 6 Align the envelope against the right paper guide and slide it into the manual feed slot 7 From your PC application tell the MFC to begin printing On completion you can place another envelope in the manual feed slot Simultaneous Printing Fax Your MFC can print data from your computer while sending or receiving a fax or while scanning information ...

Page 121: ...pressing Reset Print Priority Key When you press Print Priority the MFC enters printer mode and will not print faxes on paper Instead faxes are stored in the memory until you press Print Priority again Ink Management Key When you press Ink Management the screen will display 1 CLEANING 2 REPLACE INK If you are having trouble with one of the ink colours you may need to clean the print head See Troub...

Page 122: ...g to the application you are using The following procedure is the normal method of printing For further information refer to your application manual 1 Create the document to be printed 2 In the application Select the Print menu 3 Make sure that the MFC 760 is selected as your printer 4 Make the required settings such as Page Range or Copies If you need to make the settings for print quality media ...

Page 123: ...114 C H A P T E R T H I R T E E N ...

Page 124: ...ver a radiator or heater This product should not be placed in a built in installation unless proper ventilation is provided 7 This product should be operated from the type of power source indicated on the label If you are not sure of the type of power available consult with your dealer or local power company 8 This product is equipped with a 3 wire earthed plug This plug will fit into only an eart...

Page 125: ...ian to restore the product to normal operation E If the product has been dropped or the cabinet has been damaged F If the product exhibits a distinct change in performance indicating a need for service Radio Interference 220 240V Model Only This machine complies with EN55022 CISPR Publication 22 Class B and EN55024 A shielded interface cable should be used to ensure compatibility with the above sp...

Page 126: ...r in cassette copying CHECK SCAN The scanner lock is locked Release the scanner lock lever If you LOCK see MACHINE ERROR AF or AE stop operation and contact your Brother dealer for service COMM ERROR Poor phone line quality caused Try the call again If problem continues communication error call Telephone Company to check your phone line CONNECTION FAIL You tried to poll a fax machine that is not i...

Page 127: ... busy NOT ASSIGNED You tried to access a One Touch or Speed Dial Set up the One Touch or Speed Dial number that is not programmed number See chap 8 PLS OPEN COVER A page piece of paper or paper clip etc Press the Scanner cover release button may be jammed inside the MFC and lift the scanner cover If you see any jammed paper or other item gently pull it out then close the scanner cover If the error...

Page 128: ...ate set of instructions to remove it Document Jam in theTop of the ADF Unit 1 Remove any paper from the document feeder that is not jammed ADF Cover 2 Lift the ADF cover 3 Pull the jammed document out to the left 4 Close the ADF cover 5 Press Stop Document Jam inside the ADF Unit 1 Open the document cover 2 Remove any paper from the document feeder that is not jammed ADF Unit ...

Page 129: ... jammed document out to the right 5 Close the ADF unit 6 Press Stop Paper Jam 1 Remove the paper cassette 2 Press the blue release button and pull the jammed paper out toward you Blue Release Button 3 Slide the paper cassette into the MFC until it locks into place ...

Page 130: ...er see Chapter 3 to Run Don t handle the paper until the ink is dry The recommended environment for your MFC is between 10 C to 35 C White Lines in Text or Graphics Clean the print head see Cleaning the Print Head in this chapter Stains Appear on the Reverse Side or Make sure the Printer Platen and Pick Up Roller are not dirty with ink at the Bottom of the Page mist See Regular Maintenance in this...

Page 131: ...e the Update Device Driver Follow the instructions from the installer then click Next Click Finish Wizard or Add New Hardware when it appears on the screen Wizard message on your PC screen although you have already installed the drivers in Windows 95 or 98 The MFC does not print the data in Select the correct paper size using the DOS Utility program Since the correct position paper adjustment is d...

Page 132: ...aphics on your printed documents You can clean the four colour black cyan yellow magenta print heads or a single colour using the Ink Management key or from the printer driver Caution Do NOT clean the print head by touching it with your hand or a cloth 1 Press Ink Management 2 Press 1 to choose 1 CLEANING 3 Press or to choose the colour you want to clean 4 Press Set to clean the print head automat...

Page 133: ...s Start The MFC prints a sample page Study the alignment page and decide which sample numbers show the most evenly printed ink lines for 360 and 720 dpi The screen displays 360DPI ADJUST ENTER NO 1 9 3 Using the dial pad enter the level of adjustment needed for 360 dpi 1 to 9 4 The screen displays 720DPI ADJUST ENTER NO 1 9 5 Using the dial pad enter the level of adjustment needed for 720 dpi 1 to...

Page 134: ...d setting the MFC to print in one direction only However this will reduce print speed by one half 1 Press Menu 2 3 The screen displays 3 BI DIR PRINT 2 Press 2 to select OFF or 1 to select ON Don t handle the paper until the ink is dry Special ink jet glossy and transparency paper will take longer to dry than plain paper so do not touch the printed copy until the ink has dried ...

Page 135: ...lug the MFC from the AC outlet NOTE Do not unplug the MFC after a print job until you hear the final click 3 Lock the scanner lock lever A Press the blue scanner cover release button on the right side of the MFC and lift the scanner cover until it locks in the open position Scanner Cover Scanner Cover Release Button B The blue scanner lock lever is on the back left under side of the scanner cover ...

Page 136: ...ce them with the yellow shipping cover that was part of the original packing materials 5 Wrap the MFC in the plastic bag and place it in the original carton with the original packing material Caution If you are unable to locate the shipping cover do not remove the ink cartridges before shipping It is essential that either the yellow shipping cover or the ink cartridges be in position during shipme...

Page 137: ...128 C H A P T E R F I F T E E N 6 Place paper cassette and documents such as your manual into the carton 7 Close the carton ...

Page 138: ...n the scanner glass and white film with isopropyl alcohol on a lint free cloth Document Cover White Film Lift the ADF unit Clean the white roller and the glass strip under the roller with isopropyl alcohol on a lint free cloth If the screen still displays a scanner error please contact your Brother dealer for service White Roller Glass Strip ADF Unit ...

Page 139: ...Printer Platen WARNING Be sure to unplug the MFC from the main power outlet before cleaning the printer platen and pick up roller Be careful not to touch the paper feed star wheels and flat cable Cleaning the Pick up Roller 1 Remove the paper cassette from the MFC 2 Wipe the pick up rollers with a cloth moistened with isopropyl alcohol Pick up Rollers 3 Slide the paper cassette into the MFC until ...

Page 140: ...ows you which colour cartridges are low or empty Be sure to follow the display prompts so you replace the colour cartridges in the appropriate order When the ink cartridges are running low you must use Ink Management to begin the cartridge replacement Steps 1 3 If the ink is empty skip to Step 4 1 Press Ink Management 2 Press or to choose 2 REPLACE INK 3 Press Set If one or more ink cartridges are...

Page 141: ...move the sealing tape from the side of the ink cartridge Carefully peel the tape in the direction away from you Opening Peel in the direction away from you IMPORTANT To prevent spilling ink and staining your hands and clothing remove the sealing tape gently 9 Each colour has its own correct position Insert each new ink cartridge into the carriage using the colour indicator on the print head as a g...

Page 142: ...at colour automatically The ink dot counter enables the MFC to notify you when a colour is running low The MFC will enter a cleaning cycle for approximately two minutes for each replaced cartridge The display screen alternately shows CLEANING and PLEASE WAIT When the MFC completes the cleaning cycle the display returns to Standby mode date and time WARNING If ink gets in your eyes irrigate them wi...

Page 143: ...ion because the colours were mixed Once you open an ink cartridge install it in the MFC and use it up within six months of installation Use unopened ink cartridges within two years of production DO NOT refill the ink cartridges Attempting to use refilled cartridges may cause damage to the print head and will void your warranty NOTE If the INK EMPTY XXXX error message is on the display after you ha...

Page 144: ... 9600 7200 4800 2400 Automatic Fallback Document input width 147 mm to 216 mm ADF Max 216 Scanner Document input length 127 mm to 356 mm ADF Max 297 Scanner Scanning Printing width 208 mm Paper Cassette 250 Sheets 75 g m2 Printer type Ink Jet Grey scale 256 levels Error Diffusion Display LCD 16 characters x 2 Polling types Standard Secure Delayed Sequential Contrast control Automatic Light Dark ma...

Page 145: ...er 12 watts Operating under 30 watts Dimensions 492 x 481 x 372 mm Weight 16kg Pages refers to the ITU T Chart Specifications and printed materials are subject to change for improvement without prior notice Printer Specifications Printing Print method Piezo with 64 x 4 nozzles Resolution Monochrome Colour Printing 1440 x 720 dots per inch DPI 720 x 720 dots per inch DPI 360 x 360 dots per inch DPI...

Page 146: ...l A4 A5 B5 Executive envelopes CM10 DL C5 Custom organizer K L Width 95 3 216 mm 3 75 8 5 Length 171 356 mm 6 75 14 Weight 64 120 g m2 17 32 lb Maximum feeder capacity Approx 250 sheets of 75 g m2 plain paper Paper output Approximately 75 sheets of plain paper Face up print delivery to the paper output tray It is recommended that printed sheets are taken from the paper output tray immediately afte...

Page 147: ... publication Trademarks Multi Function Link Pro is a trademark of Brother Industries Ltd Brother is a registered trademark of Brother Industries Ltd Windows is a registered trademark of Microsoft in the U S and other countries MS DOS is a registered trademark of Microsoft in the U S and other companies Each company whose software title is mentioned in this manual has a Software License Agreement s...

Page 148: ...bility to send the same fax message to more than one location Cancel Job Cancels a programmed job like Delayed Fax or Polling CNG tones The special tones beeps sent by fax machines during automatic transmission to tell the receiving machine that they are from a fax machine COMM ERROR Communication error An error during fax sending or receiving usually caused by line noise or static Coding Method M...

Page 149: ...lly Extension Phone A telephone on the fax number that is plugged into a separate wall jack External Phone A TAD telephone answering device or telephone that is plugged into the socket on the telephone line cord of your MFC Fax Forwarding Sends a fax received in memory to another preprogrammed fax number fax tones The signals sent by sending and receiving fax machines while communicating informati...

Page 150: ...of photographs Polling The process of a fax machine calling another fax machine to retrieve waiting fax messages Pulse A form of dialling on a telephone line Print reduction reduces the size of incoming faxes Quick Dial List A listing of names and numbers stored in One Touch and Speed Dial memory in numerical order Real Time transmission When memory is full you can send documents in real time Rema...

Page 151: ...x 203 dpi Best for very small print and line art System Setup List A printed report that shows the current setting of your machine Tel Index An electronic alphabetical listing of stored One Touch Speed Dial and Group numbers Temporary Settings You can select certain options for each fax transmission without changing the default settings Timer A feature that lets you program a fax to go out at a ce...

Page 152: ...Requirements 23 Connect External Telephone Answering Machine 20 Connect External Telephone 21 Connect MFC 11 143 Connect Power Cord 12 Connecting Computer 22 Connections 7 Contrast 48 Control Panel 4 Controller 137 COOLING DOWN 117 Copy Enlarging 86 Copy Multiple 84 Copy One Page 83 Copy Reducing 86 Copy Single Colour 92 Copy Sorted 84 Copy Stacked 84 Copy Brightness 92 Copy Contrast 92 Copy Opera...

Page 153: ...k Management Key 112 Inserting Spaces 42 International Calls 53 J Job Status 55 JOURNAL 81 L Legal Limitations 94 Loading Paper 109 M Maintenance 129 Manual Feed Slot 110 Manual Mode 57 Memory Full Message 93 MEMORY STATUS 81 Memory Status List 79 Memory Storage 44 Multi Line Connections 17 Multi Purpose Paper Cassette 9 108 Multiple Copies 84 Multiple Resolution Transmission 54 O On Screen Progra...

Page 154: ...nstructions 115 Scan Fax 47 Scanner Glass 47 Scanner Lock 12 Scanner Unit 12 Scroll 33 Setup 7 Simultaneous Printing Fax 111 Speaker Volume 44 Special Characters 42 Specification 135 Speed Dial Changing 69 Speed Dial Storing 68 Speed Dialling 71 Standard Resolution 48 Station ID 40 Storing Telephone Number 67 Super Fine Resolution 48 SYSTEM SETUP 81 T TEL INDEX 81 Telephone Index 71 Telephone Numb...

Page 155: ...146 I N D E X Video Printing Setting Paper Type 100 Video Printing Setting Print Size 101 Video Printing Setting Quality 100 Video Printing Setting Video Type 100 X XMIT REPORT 81 ...

Page 156: ...1 long beep Fax message s No beeps no messages 4 After 2 short beeps enter a command 5 Press 9 0 to reset your machine when you finish 6 Hang up 4 Change Answer Mode Press 9 8 then for EXT TEL TAD press 1 Fax press 2 Exit Remote Operation Press 9 0 Change Remote Access Code 1 Press Menu 1 7 3 2 Enter the 3 digit number The cannot be used 3 Press Set 4 Press Stop to exit 1 REMOTE CONTROL ACCESS CAR...

Page 157: ...e Receiving Status Press 9 7 1 1 long beep Fax message s 3 short beeps no messages Remote Commands Change Fax Forwarding Setting Press 9 5 then to Turn feature off press 1 Enter Fax Forwarding press 2 Program Fax Forward Number press 4 Enter the new number of the remote fax machine where you want your fax message forwarded and then press Press 9 6 1 after two short beeps then enter the number of r...

Page 158: ... product is in conformity with the following normative documents Safety EN 60950 including amendment A1 1993 A2 1993 A3 1995 and A4 1997 EMC EN55022 1998 EN55024 1998 EN61000 3 2 EN61000 3 3 following the provisions of the Low Voltage Directive 73 23 EEC and the Electromagnetic Compatibility Directive 89 336 EEC as amended by 91 263 EEC and 92 31 EEC ...

Page 159: ...ystem is registered by BSI and JQA BSI Certificate of registration No FM27214 JQA Certificate of registration No JQA 0367 This machine is approved for use in the country of purchase only local Brother companies or their dealers will only support fax machines purchased in their own countries ...

Reviews: