SEWING THE STITCHES
S-38
■
Appliqué
a
Trace the pattern onto the appliqué fabric
and then cut around it, leaving a 3 mm to
5 mm (approx. 1/8 inch to 3/16 inch) seam
allowance.
a
Seam allowance: 3 mm to 5 mm
(approx. 1/8 inch to 3/16 inch)
b
Place a piece of stabilizer cut to the finished
size of the appliqué design onto the fabric,
and then fold over the seam margin using
an iron. Clip curves when necessary.
c
Turn the appliqué over, and attach the
stabilizer with basting pins or a basting
stitch.
d
Select
and attach presser foot “J”.
e
Use the quilting appliqué stitch to attach
the appliqué. Sew around the edge while
dropping the needle as close to the edge as
possible.
a
Appliqué
b
Needle drop position
You can use the appliqué technique to attach
appliqué designs like the three pictured below.
■
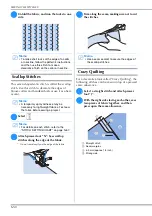
Quilting
Sewing the quilt top, batting, and backing together is
called quilting. You can sew the quilt with the
optional walking foot to keep the quilt top, batting,
and backing from sliding. The walking foot has a set
of feed dogs that move together with the feed dogs
in the needle plate during sewing.
a
Select ,
or .
b
Attach the walking foot. (“CHANGING
THE PRESSER FOOT” of “Basic
operations”)
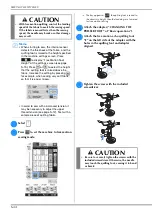
CAUTION
• Be careful that the needle does not strike a
basting pin during sewing. Striking a pin can
cause the needle to break, resulting in injury.
a
Dresden plate
b
Stained glass
c
Sunbonnet sue
Summary of Contents for 882-D10
Page 8: ...WHAT YOU CAN DO WITH THIS MACHINE B 6 ...
Page 58: ...USING FUNCTIONS BY CONNECTING THE ACCESSORY TO THE MACHINE B 56 ...
Page 77: ...USEFUL FUNCTIONS Sewing Basics Sewing S 19 S 1 ...
Page 133: ...STITCH SETTING CHART Utility Stitches Sewing S 75 S 2 ...
Page 170: ...USING STORED CUSTOM STITCHES S 112 ...
Page 207: ......


