


CHAPTER 4 OPTIONS
4-15
☛
☛
☛
☛
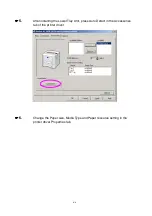
6.
Press the DIMM straight into the slot (press firmly). Make sure the locks on
each side of the DIMM snap inward into place. (To remove a DIMM, the locks
must be released.)
Fig. 4-11
☛
☛
☛
☛
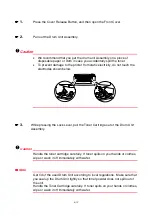
7.
Install the PCB Access Plate. Secure the PCB Access Plate with the two
screws.
Fig. 4-12
☛
☛
☛
☛
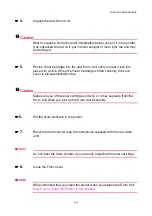
8.
Re-install the Interface Cover.
☛
☛
☛
☛
9.
Reconnect the interface cable (printer cable) from your computer. Plug the
power cord into the AC outlet, and then turn on the power switch.
☛
☛
☛
☛
10.
After you turn on the printer, the current RAM disk size will appear on the
LCD. Check it to make sure you added the new memory correctly.
Summary of Contents for 1870N - HL B/W Laser Printer
Page 58: ...2 12 Graphics Set the Resolution and so on ...
Page 61: ...CHAPTER 2 DEIVER AND SOFTWARE 2 15 Layout Set the layout and so on ...
Page 62: ...2 16 Specific Options Set the Media Type Resolution secure printing and so on ...
Page 155: ...6 16 7 Put the drum unit back into the printer 8 Close the Front Cover ...
Page 189: ...APPENDIX A 19 HP LaserJet 6P ...
Page 191: ...APPENDIX A 21 HP LaserJet IIP 6P EPSON FX 850 IBM Proprinter XL EPSON FX 850 ...


