


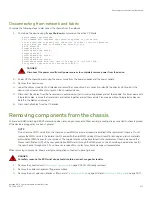


Replacing the Chassis
•
•
•
•
•
•
•
•
•
•
•
•
•
•
Chassis replacement overview
Before replacing the chassis, you will need to remove all blades and FRUs, except the WWN cards, from the existing chassis. You will
reinstall these in the replacement chassis. Do not remove components without following procedures in this section exactly as you will
need to save critical device and SAN information for these components before disconnecting the chassis from the network, fabric, and
power to begin removal procedures. After you reinstall components in the new chassis, follow exact procedures to reconnect to the
network, fabric and power, and then download firmware if necessary and verify system operation and configuration.
NOTE
New WWN cards are shipped preinstalled in the replacement chassis. Do not replace the WWN cards in the replacement
chassis with the old WWN cards from chassis that you are replacing. This will result in licensing and return materials
authorization (RMA) issues for your product. The original license will be transferred to the replacement chassis, based on the
license identification (LID) of the new, preinstalled WWN card, through the RMA process. You should be provided a license for
the new chassis through email. If you have not received this, contact your Brocade support representative.
Before beginning these procedures, perform the following tasks:
•
Place the replacement chassis in close proximity to the old chassis.
•
Provide a surface on which to place the old chassis, such as a second lift or the pallet originally provided with the chassis.
•
Obtain all tools and other materials listed under
To unpack and transport the new chassis, follow procedures under
Unpacking and transporting the device
on page 30.
Precautions specific to chassis replacement
Observe the following precautions when replacing the chassis.
When removing components, Wear a wrist grounding strap connected to bench ground.
DANGER
For safety reasons, the ESD wrist strap should contain a series 1 megaohm resistor.
Brocade X6-4 Director Hardware Installation Guide
53-1004106-07
211
Summary of Contents for X6-4
Page 12: ...Brocade X6 4 Director Hardware Installation Guide 12 53 1004106 07...
Page 20: ...Brocade X6 4 Director Hardware Installation Guide 20 53 1004106 07...
Page 28: ...Brocade X6 4 Director Hardware Installation Guide 28 53 1004106 07...
Page 64: ...Brocade X6 4 Director Hardware Installation Guide 64 53 1004106 07...
Page 86: ...Brocade X6 4 Director Hardware Installation Guide 86 53 1004106 07...
Page 102: ...Brocade X6 4 Director Hardware Installation Guide 102 53 1004106 07...
Page 130: ...Brocade X6 4 Director Hardware Installation Guide 130 53 1004106 07...
Page 140: ...Brocade X6 4 Director Hardware Installation Guide 140 53 1004106 07...
Page 166: ...Brocade X6 4 Director Hardware Installation Guide 166 53 1004106 07...
Page 196: ...Brocade X6 4 Director Hardware Installation Guide 196 53 1004106 07...
Page 200: ...Brocade X6 4 Director Hardware Installation Guide 200 53 1004106 07...
Page 204: ...Brocade X6 4 Director Hardware Installation Guide 204 53 1004106 07...
Page 210: ...Brocade X6 4 Director Hardware Installation Guide 210 53 1004106 07...
Page 224: ...Brocade X6 4 Director Hardware Installation Guide 224 53 1004106 07...
Page 238: ...Brocade X6 4 Director Hardware Installation Guide 238 53 1004106 07...