


•
The
psShow
or
fanShow
commands continue to show a faulty component even though the component was replaced.
•
The
slotShow
command continues to show a faulty control processor, core switch, or port blade even though the blade was
replaced.
Time and items required
The chassis replacement takes approximately 3 to 4 hours.
The following items are required for the chassis replacement:
•
Electrostatic discharge (ESD) grounding strap
•
ESD grounding pads for protecting all blades and WWN cards
•
Serial cable and workstation computer with a terminal emulator application (such as HyperTerminal for Windows systems or TIP
for Solaris systems), required only if serial console session used
•
Pallet jack or hydraulic or assisted lift that raises a minimum of 140 cm (55 in.) and carries a minimum of 113 kg (250 lb)
•
A surface on which to place the old chassis, such as a second lift or the pallet originally provided with the old chassis
•
#1 and #2 Phillips screwdriver. Use #1 Phillips screwdriver for removing and installing blades and FRUs in chassis.
Preparing for replacement
Before beginning replacement procedures you must run the a series of Fabric OS commands and record device information for
safekeeping that may be required for installing and configuring the new chassis. This includes information on licenses, IP address, WWN,
serial numbers, switch ID, location of configuration files, and fabric details. It also includes information that might be required by Technical
Support.
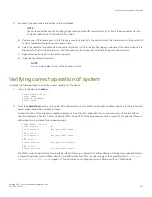
Recording critical device and SAN information
on page 214 instructs you to run the following commands and record specific
output:
•
supportShow
•
configUpload - all
•
configupload -vf
•
ipAddrShow -sw
•
chassisShow
•
nsShow
•
nsAllShow
•
switchShow -qsfp
•
fabricShow
•
licenseShow
•
supportShow
Before beginning replacement, you must also properly shut down the device and disconnect from the fabric and power using procedures
under
Disconnecting from network and fabric
Preparing for replacement
Brocade X6-4 Director Hardware Installation Guide
53-1004106-07
213
Summary of Contents for X6-4
Page 12: ...Brocade X6 4 Director Hardware Installation Guide 12 53 1004106 07...
Page 20: ...Brocade X6 4 Director Hardware Installation Guide 20 53 1004106 07...
Page 28: ...Brocade X6 4 Director Hardware Installation Guide 28 53 1004106 07...
Page 64: ...Brocade X6 4 Director Hardware Installation Guide 64 53 1004106 07...
Page 86: ...Brocade X6 4 Director Hardware Installation Guide 86 53 1004106 07...
Page 102: ...Brocade X6 4 Director Hardware Installation Guide 102 53 1004106 07...
Page 130: ...Brocade X6 4 Director Hardware Installation Guide 130 53 1004106 07...
Page 140: ...Brocade X6 4 Director Hardware Installation Guide 140 53 1004106 07...
Page 166: ...Brocade X6 4 Director Hardware Installation Guide 166 53 1004106 07...
Page 196: ...Brocade X6 4 Director Hardware Installation Guide 196 53 1004106 07...
Page 200: ...Brocade X6 4 Director Hardware Installation Guide 200 53 1004106 07...
Page 204: ...Brocade X6 4 Director Hardware Installation Guide 204 53 1004106 07...
Page 210: ...Brocade X6 4 Director Hardware Installation Guide 210 53 1004106 07...
Page 224: ...Brocade X6 4 Director Hardware Installation Guide 224 53 1004106 07...
Page 238: ...Brocade X6 4 Director Hardware Installation Guide 238 53 1004106 07...