SA-SRVG8-20, SA-SRVG8-40
3
Security Analytics Gen14 Dell Server Quick Start Guide
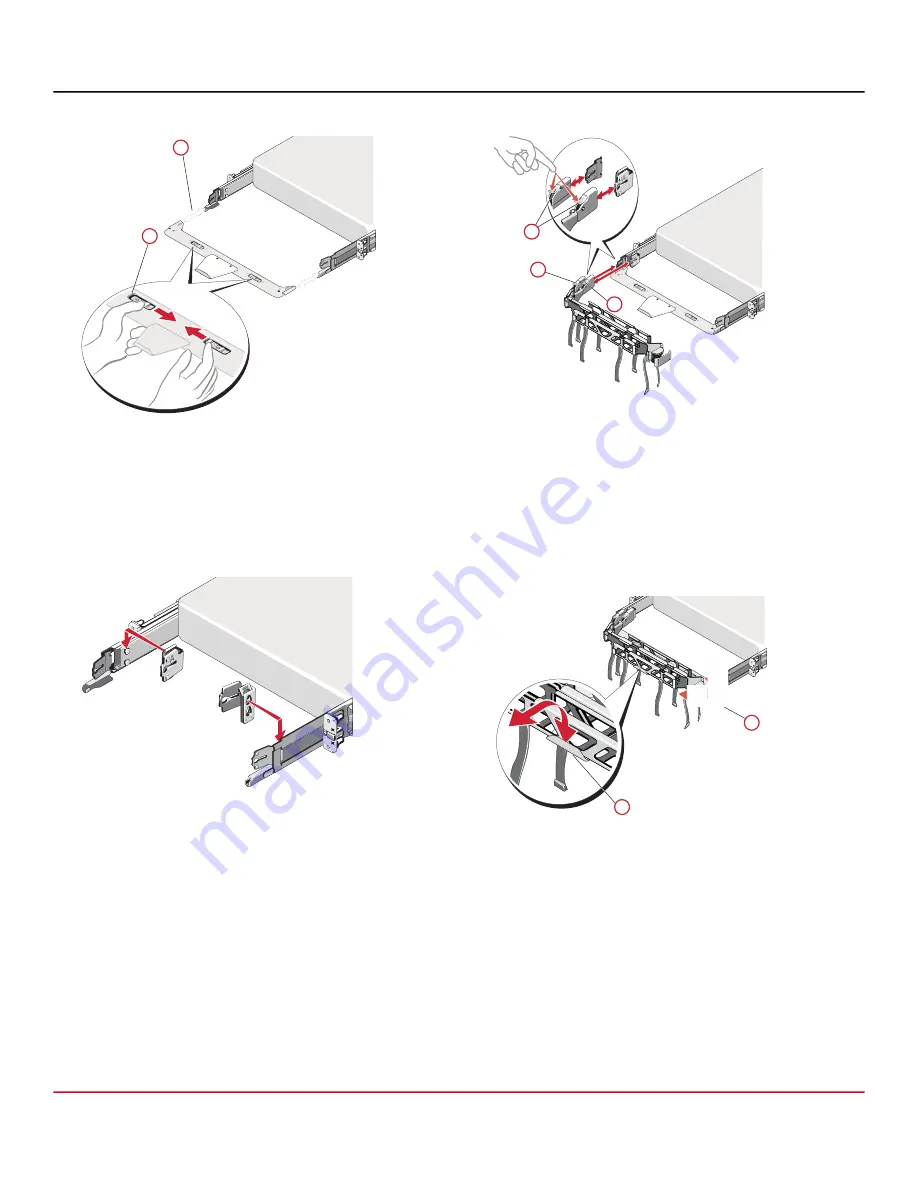
2. Install the CMA tray:
Align and engage each side of the tray with the receiver
brackets on the inner edges of the rails. Push the tray
forward until it clicks in place (
1
).
To remove the tray, squeeze the latch-release buttons
toward the center and pull the tray out of the receiver
brackets (
2
).
3. Install the CMA attachment brackets:
Attach the CMA to either the right or left mounting rail,
depending on the cable routing for the server. The side
opposite the power supplies (SIDE A) is recommended.
SIDE B requires removal of the CMA if you need to
remove the power supplies.
Select the appropriate CMA attachment bracket based on
the side you will mount the CMA (SIDE A or SIDE B). Install
the CMA attachment bracket at the back of the slide rail
with the corresponding SIDE A or SIDE B marking. Align
the holes on the bracket with the pins on the slide rail and
push the bracket downward until it locks in place.
4. Install the CMA:
At the back of the server, fit the latch on the front end of
the CMA on the innermost bracket of the slide assembly
until the latch engages (
1
).
Fit the other latch on the end of the outermost bracket
until the latch engages (
2
).
To remove the CMA, disengage both latches by
pressing the CMA release buttons at the top of the inner
and outer latch housings (
3
).
5. Move the CMA away from the CMA tray:
The CMA can be rotated away from the server for access
and service (to the service position). At the hinged end, lift
the CMA away from the tray to unseat it (
1
).
After it is unseated from the tray, swing the CMA away
from the server (
2
).
2
1
2
1
3
2
1


