background image


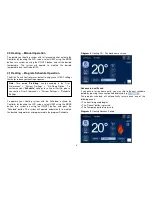
6.0 Evaporative Cooling – Manual Operation 

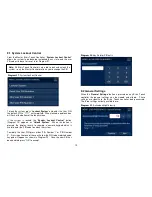
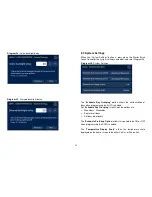
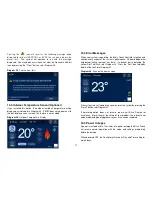
To  operate  your  Evaporative  Cooling  system  with  full manual control, 
activate the Controller by touching the LCD screen, select EVAP using 
the MODE button, turn system on using the ON/OFF button.  When the 
Evaporative Cooler turns on for the first time the PUMP and FAN will 
be on, indicated by the light blue colour buttons.  Set the desired FAN 
SPEED level with the UP/DOWN arrows.  The system will operate until 
turned OFF. 


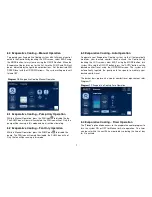
6.1 Evaporative Cooling – Pump Only Operation 

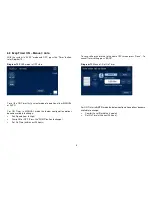
While in Manual Operation, press the FAN icon 

 to disable the fan. 

The PUMP icon will remain illuminated, the FAN icon will not. Only the 
pump will be running in this mode and no air will be circulating. 
 

6.2 Evaporative Cooling – Fan Only Operation 

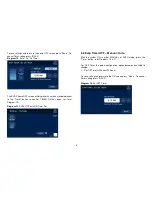
While in Manual Operation, press the PUMP icon 

 to disable the 

pump. The FAN icon will remain illuminated, the PUMP icon will not. 
Only the fan will be running in this mode. 
 

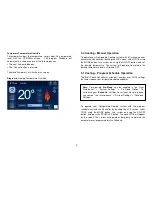
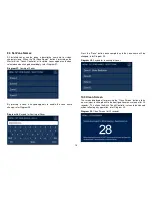
6.3 Evaporative Cooling– Auto Operation 

To  operate  your  Evaporative  Cooling  system  so  that  it  automatically 
maintains  your  desired  comfort  level,  activate  the  Controller  by 
touching  the  LCD  screen,  select  EVAP  using  the  MODE  button,  turn 
system ON using the ON/OFF button, press the “AUTO” button, set the 
desired  comfort  level  using  the  UP/DOWN  arrows.  The  system  will 
automatically  regulate  the  pump  and  fan  speed  to  maintain  your 
desired comfort level.   
 
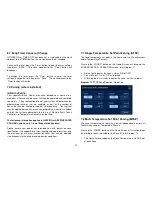
The  darker  bars  represents  a  cooler  comfort  level  requirement,  refer 
Diagram 11. 


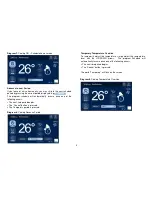
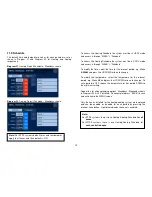
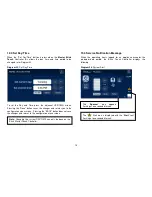
6.4 Evaporative Cooling – Timer Operation 

The “

Timer

” option allows access to the evaporative cooler program to 

turn  the system ON  or  OFF  for Manual  or  Auto  operation.   The  timer 
can be set within the next 24 hour period by selecting the time of day 
for it to activate. 
 

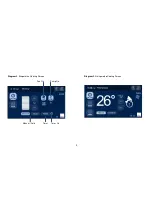
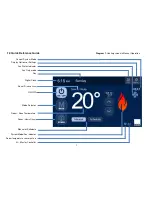
Diagram 10

: Evaporative Cooling Manual Operation


Diagram 11

: Evaporative Cooling Auto Operation


Summary of Contents for Touch

Page 1: ...Brivis Touch Owner s Manual ...

Page 2: ...ms a single Touch Controller with single or multiple room temperature sensors multiple Touch Controllers The Brivis Touch Controller also facilitates either Single Temperature Set Point STSP or Multi Temperature Set Point MTSP control of zoned systems Your Brivis designer installer will advise you on the appropriate configuration and operation of your system Please also refer to any Owner s Manual...

Page 3: ...on 7 6 4 Evaporative Cooling Timer Operation 7 6 5 Evap Timer ON Manual Auto 8 6 6 Evap Timer OFF Manual Auto 9 6 7 Evap Timer Cancel or Change 10 7 0 Zoning where installed 10 7 1 Single Temperature Set Point Zoning STSP 10 7 2 Multi Temperature Set Point Zoning MTSP 10 8 0 Menu 11 9 0 User Preferences 11 9 1 System Lockout Control 12 9 2 General Settings 12 9 3 System Settings 13 9 4 Set Zone Na...

Page 4: ...om temperature sensor active System Mode Run indicator Zones Where Fitted Mode Selector ON OFF Digital Clock Manual or Schedule M Master Controller Day Fan Only mode Display Options or Settings Fan Status Indicator Current System Mode Room Zone Temperature Zone ID where fitted ...

Page 5: ...2 Diagram 3 Refrigerated Cooling Screen Diagram 2 Evaporative Cooling Screen Pump On Fan On Timer On Timer Manual Auto ...

Page 6: ...re comfort level by using the UP DOWN buttons 5 System will run at desired comfort level until turned OFF by pressing the ON OFF button You may access User Preferences and other advanced options by pressing the MENU button 3 0 Fan Operation FAN ONLY With the system OFF standby push the FAN button in the top right hand corner to turn the fan ON If in HEAT or COOL mode the heater fan will turn on If...

Page 7: ...utton turn system on using the ON OFF button and press the Schedule button The system will operate automatically to maintain the desired temperatures as programmed in the program Schedule Advance to next Period If you leave or arrive home early you may skip to the next schedule period by pressing the current period displayed e g The program schedule will automatically resume once one of the follow...

Page 8: ...perature level until turned OFF 5 1 Cooling Program Schedule Operation The Brivis Touch Controller uses default energy saver COOL settings that helps reduce your refrigerated cooling expenses To operate your Refrigerated Cooling system with the program schedule activate the Controller by touching the LCD screen select COOL using the MODE button turn system on using the ON OFF button and press the ...

Page 9: ...on is pressed The Temporary period is pressed Temporary Temperature Override To temporarily adjust the temperature simply adjust the temperature level with the UP DOWN arrows The program Schedule will automatically resume once one of the following occurs The next time period begins The Cancel button is pressed The word Temporary will flash on the screen Diagram 7 Cooling ON Schedule home screen Di...

Page 10: ...able the pump The FAN icon will remain illuminated the PUMP icon will not Only the fan will be running in this mode 6 3 Evaporative Cooling Auto Operation To operate your Evaporative Cooling system so that it automatically maintains your desired comfort level activate the Controller by touching the LCD screen select EVAP using the MODE button turn system ON using the ON OFF button press the AUTO b...
Page 11: ...s become available to change Fan Speed Low to High Pump ON or OFF Press the PUMP button to change Set On Time within next 24 hours To save settings and return to the home OFF screen press Done To cancel Timer setting press BACK For ON Timer in AUTO mode the below configuration options become available to change Comfort Level Dark blue is cooler Set On Time within next 24 hours Diagram 12 EVAP mode...

Page 12: ... Diagram 15 6 6 Evap Timer OFF Manual Auto With the system ON in either MANUAL or AUTO mode press the Timer button refer Diagrams 10 11 For OFF Timer the below configuration option becomes available to change Set Off Time within next 24 hours To save settings and return to the ON screen press Done To cancel Timer setting press BACK Diagram 15 EVAP OFF with ON Timer Set Diagram 16 Set OFF Timer Dia...

Page 13: ...re Sensors may be fitted The following information applies to HEATING or REFRIGERATED COOLING systems only i e not Evaporative Systems Please ensure your dealer has provided you with details on zone identification the capabilities of your heating and cooling system and the maximum or minimum number of zones that can be operated simultaneously for heating or cooling design conditions 7 1 Single Tem...

Page 14: ... the homeowner these are 1 User Preferences 2 Clean Screen 3 Schedule 4 Set Day Time Refer Diagram 19 Note Once you access the MENU Screen and select a configuration option if no button is pressed for 60 seconds the Touch will exit the configuration mode and return to normal operation this applies to all options other than SCHEDULE 9 0 User Preferences When the User Preferences button is pressed o...

Page 15: ... to enter the PIN code to unlock the system To modify the User PIN press either PIN Number 1 or PIN Number 2 Pressing either one of these will allow the PIN to be modified and a key pad will appear as shown in Diagram 22 Once the new PIN has been entered press OK to accept 9 2 General Settings When the General Settings button is pressed on any Brivis Touch controller the general settings can be vi...

Page 16: ...e AUTO schedule For Schedule Day Grouping Heat Cool the options are Weekdays Weekends Same for all days Set days individually The Schedule Pre Sleep Option allows this period to be ON or OFF when programming the AUTO schedule The Temperature Display Scale allows the temperature scale displayed on the home screen to be either Celsius or Fahrenheit Diagram 26 System Settings Diagram 24 Active backli...

Page 17: ...me change refer Diagram 28 Press the Done button once complete and the zone name will be changed refer Diagram 29 10 0 Clean Screen The screen displayed after pressing the Clean Screen button allows no user input reverting back to the configuration menu screen after 30 seconds This allows the Brivis Touch Controller screen to be cleaned without affecting any operation refer Diagram 30 Diagram 27 N...

Page 18: ... set a period to OFF reduce the temperature for that period DOWN to the minimum setting Repeat this for all day grouping options Weekdays Weekends shown in Diagrams 29 30 if installed Once complete press BACK to save and exit back to the MENU screen Only the zones installed for the heating cooling system are displayed and can be enabled or disabled for each period by pressing the relevant zone but...

Page 19: ... the BACK button does not save the changes and returns to the configuration menu screen 13 0 Service Notification Message When the operating hours logged for an appliance exceeds the predetermined period the Brivis Touch Controller displays the following Diagram 33 Set Day Time The Spanner icon appears flashing at one second intervals The Alert icon is displayed with the Alert text flashing at one...

Page 20: ...e On board diagnostics help determine the source of any faults If a lockout fault is detected the yellow Alert will flash refer Diagram 36 Press the Alert icon to display details of the fault refer Diagram 37 If the system turns off completely you may reset the system by pressing the Reset button refer Diagram 37 If normal operation does not resume please call Brivis Service for assistance Inform ...

Page 21: ...HEDULE operation select each zone you wish to operate for each time and temperature setting in the program schedule Multi Temperature Set Point MTSP System The zone temperature set point can be set independently across all Touchscreens and or Temperature Sensors Your system can control up to four zones so that each zone has its own temperature set point You may operate the system in MANUAL or SCHE...

Page 22: ...19 Notes ...

Page 23: ...20 Notes ...

Page 24: ... brivis com au email sales brivis com au Brivis New Zealand Distributor Warm Air Ltd 69 Marsden Street Lower Hutt 5010 New Zealand PO Box 38523 Wellington Mail Centre Wellington 5043 New Zealand 0800 WARMAIR 0800 9276 247 Ph 64 04 920 1670 Fax 64 04 920 1681 www warmair co nz Brivis South Africa Distributor Lorenz and Associates Northlands Deco Park Cnr Witkoppen and Newmarket Roads North Riding J...

Reviews: