background image

ENGLISH 


OPERATION MANUAL 


BRITEQ

®


2/69 

BT-150LS 

SAFETY INSTRUCTIONS: 


  To protect the environment, please try to recycle the packing material as much as possible. 

  To prevent fire or shock hazard, do not expose this appliance to rain or moisture. 

  To avoid condensation to be formed inside, allow the unit to adapt to the surrounding temperatures when 

bringing  it  into  a  warm  room  after  transport.  Condense  sometimes  prevents  the  unit  from  working  at  full 
performance or may even cause damages. 

  This unit is for indoor use only.  


Don’t place metal objects or spill liquid inside the unit. Electric shock or malfunction may result. If a foreign 
object enters the unit, immediately disconnect the mains power. 

  Locate the fixture in a well ventilated spot, away from any flammable materials and/or liquids. The fixture 

must be fixed at least 50cm from surrounding walls. 


Don’t cover any ventilation openings as this may result in overheating.  

  Prevent use in dusty environments and clean the unit regularly. 

  Keep the unit away from children. 

  Inexperienced persons should not operate this device. 

  Maximum safe ambient temperature is 40

°C. Don’t use this unit at higher ambient temperatures. 

  Make  sure  the  area  below  the  installation  place  is  free  from  unwanted  persons  during  rigging, de-rigging 

and servicing. 

  Allow the device about 10 minutes to cool down before to start servicing. 

  Always unplug the unit when it is not used for a longer time or before to start servicing. 

  The electrical installation should be carried out by qualified personal only, according to the regulations for 

electrical and mechanical safety in your country. 

  Check that the available voltage is not higher than the one stated on the unit. 

  The power cord should always be in perfect condition. Switch the unit immediately off when the power cord 

is squashed or damaged. It must be replaced  by the  manufacturer, its service agent or similarly  qualified 
persons in order to avoid a hazard. 

  Never let the power-cord come into contact with other cables! 

  This fixture must be earthed in order to comply with safety regulations. 


Don’t connect the unit to any dimmer pack. 

  Always use an appropriate and certified safety cable when installing the unit. 

  In order to prevent electric shock, do not open the cover. There are no user serviceable parts inside. 


Never

 repair a fuse or bypass the fuse holder. 

Always

 replace a damaged fuse  with a fuse of the same 

type and electrical specifications! 

  In the event of serious operating problems, stop using the fixture and contact your dealer immediately. 

  The housing and the lenses must be replaced if they are visibly damaged. 

  Please use the original packing when the device is to be transported. 


CAUTION:

  To  reduce  the  risk  of  electric  shock,  do  not  remove 

the  top  cover.  No  user-serviceable  parts  inside.  Refer  servicing 
to qualified service personnel only. 


The  lightning  flash  with arrowhead  symbol  within  the  equilateral  triangle  is  intended  to alert  the 
use or the presence of un-

insulated “dangerous voltage” within the product’s enclosure that may 

be of sufficient magnitude to constitute a risk of electric shock. 


The exclamation point within the equilateral triangle is intended to alert the user to the presence 
of  important  operation  and  maintenance  (servicing)  instructions  in  the  literature  accompanying 
this appliance. 


This symbol means: indoor use only


This symbol means: Read instructions


This symbol means: Safety Class I appliance 


The device is not suitable for direct mounting on normally flammable surfaces. (suitable only for 
mounting on non-combustible surfaces) 


CAUTION: 

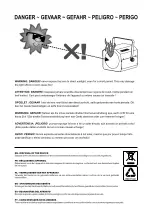
Do not stare at operating lamp.  

May be harmful to the eyes. 

Summary of Contents for BT-150LS

Page 1: ......

Page 2: ......

Page 3: ...cus Automatic X Y re positioning 0 100 dimming and ultra fast strobe function Optional remote controllers can be used wired CA8 or wireless RF8 SET Easy firmware updates keep your machine up to date a...

Page 4: ...uld always be in perfect condition Switch the unit immediately off when the power cord is squashed or damaged It must be replaced by the manufacturer its service agent or similarly qualified persons i...

Page 5: ...persons may walk by or be seated Before rigging make sure that the installation area can hold a minimum point load of 10times the device s weight Always use a certified safety cable number 3 on the p...

Page 6: ...WN and UP buttons to change the DMX512 address Once the correct address shows on the display press the ENTER button to save it To go back to the main menu without any change press the MENU button shor...

Page 7: ...ograms will be triggered to the rhythm of the music by the built in microphone HOLD when no DMX signal is detected the unit freezes with the latest DMX values received and waits for the DMX signal BLA...

Page 8: ...e it To go back to the main menu without any change press the MENU button shortly To exit the programming mode and to store the new settings in the memory press the MENU button for about 2 seconds Bac...

Page 9: ...o the functions press the MENU button If you want to go back to normal running mode press the MENU button for about 2 seconds Reset Used to force a reset of the unit Press the MENU button until the di...

Page 10: ...won t work Make sure that all units are connected to the mains Each light effect in the chain needs to have its proper starting address so it knows which commands from the controller it has to decode...

Page 11: ...aking 074 082 GOBO 2 Shaking 083 091 GOBO 3 Shaking 092 100 GOBO 4 Shaking 101 109 GOBO 5 Shaking 110 118 GOBO 6 Shaking 119 127 GOBO 7 Shaking 128 189 Gobo wheel turning clockwise fast slow 190 193 G...

Page 12: ...IN 15CH MODE CHANNEL VALUE FUNCTION 1 000 255 Pan 2 000 255 Pan Fine Least significant bit 3 000 255 Tilt 4 000 255 Tilt Fine Least significant bit 5 000 255 Pan Tilt Speed 000 fast 255 slow 6 000 255...

Page 13: ...rism on off 000 127 Prism effect OFF 128 255 Prism effect ON 12 Prism rotation 000 127 indexed positioning 0 360 128 189 Prism turning clockwise fast slow 190 193 Prism stops turning 194 255 Prism tur...

Page 14: ...e using a Phillips screwdriver PH2 Done OPERATE THE UNIT BY CA8 OR RF8SET When used in standalone or master slave mode we strongly advise you to use the CA 8 Wired easy controller or RF 8SET Wireless...

Page 15: ...the device should be cleaned annually using a vacuum cleaner or air jet The cleaning of internal and external optical lenses and or mirrors must be carried out periodically to optimize light output Cl...

Page 16: ...stroboscope ultrarapides Des t l commandes en option peuvent tre utilis es filaire CA8 ou sans fil RF8 SET Les mises jour faciles du micrologiciel permettent de maintenir votre appareil jour en perma...

Page 17: ...L installation lectrique doit tre effectu e par du personnel qualifi conform ment la r glementation en mati re de s curit lectrique et m canique dans votre pays V rifiez que la tension secteur n est...

Page 18: ...l emplacement d installation durant le montage le d montage et l entretien Fixez l appareil dans un endroit bien a r loin de tout mat riau et ou liquide inflammable L appareil doit tre fix au moins 50...

Page 19: ...n autre appareil MENU PRINCIPAL Pour s lectionner n importe quelle fonction appuyez sur la touche MENU plusieurs fois jusqu ce que celle qui vous est n cessaire s affiche sur l cran ou utilisez les to...

Page 20: ...n 90 60 au dessus l horizontale 30 sous l horizontale Show 4 Le projecteur est accroch au plafond Le projecteur est principalement dirig vers l avant de la sc ne Angle de mouvement horizontal gauche d...

Page 21: ...vement sur la touche MENU Pour quitter le mode de programmation et stocker les nouveaux r glages en m moire maintenez enfonc e la touche MENU pendant environ 2 secondes Sensibilit sonore Utilis pour r...

Page 22: ...on ce que l appareil se place en position Panoramique 270 Dans les 5 tapes pr c dentes vous tes en mesure d effectuer la mise au point de l appareil avec les touches HAUT BAS l cran indique la valeur...

Page 23: ...omment utiliser l appareil pour apprendre comment faire cela Remarque 2 S il n y a pas de sortie assurez vous de mettre l appareil en mode ma tre et de d finir le mode blackout sur M S et le mode sono...

Page 24: ...cela d pend enti rement du contr leur que vous allez utiliser Reportez vous alors au manuel de votre contr leur DMX pour savoir quelles adresses de d part vous devez d finir CONFIGURATION DMX BT 150LS...

Page 25: ...dans le sens horaire rapide lent 190 193 Gobo s arr tant de tourner 194 255 Gobo tournant dans le sens antihoraire lent rapide 11 Activer d sactiver le prisme 000 127 Effet de prisme d sactiv 128 255...

Page 26: ...scopique Obturateur 000 007 Obturateur ferm pas de lumi re 008 015 Obturateur ouvert 016 131 Effet stroboscopique 1 lent rapide 132 139 Obturateur ouvert 140 181 Effet stroboscopique 2 Ouverture lente...

Page 27: ...tant de tourner 194 255 Prisme tournant dans le sens antihoraire lent rapide 13 000 255 Mise au point de pr s loin 14 Fonctions sp ciales 000 069 Aucun r le 070 079 Activer l obscurcissement pendant...

Page 28: ...t utilis en mode autonome ou ma tre esclave nous vous conseillons fortement d utiliser le contr leur filaire facile CA 8 ou le contr leur sans fil facile RF 8SET T l commande filaire CA 8 Raccordez le...

Page 29: ...areil doit tre nettoy une fois par an l aide d un aspirateur ou d un jet d air Le nettoyage des lentilles optiques et ou miroirs internes et externes doit tre effectu p riodiquement pour optimiser le...

Page 30: ...Y herpositionering 0 100 dimmer en uiterst snelle stroboscoopfunctie Optionele afstandsbedieningen kunnen als volgt worden gebruikt bedraad CA8 of draadloos RF8 SET Gemakkelijke firmware updates houde...

Page 31: ...houd aan wordt gepleegd De elektrische installatie dient alleen door gekwalificeerd personeel en in overeenstemming met de voorschriften voor elektrische en mechanische veiligheid in uw land te worden...

Page 32: ...geen ongewenste personen bevinden in het gebied onder de installatieplaats Plaats de armatuur op een goed geventileerde plek uit de buurt van brandbare materialen en of vloeistoffen De armatuur moet o...

Page 33: ...arde 8 LICHTNETINGANG UITGANG IEC contactdozen sluiten het meegeleverde netsnoer aan op de ingang De uitgang kan worden gebruikt om de stroomvoorziening door te koppelen naar het volgende apparaat HOO...

Page 34: ...U knop Voor het verlaten van de programmeerstand en het opslaan van de nieuwe instellingen in het geheugen houd de MENU knop gedurende ongeveer 2 seconden ingedrukt Slave modus Wordt gebruikt om het s...

Page 35: ...gheid te selecteren Zodra de modus is geselecteerd druk op de ENTER knop om het op te slaan Om zonder wijziging naar het hoofdmenu terug te keren druk kort op de MENU knop Voor het verlaten van de pro...

Page 36: ...anorama 270 In de voorgaande 5 stappen kunt u met de knoppen OMHOOG OMLAAG knoppen op het apparaat het brandpunt instellen het scherm geeft de huidige status voor het brandpunt weer Opgelet Merk op da...

Page 37: ...t te bedienen om te leren hoe dit te doen Opmerking 2 Als er geen output is zorg ervoor het apparaat in de master modus de blackout modus op M S en de geluidmodus op ON in te stellen zie vorig hoofdst...

Page 38: ...e controller die u zult gebruiken Dus raadpleeg de gebruikershandleiding van uw DMX controller om te achterhalen welke startadressen u moet instellen DMX CONFIGURATIE VAN BT 150LS IN 14 KANAALS STAND...

Page 39: ...193 Gobo stopt met draaien 194 255 Gobo draait linksom traag snel 11 Prisma aan uit 000 127 Prisma effect UIT 128 255 Prisma effect AAN 12 Prisma rotatie 000 127 ge ndexeerde positionering 0 360 128...

Page 40: ...0 007 Shutter gesloten geen uitgang 008 015 Shutter geopend 016 131 Strobe 1 traag snel 132 139 Shutter geopend 140 181 Strobe 2 traag open onmiddellijk sluiten traag snel 182 189 Shutter geopend 190...

Page 41: ...draaien 194 255 Prisma draait linksom traag snel 13 000 255 Focus dichtbij tot afgelegen 14 Speciale functies 000 069 Geen functie 070 079 Black out activeren tijdens pan tilt 080 089 Black out uitsch...

Page 42: ...N HET APPARAAT VIA DE CA8 OF RF8 SET Bij gebruik in stand alone of master slave modus raden wij u aan de CA 8 Bekabelde gemakkelijke bediening of de RF 8 SET Draadloze gemakkelijke bediening te gebrui...

Page 43: ...an het apparaat moeten jaarlijks met een stofzuiger of luchtspuit worden gereinigd Het reinigen van de interne en externe optische lenzen en of spiegels moet regelmatig worden uitgevoerd om de lichtop...

Page 44: ...lle Stroboskop Funktion Optionale Fernbedienungen k nnen verwendet werden Kabelgebundene CA8 oder drahtlose RF8 SET Einfache Firmware Updates halten Ihr Ger t immer auf dem neuesten Stand optionaler F...

Page 45: ...tet wird Die elektrische Installation darf nur von qualifiziertem Personal unter Beachtung der Vorschriften zur elektrischen und mechanischen Sicherheit in Ihrem Land durchgef hrt werden Stellen Sie s...

Page 46: ...werden Stellen Sie sicher dass sich w hrend des Auf oder Abbaus und der Wartung keine unbefugten Personen unterhalb des Ger ts befinden Das Ger t nur an einem gut bel fteten Ort und entfernt von entf...

Page 47: ...Sie die mitgelieferten Netzkabel an den Eingang an Der Ausgang kann zur Stromversorgung des n chsten Ger ts verwendet werden HAUPTMEN Um eine der Funktionen auszuw hlen dr cken Sie mehrmals die Taste...

Page 48: ...von links nach rechts und wieder nach links 160 Winkel der Kipp Bewegung 90 vertikal vorne 75 wieder 15 Sobald der richtige Show Modus auf dem Display angezeigt wird k nnen Sie diesen mit der Taste EN...

Page 49: ...te f r ca 2 Sekunden gedr ckt Musikempfindlichkeit Zur Einstellung der Empfindlichkeit des eingebauten Mikrofons Dr cken Sie die Taste MENU bis Sound Sense auf dem Display angezeigt wird Dr cken Sie d...

Page 50: ...renden Gobos an Dr cken Sie die Taste MENU bis Focus Adjust auf dem Display angezeigt wird Drucken Sie ENTER damit die Einheit in die Stellung Kippen 90 geht Drucken Sie ENTER damit die Einheit in die...

Page 51: ...tecken Sie einfach den Netzstecker in eine Steckdose Das Ger t f ngt sofort an im Standalone Modus zu arbeiten Hinweis 1 Sie k nnen eine CA 8 oder RF 8 Steuerung an der Einheit anschlie en Weitere Inf...

Page 52: ...es Kapitel DMX 512 Adresseinstellung Die Startadresse jedes einzelnen Ger ts ist ausgesprochen wichtig Leider ist es unm glich Ihnen hier schon die richtigen Adressen mitzuteilen denn die Startadresse...

Page 53: ...angsam schnell 10 Goborad Drehung 000 127 Indizierte Positionierung 0 360 128 189 Gobo dreht sich im Uhrzeigersinn schnell langsam 190 193 Gobo dreht sich nicht 194 255 Gobo dreht sich gegen den Uhrze...

Page 54: ...5 langsam 6 000 255 Dimmer 0 bis 100 7 Strobe Shutter Effekt 000 007 Shutter geschlossen keine Ausgabe 008 015 Shutter offen 016 131 Strobe 1 langsam schnell 132 139 Shutter offen 140 181 Strobe 2 lan...

Page 55: ...dreht sich im Uhrzeigersinn schnell langsam 190 193 Prisma dreht sich nicht 194 255 Prisma dreht sich gegen den Uhrzeigersinn langsam schnell 13 000 255 Fokus weit nach nah 14 Sonderfunktionen 000 06...

Page 56: ...ckung mit einem Kreuzschlitzschraubendreher PH2 wieder am Kopf Fertig BETRIEB MIT CA8 ODER RF8SET Im Einzel und Master Slave Modus ist es sehr empfehlenswert ein CA 8 Kabel Controller oder RF 8SET Fun...

Page 57: ...inneren und u eren optischen Linsen und oder Spiegel muss in regelm igen Abst nden zur Beibehaltung einer optimalen Lichtausbeute vorgenommen werden Die Reinigungsintervalle h ngen stark von der Umgeb...

Page 58: ...estrobosc pica de alta frecuencia Los controladores remotos opcionales se pueden utilizar por cable CA8 o de modo inal mbrico RF8 SET La f cil actualizaci n del firmware mantiene su m quina al d a en...

Page 59: ...izar labores de mantenimiento o reparaci n La instalaci n el ctrica debe realizarla solamente personal cualificado de acuerdo con la normativa sobre seguridad el ctrica y mec nica de su pa s Compruebe...

Page 60: ...ugar de instalaci n est libre de personas no autorizadas durante la subida bajada y reparaci n del aparato Coloque el proyector en un lugar bien ventilado lejos de materiales y o l quidos inflamables...

Page 61: ...no del mismo valor 8 ENTRADA DE ALIMENTACI N SALIDA Conectores IEC conecte el cable de alimentaci n suministrado en el conector de entrada el conector de salida se puede usar para dar alimentaci n a l...

Page 62: ...ione el bot n ENTER para guardarlo Para regresar al men principal sin realizar ning n cambio pulse brevemente el bot n MENU Para salir del modo de programaci n y guardar la nueva configuraci n en la m...

Page 63: ...sensibilidad Una vez seleccionado el modo presione el bot n ENTER para guardarlo Para regresar al men principal sin realizar ning n cambio pulse brevemente el bot n MENU Para salir del modo de progra...

Page 64: ...laza a la posici n 270 en orientaci n En los 5 pasos anteriores podr ajustar el enfoque usando los botones ARRIBA ABAJO de la unidad el visualizador mostrar el estado actual del enfoque Atenci n Por f...

Page 65: ...Observaci n 2 Si no hay salida aseg rese de configurar la unidad en el modo maestro y establezca el modo de apagado blackout en M S y el Modo de sonido Sound Mode en On consulte el cap tulo anterior I...

Page 66: ...en este manual de usuario cu les direcciones de inicio tiene que establecer porque esto depende completamente del controlador que utilice De manera que consulte el manual de usuario de su controlador...

Page 67: ...127 posicionamiento indexado 0 360 128 189 Gobo girando en sentido de las agujas del reloj r pido lento 190 193 Gobo deja de girar 194 255 Gobo girando en sentido contrario a las agujas del reloj lent...

Page 68: ...007 Obturador cerrado sin emisi n 008 015 Obturador abierto 016 131 Estrobosc pio 1 lento r pido 132 139 Obturador abierto 140 181 Estrobosc pio 2 apertura lenta cierre instant neo lento r pido 182 1...

Page 69: ...9 Prisma girando en sentido de las agujas del reloj r pido lento 190 193 Prisma deja de girar 194 255 Prisma girando en sentido contrario a las agujas del reloj lento r pido 13 000 255 Foco cercano a...

Page 70: ...DAD CON EL CA8 O EL RF8SET Cuando se utilice en los modos aut nomo o maestro esclavo recomendamos enf ticamente utilizar el CA 8 Wired easy controller o el RF 8SET Wireless easy controller CA 8 con ca...

Page 71: ...ensualmente El interior del dispositivo debe limpiarse anualmente utilizando una aspiradora o chorro de aire La limpieza de las lentes pticas y o espejos internos y externos debe efectuarse peri dicam...

Page 72: ...RITEQ LIGHTING COM Copyright 2014 by BEGLEC NV t Hofveld 2C B1702 Groot Bijgaarden Belgium Reproduction or publication of the content in any manner without express permission of the publisher is prohi...

Reviews: