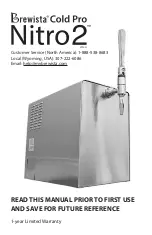
BREWISTA Cold Pro Nitro 2 Owner'S Manual Download Page 11

11

Troubleshooting your Cold Pro Nitro 2™ System

Problem

Cause

Solution

Not enough or too much 

foam

The gas needle valve is not 

set up properly.

Follow instructions in the 

“Adjusting the Gas Level” 

section on page 7. The 

needle valve has a default 

setup of 1.

A change in the foaming 

behavior can also be 

a result of a flowrate 

reduction due to clogging 

of the filter adapter (13) or 

the spout (3).

Check all filters or strainers 

and remove any particles in 

it.  Unscrew the tap nozzle 

(3) and check for particles 

lodged in the strainer.

If there is suddenly too 

much foam, the dispenser 

might be sucking air in via 

the product intake line (11).

Ensure that all connections 

between the dispenser and 

coffee container are sealed 

well. Sometimes the push-in 

connection system causes 

air leaks that need to be 

removed.

Dispensed coffee is not 

cold enough

No electrical power or 

temperature control is 

turned off.

Check the dispenser’s 

electrical connection. 

If the air compressor is 

working then the problem 

is not power related. For 

maximum cooling, turn the 

temperature control to the 

MAX position.

When I pour two glasses of 

Nitro Cold Brew coffee, the 

second one is sometimes 

slightly less chilled than 

the first one. Why is this 

happening?

We recommend pouring 

for 45 seconds and then 

pausing for 15 sec. before 

your 2nd pour. This 

allows the coffee inside 

the fridge to chill to your 

desired temperature. 

The temperature can be 

adjusted on the thermostat 

knob on the control 

panel. The target pour 

temperature is 35.6°F (2°C). 

In cases of continuous 

pouring, temperature may 

rise to 41°F (5°C).  If the 

cooling capacity of the 

device is not strong enough, 

you will need to increase 

the cooling capacity using 

solutions found on page 8.

Summary of Contents for Cold Pro Nitro 2

Page 1: ...Customer Service North America 1 888 538 8683 Local Wyoming USA 307 222 6086 Email help mybrewista com READ THIS MANUAL PRIOR TO FIRST USE AND SAVE FOR FUTURE REFERENCE 1 year Limited Warranty V2PX H ...

Page 2: ...void contacting moving parts Do not insert objects into rotating parts fan or compressor Prevent dirt dust fibers etc from entering the unit Operate the Cold Pro Nitro 2 in a dust free environment Connect only the specified supply voltage Protect the device against moisture especially by penetrating liquids If the supplied cord is damaged it must be replaced by the manufacturer its service agent o...

Page 3: ...appliance must be grounded while in use CAUTION To ensure continued protection against risk of electric shock connect to properly grounded outlets only GROUNDING INSTRUCTIONS In North American markets the appliance has a plug that looks like Figure A DO NOT attempt to insert a power cord into an incompatible outlet Appliance damage electrical system damage or physical harm may result An adaptor as...

Page 4: ...vel 7 Higher Cooling Power for High Volume Dispensing 8 Filtration 8 Decomissioning 8 Product Shelf Life 8 Downtimes 8 Cleaning Instructions 9 Maintenance 10 Remove Dust at Condensator Grid 10 Changing O rings and Connectors 10 Other Maintenance and Repairs 10 Troubleshooting 11 1 year Limited Warranty Information 14 Correct Disposal of this Product 14 Warnings and Technical Data 15 Online User Ma...

Page 5: ...ew Inlet 6 Power Button 7 Non slip Feet 8 Power Cord 9 Air Intake Vent 10 Control Panel Cover protects Temperature Control and Gas Level Control 11 Intake Line 2 0 m with Coupler to connect to dispenser 12 Male Elbow Coupler 13 Intake Filter 14 Bag in Box Adaptor 13 12 14 Front 6 5 Back 10 8 9 11 1 2 3 4 7 ...

Page 6: ...3 Assemble the tap handle 1 by screwing on at the top of the dispenser s spout component 2 and 3 4 Ensure the power button 6 at the bottom of the machine is switched off If the red light inside of the switch is off then the air compressor is off 5 Plug in the power cord 8 to a grounded outlet refer to Additional Safeguards page 3 6 Connect the intake tube 11 to the Cold Pro Nitro 2 by pushing the ...

Page 7: ...and pull the tap handle 1 forward to about a 90 angle 3 The unit now pumps the coffee from the container and after a short period of time cooled and nitrogenated cold brew coffee flows out of the tap You may need to tap 1 2 glasses until you reach the desired foam level 4 To stop dispensing tilt the tap handle 1 upwards to a vertical position Adjustable Settings Temperature The target dispense tem...

Page 8: ...owing down the liquid pump inside the machine Decommissioning Before putting the dispenser out of service for an extended period of time we recommend cleaning the system first After cleaning flush the dispenser with clean water Let the dispenser suck air to empty the internal liquid buffer of about 25 fl oz 750 ml is emptied Disconnect the intake line 11 and unplug the power cord 8 Pull tap handle...

Page 9: ...the intake line 11 after cleaning 4 If used disconnect your coffee container spout system dismantle and clean it as well 5 Add one teaspoon of Cold Pro Cleaner to one liter of water in a container of your choice Let the dispenser pull the solution through its lines as it would with water or coffee until the solution leaves the tap Release tap handle to stop dispensing the solution 6 Allow to sit f...

Page 10: ... these parts depends on the specific system being used Brewista recommends checking these connections about once a month to ensure proper system function Other Maintenance and Repairs In case of failure problems or a suspected fault resulting from a fall immediately remove the plug from the power socket and alert a service provider or specialized technician Never attempt to operate the Cold Pro Ni...

Page 11: ...system causes air leaks that need to be removed Dispensed coffee is not cold enough No electrical power or temperature control is turned off Check the dispenser s electrical connection If the air compressor is working then the problem is not power related For maximum cooling turn the temperature control to the MAX position When I pour two glasses of Nitro Cold Brew coffee the second one is sometim...

Page 12: ...ee Filter adapter 13 in the intake line is clogged Check to see if the filter strainers are clogged and clean per instructions on page 9 of this manual if needed Air compressor is turned off or has no electrical power Check the power switch 6 at the base of the dispenser to ensure it is turned on and if the dispenser has power Coffee is frozen Unplug the Cold Pro Nitro 2 entirely from the power su...

Page 13: ...ons of this manual page 9 Check to see if there is a blockage 2 Test to see if the dispenser pours 3 If not there may be a bigger blockage in the liquid pump You will need to unscrew the spout 4 Remove the BiB Adaptor and place a hose at the far end of the intake tube 5 Turn power button 6 on 6 Pour water into the intake tube 11 at a high pressure Pull the tap still without a nozzle to flush out a...

Page 14: ...r quality or repair attempts by non authorized persons are not covered by the warranty The same applies for failure to comply with the use of consumables e g cleaning and decalcifying agents that do not correspond to the original specifications 3 Routine wear parts e g seals and valves and fragile parts like glass are excluded from the warranty 4 Damages which are not under responsibility of the m...

Page 15: ...he unit in water or any other liquid This may cause electric shock or damage the appliance TECHNICAL DATA For countries with voltage ranging from 110 127V Rated voltage 115 V 60 Hz Rated current 3 2A Rated power input 368W For countries with voltage ranging from 220 240V Rated voltage 220 230 V 50 Hz Rated power input 280W 1 45 1 52 A ...

Page 16: ...1133 W 27th Street Cheyenne WY 82001 USA www mybrewista com Toll Free in North America 888 538 8683 Local 307 222 6086 V2PX H ...

Reviews: