- 10 -
Using the LED Viewfinder
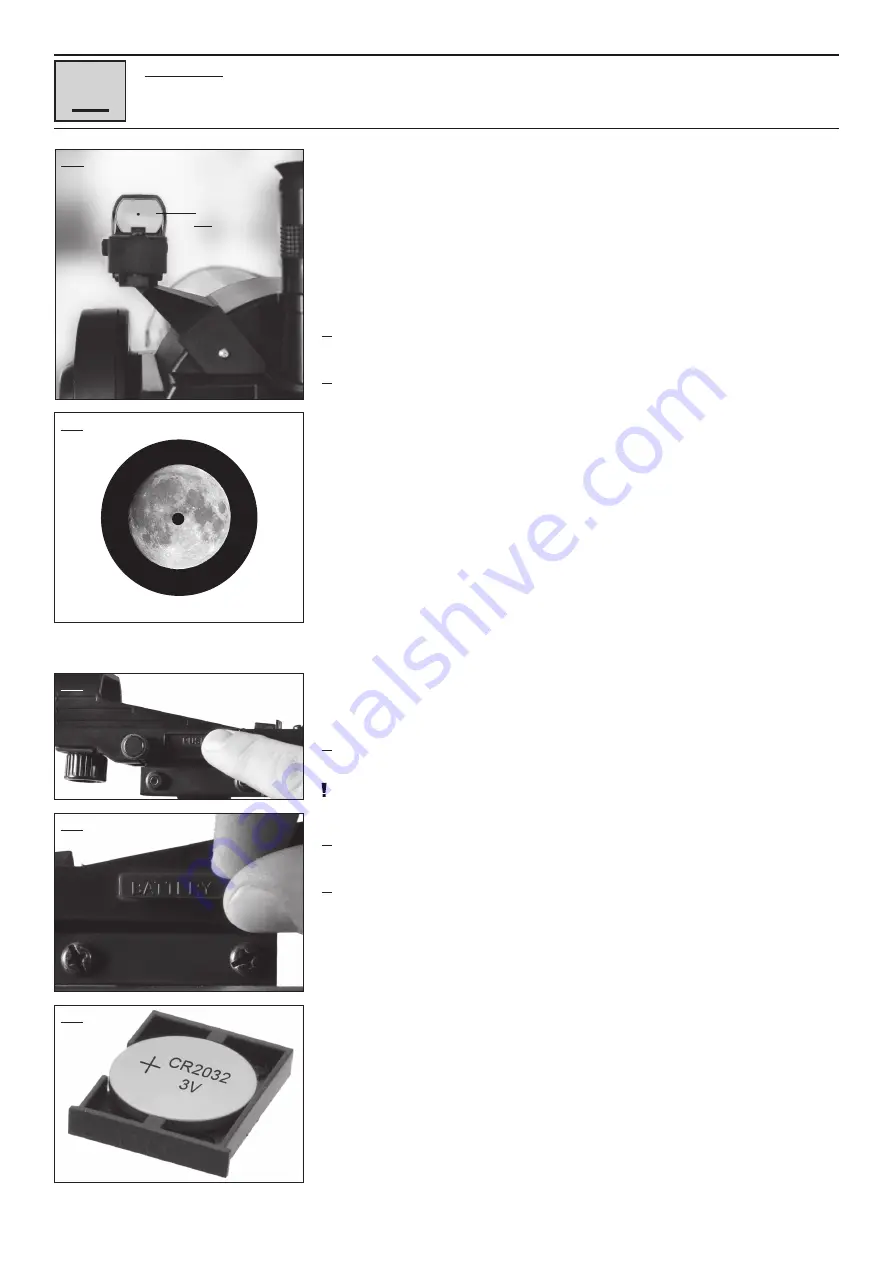
The LED viewfinder projects a red dot onto the mirror surface (1, fig. 24) and thus "before"
the target. This makes it easier to adjust objects.
By turning the large knurled wheel, you can switch the LED viewfinder on or off and also
adjust the brightness of the illuminated dot.
The viewfinder is aligned with the small knurled wheels on the lower and left side. Proceed
as follows to align the unit correctly:
1.
Insert the supplied 26mm eyepiece into the eyepiece holder. Look through the eyepiece
and place a clearly visible object (moon, bright star) in the middle of it.
2. Turn on the LED viewfinder and aim at the same object. Use the two small knurled
wheels to adjust the visible red illuminated dot until it is centered above the object (fig.
24). Eyepiece and illuminated dot are now matched to each other.
Battery change for LED viewfinder
If the red dot on the mirror surface is not visible after switching on, the battery (type
CR2032, 3V) of the viewfinder must be replaced. Proceed as follows:
1. Press the battery drawer labelled PUSH (fig. 37) and pull out the drawer on the other
side (Fig. 38).
NOTE!
Replace the battery only with a completely new, unused battery of the same type!
2. Insert the battery into the battery drawer. Pay attention to the correct installation
position and polarity of the new battery (fig. 39).
3. Push the drawer back into the shaft. The drawer can only be inserted correctly from
one side.
Fig. 24
Use of the
IV
Fig. 37
Fig. 38
Fig. 39
Fig. 23
b
Summary of Contents for MCX Goto Series
Page 30: ...30 Computerised Handset with LED display VII Fig 35...
Page 39: ...39...


