background image

5

EN

SAFETY MEASURES AND OPERATION 

RECOMMENDATIONS 

Read the operation manual carefully before using 

the kitchen machine; after reading, keep it for future 

reference. 

•  Use the unit for its intended purpose only, as it is 

stated in this manual. 

•  Mishandling the kitchen machine can lead to its 

breakage and cause harm to the user or damage to 

his/her property and it is not covered by warranty. 

•  Make sure that the operating voltage of the unit 

indicated on the label corresponds to your home 

mains voltage. 

ATTENTION!

 A continuous operation should not exceed 

5-6 minutes, take a break for at least 10-15 minutes 

after two operation cycles.
•  Do not use the unit outdoors. 

•  It is recommended not to use the unit during lightning 

storms. 

• 

Place and use the kitchen machine only on a dry flat 

and stable surface, away from heat sources, open 

flame and direct sunlight. 

•  Do not use the unit near heating appliances, heat 

sources or open flame.

•  Do not use the kitchen machine in places where 

aerosols are stored, used or sprayed, and in 

proximity to inflammable liquids.

•  Protect the unit from blows, drops, vibrations and 

other mechanical stress. 

•  Do not block the ventilation openings on the unit 

body during the kitchen machine operation; this may 

lead to the electric motor overheating.

•  Never leave the unit connected to the mains 

unattended.

•  Do not immerse the kitchen machine body, the power 

cord or the power plug into water or any other liquids.

•  Do not use the unit in proximity to the kitchen sink, in 

bathrooms, near swimming pools or other containers 

filled with water.

•  If the unit is dropped into water, unplug it 

immediately, and only then you can take the unit out 

of water. Apply to the authorized service center for 

testing or repairing the unit.

•  Do not let the power cord touch hot surfaces and 

sharp edges of furniture.

•  Handle the power cord with care, avoid twisting it and 

periodically straighten the cord. 

•  Do not use the power cord as a carrying handle for 

the kitchen machine. 

•  Do not touch the unit body, the power cord and the 

power plug with wet hands. 

•  Unplug the unit after usage or before cleaning. When 

unplugging the unit, hold the power plug and carefully 

remove it from the mains socket, do not pull the 

power cord, as this can lead to its damage and cause 

a short circuit. 

Summary of Contents for BR1500

Page 1: ...Instruction manual Kitchen machine BR1500 BR1500 brayer ru...

Page 2: ...EN 3 DE 12 RU 22 KZ 32...

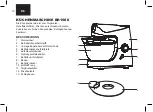
Page 3: ...ng sauces mayonnaise whipped cream etc DESCRIPTION 1 Motor unit 2 Operation mode switch knob 3 Motor unit lock lever 4 Bowl lid installation place 5 Attachments installation shaft 6 Food bowl 7 Bowl i...

Page 4: ...4 EN 12 13 11 Pic 1 Pic 3 Pic 2 Pic 4...

Page 5: ...ammable liquids Protect the unit from blows drops vibrations and other mechanical stress Do not block the ventilation openings on the unit body during the kitchen machine operation this may lead to th...

Page 6: ...ich were used during the operation For child safety reasons do not leave polyethylene bags used as packaging unattended ATTENTION Do not allow children to play with polyethylene bags or packaging film...

Page 7: ...in the mains with 60 Hz frequency it does not need any additional settings Wash the attachments 11 12 13 the lid 9 the bowl 6 with warm water and a neutral detergent rinse and dry Wipe the motor unit...

Page 8: ...ove it fig 2 Remove the bowl 6 by turning it counterclockwise to the OPEN position Remove food from the bowl 6 Wash the used attachment and the bowl 6 with warm water and a neutral detergent rinse and...

Page 9: ...ch of children and disabled persons ATTACHMENTS USAGE AND BASIC COOKING RECIPES Attachment Basic recipe Baking dough Basic recipe tips Composition 700 g wheat flour 420 ml water flour to water ratio 1...

Page 10: ...Maximum power consumption 1300 W Bowl capacity 4 5 liter RECYCLING To prevent possible damage to the environment or harm to the health of people by uncontrolled waste disposal after expiration of the...

Page 11: ...11 EN...

Page 12: ...se Schlagsahne usw bestimmt BESCHREIBUNG 1 Motoreinheit 2 Betriebstufenschaltergriff 3 Verriegelungshebel der Motoreinheit 4 Beh lterdeckel Aufstellplatz 5 Aufsatzaufstellwelle 6 Nahrungsmittelbeh lte...

Page 13: ...13 DE 12 13 11 Add 1 Add 3 Abb 2 Add 4...

Page 14: ...enem Feuer nicht Es ist verboten den K chenmaschine an Orten zu verwenden an denen Aerosole gelagert verwendet oder gespr ht werden sowie in der N he von leichtentz ndbaren Fl ssigkeiten Sch tzen Sie...

Page 15: ...Boden der K chenmaschine gelangen Bevor Sie den Netzstecker an eine Steckdose anschlie en vergewissern Sie sich dass der Betriebstufenschaltergriff auf 0 eingestellt ist Es ist verboten die K chenmasc...

Page 16: ...digungen zu vermeiden transportieren Sie das Ger t nur in der Fabrikverpackung Bewahren Sie das Ger t an einem trockenen k hlen und f r Kinder und behinderte Personen unzug nglichen Ort auf DAS GER T...

Page 17: ...keit des Aufsatzes 13 mit dem Betriebstufenschaltergriff 2 ein NUTZUNG DER K CHENMASCHINE ACHTUNG Vergewissern Sie sich vor dem Aufstellen der Aufs tze dass der Netzstecker an keine Steckdose angeschl...

Page 18: ...osition ein Nehmen Sie den aufgestellten Aufsatz ab indem Sie ihn im Uhrzeigersinn drehen Abb 4 Drehen Sie den Deckel 9 und nehmen Sie ihn ab Abb 2 Entfernen Sie den Beh lter 6 indem Sie ihn entgegen...

Page 19: ...atz Grundrezept Teig zum Backen Grundrezept Tipps Zusammensetzung 700 g Weizenmehl 420 ml Wasser Mehl Wasser Verh ltnis 1 0 6 Stellen und befestigen Sie den Deckel 9 Stellen Sie den Aufsatz 11 auf und...

Page 20: ...stigen Sie den Beh lter 6 Betreiben Sie die K chenmaschine bei hoher Drehgeschwindigkeit des Aufsatzes 13 nach ca 5 6 Minuten werden die Eiwei e geschlagen Um die K chenmaschine kurzzeitig einzuschalt...

Page 21: ...ieses Produkts erhalten Sie bei Ihrer lokalen Stadtverwaltung einem Abfallentsorgungsdienst oder beim Gesch ft wo Sie dieses Produkt gekauft haben Der Hersteller beh lt sich das Recht vor das Design d...

Page 22: ...22 RURU BR1500 1 2 3 4 5 6 7 8 9 10 11 12 13 1 2 3 3 8 10 7 6 4 5...

Page 23: ...23 RU 12 13 11 1 3 2 4...

Page 24: ...24 RU 5 6 10 15...

Page 25: ...25 RU 0...

Page 26: ...26 RU 3 60...

Page 27: ...27 RU 11 12 13 9 6 1 8 11 11 1 2 12 12 12 2 13 13 2 13 2 0 5 6 10 15 1 3 1 9 4 1 9 2 6 7 LOCK 5 11 12 13 3 4 6...

Page 28: ...28 RU 3 1 3 1 2 9 10 2 2 2 0 1 3 1 4 9 2 6 OPEN 6 6 2 0 9 6 1 8 1 1 8...

Page 29: ...29 RU 11 12 13 6 700 420 1 0 6 9 11 6 6 11 30 11 5 6...

Page 30: ...30 RU 9 12 6 6 12 30 12 5 6 4 9 13 6 4 6 13 5 6 2 2 1 1 2 1 3 1 4 3 5 1 220 240 50 1300 4 5...

Page 31: ...31 RU 3...

Page 32: ...32 KZ BR1500 1 2 3 4 5 6 7 8 9 10 11 12 13 KZ 1 2 3 3 8 10 7 6 4 5...

Page 33: ...33 KZ 12 13 11 1 3 2 4...

Page 34: ...34 KZ 5 6 10 15...

Page 35: ...35 KZ 0...

Page 36: ...36 KZ 3...

Page 37: ...37 KZ 13 13 2 13 60 11 12 13 9 6 1 8 11 11 1 2 12 12 12 2 2 0 5 6 10 15 1 3 1 9 4 1 9 2 6 7 LOCK...

Page 38: ...38 KZ 4 9 2 6 OPEN 6 6 2 0 9 6 1 8 1 1 8 5 11 12 13 3 4 6 3 1 3 1 2 9 10 2 2 2 0 1 3 1...

Page 39: ...39 KZ 11 12 13 6 700 420 1 0 6 9 11 6 6 11 30 11 5 6...

Page 40: ...40 KZ 9 12 6 6 12 30 12 5 6 4 9 13 6 4 6 13 5 6 2 2 1 1 2 1 3 1 4 3 5 1 220 240 50 1300 4 5...

Page 41: ...41 KZ 3...

Page 42: ......

Page 43: ...Made in China Hergestellt f r Ruste GmbH Berggasse 18 18 1090 Wien Osterreich Produced for Ruste GmbH Berggasse 18 18 1090 Vienna Austria 18 18 1090 143912 1 7 495 297 50 20 e mail info brayer su...

Page 44: ...brayer ru...

Reviews: