


INSTALLATION INSTRUCTIONS
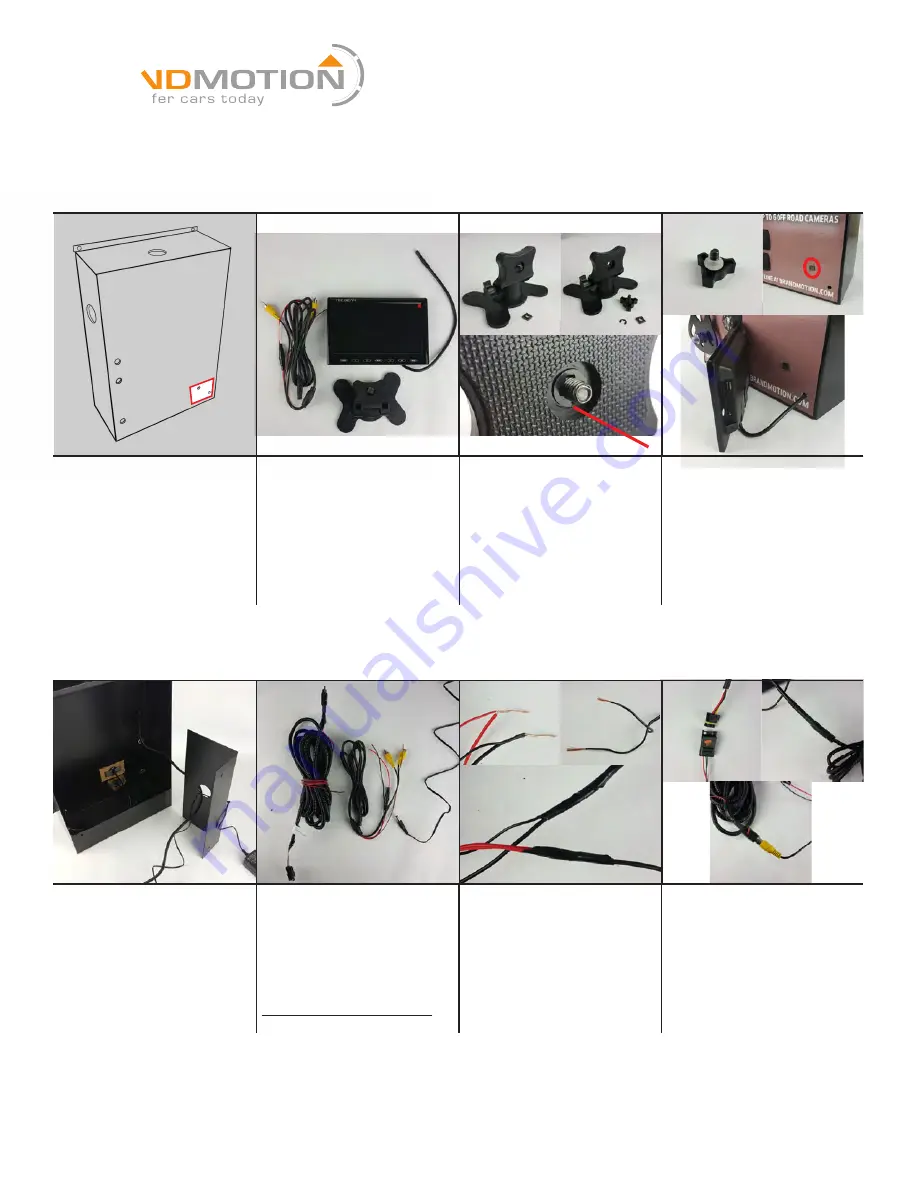
Step 6. Installation of 7” monitor
Step 7. Electrical wiring
7.1- Feed video harness from
backup camera and power
supply cord through top of
metal plate as shown.
7.2- Locate power/video
harness for camera and
monitor. Strip ends of loose
red and black wires for both.
Do not strip brown wire.
7.3- Secure positive and
negative connections
between harnesses. Remove
end of power supply, strip
wires, then secure positive
and negative connections.
(on power supply, gray dashed line is negative)
7.4- Secure waterproof
connection of back up
camera, video input, and
6-pin connector.
Page 4/5
Brandmotion Tech Support: (734)-619-1250
6.1- Locate the mounting and
video harness hole.
6.2- Remove the monitor,
video input/power harness,
and stand from monitor
box.
6.3- Remove metal square,
retaining collar, and bolt
from stand. Use pick to
dislodge retaining collar
from bolt.
6.4-
Slide plastic washer over
bolt, insert through back of
display at location marked, then
loosely attach metal square.
Feed video cable through lower
hole. Slide monitor over metal
square and gently tighten.


