


Page 8
Cleaning and maintenance
•
Turn the unit off.
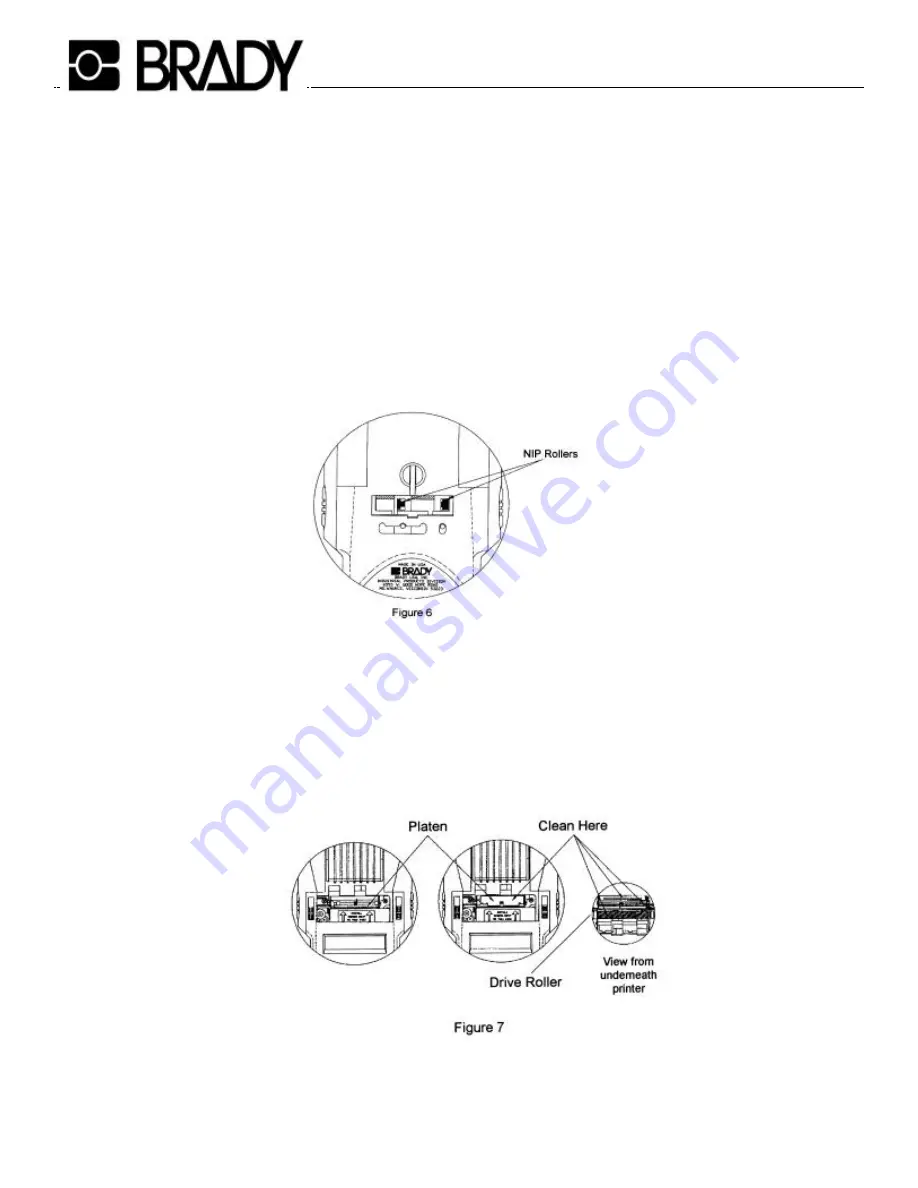
•
Remove the labels and the bottom door. With a cotton swab and isopropyl alcohol clean the drive roller and
the material guide nip roller.
•
Drive roller cleaning - Turn the unit on. From the back of the unit run the cotton swab over the drive roller
press ant Feed button (this will rotate the roller). Move the material guides to access all of the drive rollers.
Continue this until the roller is clean.
•
Material guide cleaning - Insert the cotton swab into the material guide by the white nip roller. Press the Feed
key to rotate the nip
rollers while cleaning them.
•
Printhead mask cleaning - Gently rotate the platen toward the back of the unit. Clean off the outside surface of
the printhead mask with isopropyl alcohol and a cotton swab. Make sure that both slots are thoroughly clean
and free of dirt. Also, remove any black lint that is around
the printer.


