background image

20

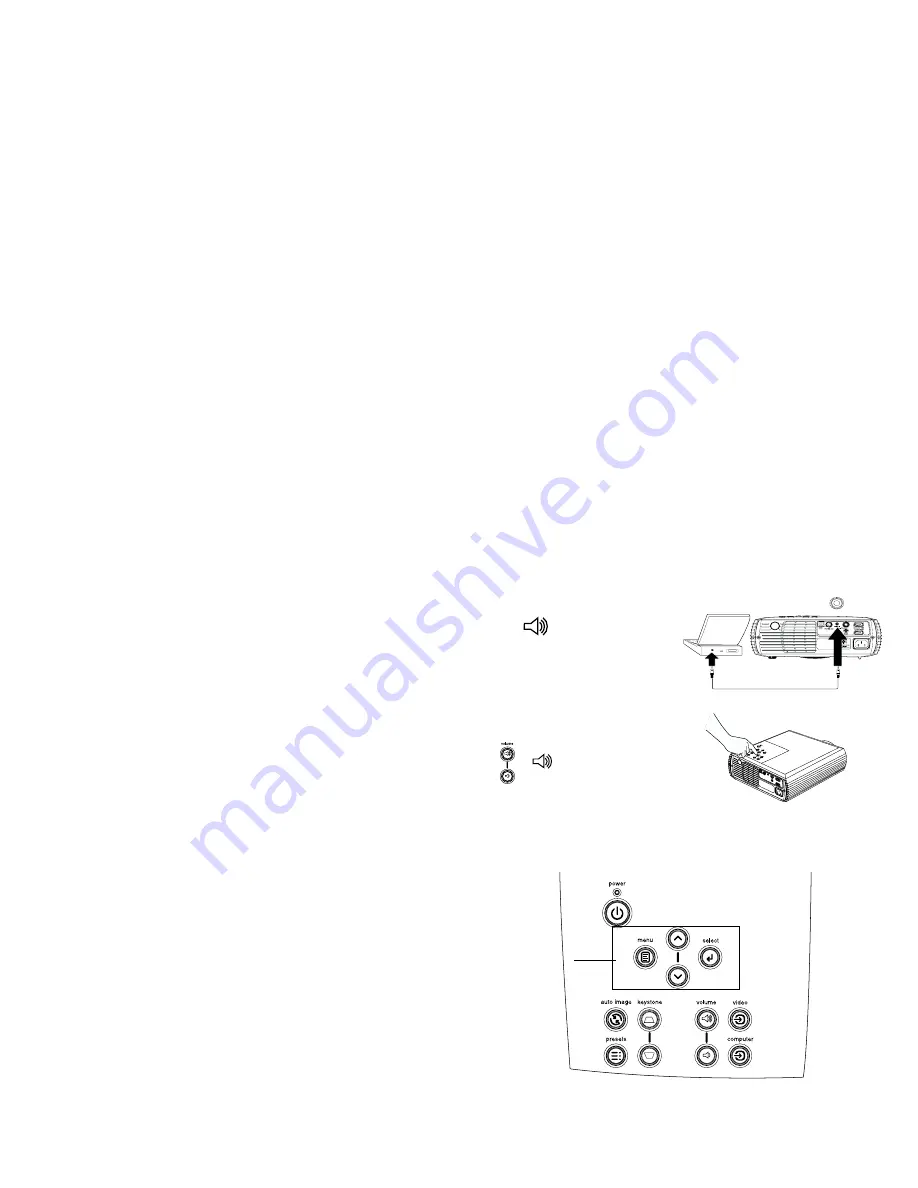
Using the audio 

 " '- C' 9  ( " &

 " '- :

-" .,  " .,  " 9 ('

 , :

, " ' " 

mute

 "  , :

Troubleshooting Audio

( C" #" " 9" #

9  "     :

9  , . E' " 

mute

 "  , F:

9  " .,  ' #": " 

volume 


" 9 (' , :

9  "   . :

&-"  :

'(#. ,9  " '( 9"   ' :

Using the keypad buttons

      "   " 

. . " 

' M" '- E'#  +FE'#  F:

, M' " )  , E'#  F:

  M," , " , E'#  F:

'3M.# - #" ,

E'#  F:

,# M  " '- "  :

'  M( "#"" .  '   #E'#  +F:

9 ( M-;  " ,# E'#  8F:

., M-E'#  6F:

. ,' M"# " .  :

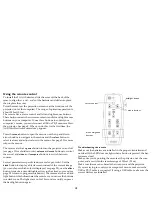
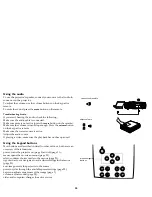
connect audio cable

adjust volume

menu navigation
buttons

Summary of Contents for SP-45m

Page 1: ...User s Guide 45m XP 55m ...

Page 2: ...tion of Conformity 0 1 2 3 43 0 3423 0 0 5 6 5 6 5 4 666 5 4 666 7 1 8 3 3 0 3423 0 5 46 6 666 66 Trademarks 9 9 9 0 3 9 9 9 9 0 FCC Warning 5 0 00 0 0 3 7 Canada 0 0 0 66 0 5 66 0 Safety Certifications 0 A7 5 ...

Page 3: ...2 0 1 2 4 8 2 2 1 6 9 6 B B 0 B 8 6 0 6 0 1 6 0 C Important Operating Considerations 1 9 1 9 Do not place objects in this area behind the projector 2 ft 6m ...

Page 4: ...ble audio video cable audio cable lens cap documentation projector country dependent PS 2 mouse cable PS 2 mouse adapter remote control receiver IR keypad zoom focus speaker foot release remote control receiver IR leveling foot power cord connector dust filters lamp door ...

Page 5: ... Required computer connections 0 0 0 9 C 0 9 9 1 9 2 2 2 2 Optional computer connections C C 3 0 3 D E F 9 connect computer cable connect power cable connect audio cable connect mouse cable connect monitor cable ...

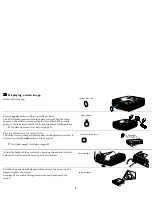
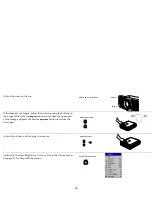
Page 6: ...5 3 3 3 3 Displaying a computer image power 1 1 9 5 G C C computer 9 9 C 9 9 5 H C C 9 5 G auto image 9 remove lens cap press Power Power turn on computer activate laptop s external port ...

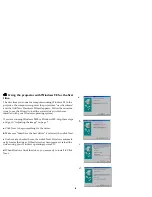
Page 7: ...6 4 4 4 4 Using the projector with Windows 98 for the first time 2 B I J 5 B B E F 666 9 I J 8 a 0 9 5 b 9 I J 9 5 c 9 9 9 5 01 d 0 9 5 a b c d ...

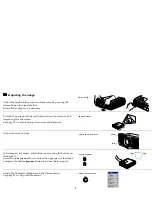
Page 8: ...7 5 5 5 5 Adjusting the image 6 B B 9 9 keystone keystone 0 adjust height adjust distance adjust zoom and focus zoom focus adjust keystone adjust Picture menu ...

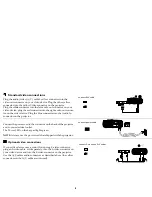
Page 9: ...8 1 1 1 1 Standard video connections 3 E 37F C 7 K 0 9 1 9 2 2 2 2 Optional video connections 37 E 37 F connect A V cable connect power cable connect S video and A V cables ...

Page 10: ...9 3 3 3 3 Displaying a video image power 1 1 9 5 G C C video 9 5 G 6 B remove lens cap press power Power turn on video device adjust height adjust distance ...

Page 11: ...10 B 9 9 keystone keystone 9 0 0 adjust zoom and focus zoom focus adjust keystone adjust volume adjust Picture menu ...

Page 12: ...ans have stopped blinking green The power button has been pressed and the software is initializing or the projec tor is powering down and the fans are running to cool the lamp blinking red A fan or lamp failure has occurred Turn off the projector and wait one minute then turn the projector on again If the projector has been working for 2000 hours or more replace the lamp and reset the lamp timer A...

Page 13: ...p screen plug power cord in remove lens cap press power button correct image only start up screen appears press the computer button activate laptop s external port computer image projected startup screen A startup screen restart laptop A A ...

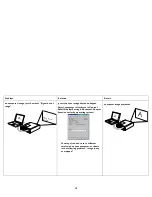
Page 14: ...utton on keypad computer image projected Signal out of range A Adjust computer refresh rate in Control Panel Display Settings Advanced Adapter location varies by operating system You may also need to set a different resolution on your computer as shown in the following problem image fuzzy or cropped A A ...

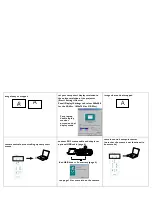
Page 15: ...8 for XP 55m image clear and not cropped remote control not controlling my computer s mouse connect PS 2 mouse cable and adapter or optional USB cable page 4 remote controls computer cursor note that the mouse is not functional in zoom mode A A A For a laptop disable laptop monitor or turn on dual display mode A X load USB drivers if necessary page 6 see page 19 for more info on the remote ...

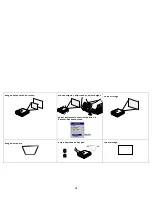
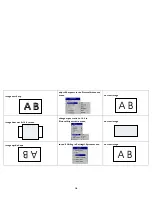
Page 16: ...age not centered on screen move projector adjust zoom adjust height correct image image not square adjust keystone on keypad square image zoom adjust horizontal or vertical position in Picture Advanced menu ...

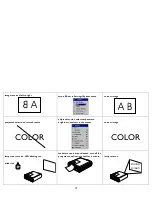
Page 17: ...in the Picture Advanced menu correct image image does not fit 16 9 screen change aspect ratio to 16 9 in Picture Aspect ratio menu correct image image upside down turn off Ceiling in Settings System menu correct image A B A B A B A B A B ...

Page 18: ...d colors don t match source adjust color tint color temperature brightness contrast in the menus correct image lamp won t turn on LED blinking red make sure vents aren t blocked turn off the projector and allow it to cool for a minute lamp turns on A B A B COLOR COLOR blinks red startup screen ...

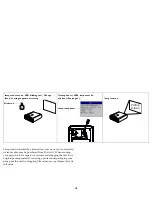
Page 19: ...18 9 9 9 9 lamp won t turn on LED blinking red Change lamp message appears at startup If lamp hours 2000 lamp must be replaced See page 31 lamp turns on blinks red check lamp hours startup screen ...

Page 20: ... M 3 E F 6 E F C 3 5 B menu select power E F volume mute video computer blank 9 E 2FK effect 9 B B E 2 F 9 9 6 9 Troubleshooting the remote 9 1 9 C 6 E F 9 C 9 3 9 cursor control menu navigation buttons mouse buttons backlight button ...

Page 21: ...e audio C 9 9 mute Troubleshooting Audio C 9 9 9 E mute F 9 volume 9 9 9 9 Using the keypad buttons M E F E F M E F M E F 3 M E F M M E F 9 M E 8F M E 6F M connect audio cable adjust volume menu navigation buttons ...

Page 22: ...21 Optimizing computer images C B N O 0 E F N 0 0 E F N E 4F N 9 B E 4F N 9 1 9 9 E F N B 9 E F Presentation features 9 effect D 9 B B E F 9 2 B B 9 9 9 blank 9 E 2F 9 E 2F E 8F ...

Page 23: ...22 Optimizing video images B N O 0 0 E F N 0 0 E F N E 4F N 0 E 4F N 1 9 9 E F Customizing the projector D B 8 N L N L N 9 N effect N C N N 9 N N ...

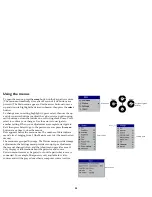
Page 24: ...23 Using the menus menu 9 E 46 F select 9 K menu 1 C E F E F K 0 keypad navigation Main menu buttons dots Picture menu Settings menu About menu ...

Page 25: ...24 Picture menu Keystone 9 D 9 9 Contrast 9 9 Brightness Color 9 NOTE 5 0 Tint 5 0 Aspect Ratio 0 7 9 1 7 171 82 4 5 B 4 171 Picture menu increasing keystone decreasing keystone Aspect ratio ...

Page 26: ...25 Presets B E 9 K 9 7 F D B B L E F D D Room Lighting B C 1 9 9 0 B Presets Save User Settings Room lighting ...

Page 27: ...26 Advanced menu Sharpness E F Color Temperature Phase B Tracking Horizontal Vertical Position Advanced menu Sharpness Color Temperature ...

Page 28: ...ings menu Sources Start up Source 9 Autosource 9 computer video 9 SystemLRear Ceiling Display Messages E I J I JF Power Save 1 9 D power 6 9 Screen Save 9 6 9 Settings menu Sources Start up Source System menu ...

Page 29: ...28 Start up logo 9 9 Blank Screen blank Effect effect 9 select 4 5 E F E 6F B B 9 P effect B B effect B 9 9 Start up logo Blank screen Effect ...

Page 30: ...29 E F D C D D D Language Service Factory Reset Reset Lamp B 1 Service Info C Service Code B About effect Picture in Picture PiP size PiP Position Language Service menu About menu ...

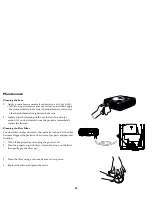
Page 31: ...30 Maintenance Cleaning the Lens N C C Cleaning the Dust Filter 0 ...

Page 32: ...31 Replacing the Projection Lamp 26 I0 J 666 D NOTE 46 E F CAUTION 5 Lamp hours used 60 minutes ...

Page 33: ...32 WARNING 46 WARNING 1 Q WARNING 9 0 1 4 8 2 power 9 L Cleaning the Lamp Housing Screens E F B 6 1 2 3 Service menu ...

Page 34: ...55 x 95 mm Weight 5 7 lbs 2 6 kg unpacked Optics Focus Range 4 9 29 feet 1 5 8 9 m Lamp type 132 watt UHP lamp for SP 45m 150 watt UHP lamp for XP 55m Input Power Requirements 100 240V 2 5 1 A 50 60 Hz Ceiling Mount UL tested listed ceiling mount with minimum capacity of 23 lbs 10 4 kg Standard Accessories ship with the projector Soft Case Shipping Box with packaging Computer Cable 6 ft 1 8 m Audi...

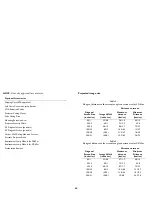
Page 35: ... Presentation Remote Diagonal Screen Size inches m Distance to screen Image Width inches m Maximum distance feet m Minimum Distance feet m 40 1 32 0 8 5 8 1 8 4 8 1 5 50 1 3 40 1 7 3 2 2 6 1 8 60 1 5 48 1 2 8 8 2 7 7 2 2 2 100 2 5 80 2 14 6 4 5 12 3 7 150 3 8 120 3 1 21 9 6 7 18 5 5 200 5 1 160 4 1 29 2 8 9 24 7 3 Diagonal Screen Size inches m Distance to screen Image Width inches m Maximum distan...

Page 36: ...ON AND EXCLUSION E 9 F B B DISCLAIMER OF UNSTATED WARRANTIES 5 D 5 1 7 5 D 5 D 0 0 5 1 50 1 5 5 1 1 5 0 5 D 51 5 0 1 0 1 5 5 51 D 51 0 51 5 5 D 5 51 1 1 7 1 0 D 5 5 5 5 1 D 1 5 5 5 5 5 1 5 D D 0 5 D 5 D D LIMITATION OF LIABILITY 51 1 51 1 C D 5 0 5 0 5 51 5D 5 D 5 5 50 5 0 1 5 5 0 0 1 D 0 51 51 5 0 0 50 0 51 0 50 1 5 0 5 R 5 1 7 5 7 5 0 1 1 0 0 5 1 5 5 5 C D 5 0 5 1 5 5 0 1 0 D D 0 5 5 D 0 0 5 00 ...

Page 37: ......
Reviews: