background image

BV7350T User’s Manual - page


14

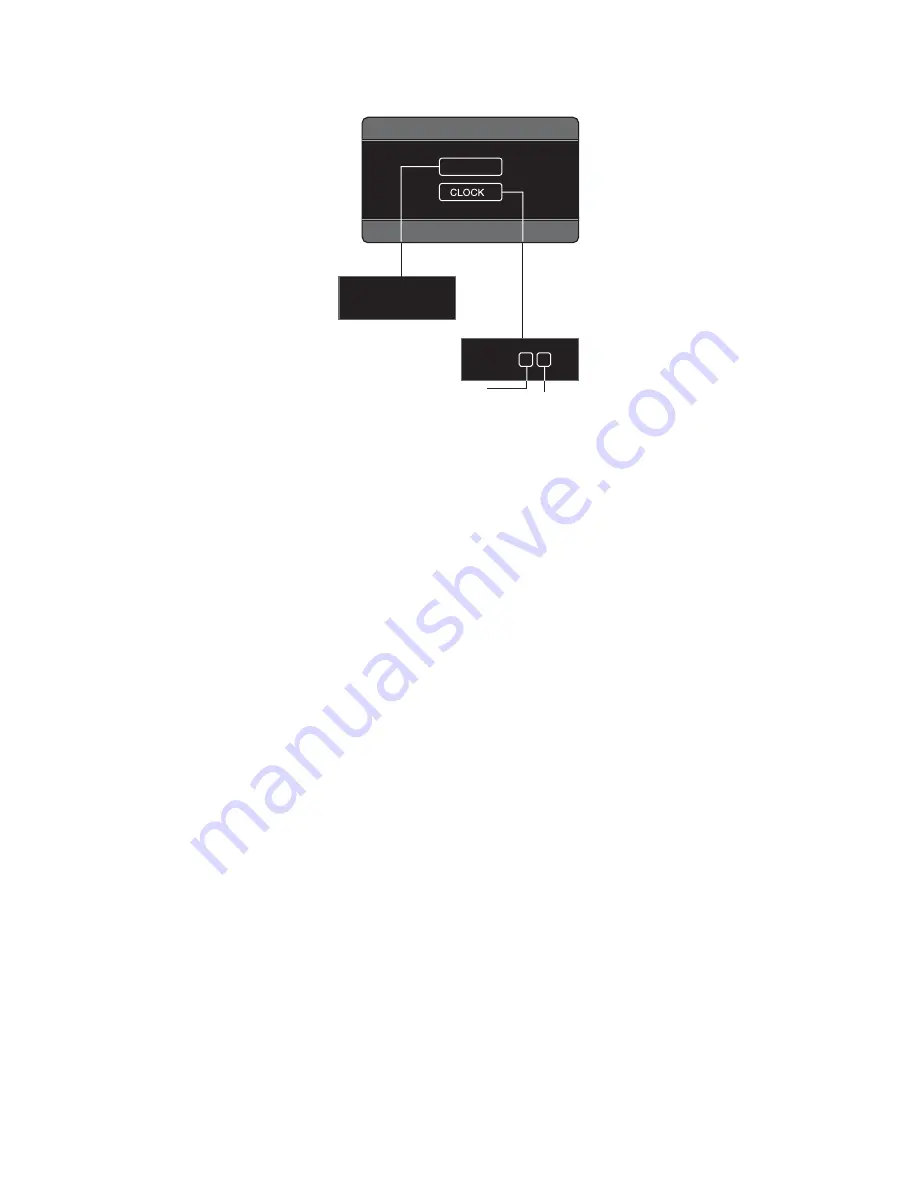
Setup Menu

SYSTEM

TIME

ON

TIME.M

12

AM    11 : 0 0

SETUP MENU

H o u r

M i n u t e

1. Use the arrow buttons to select a menu item you wish to adjust.

2. Press 

VOL+/- 

button to adjust the item selected.

3. Repeat steps 1 and 2 to adjust other items if necessary.

4. Press 

ZOOM

 or 

MODE

 to return to previous menu.

Time:

 ON/OFF 

Turns the clock display on/off.

Time.M:

 12 / 24 

Use this setting to select 12 hour clock mode or 24 hour clock mode.

Clock setting:


Use this menu item to set or make changes to the time displayed on the clock.

Summary of Contents for BV7350T

Page 1: ......

Page 2: ......

Page 3: ...IN Operation 20 TV Operation 21 Setup 21 System Setup 22 Language Setup 23 Audio Setup 23 Digital Setup 23 More About This Player 25 Specification 26 Troubleshooting page CONTENTS USER S MANUAL BV7350T Multi Media Disc Player with 3 2 inch TFT LCD Display Congratulations on your purchase of a Multi Media Disc Player It has been designed engineered and manufactured to bring you the high est level of...

Page 4: ... must be authorized by Macrovision Corporation and is intended for home and other limited viewing uses only unless otherwise authorized by Macrovision Corporation Reverse engineering or disassembly is prohibited Region Management Information This mobile DVD Player is designed and manufactured to respond to the Region Management Information that is recorded on a DVD disc If the Region number descri...

Page 5: ... of unauthorized parts can cause malfunctions Consult with your dealer if installation requires the drilling of holes or other modifications of the vehicle Install the unit where it does not get in the driver s way and cannot injure the passenger if there is a sudden stop like an emergency stop If installation angle exceeds 30 from horizontal the unit may not perform properly Avoid installing the u...

Page 6: ...located around the sleeve with a screwdriver Not all tabs will be able to make contact so examine the opening to determine which tabs will be most effective Bend open the appropriate tabs behind the dashboard to secure the sleeve in place 7 Reconnect the wire harness and the an tenna being careful not to pinch any wires or cables 8 Slide the unit into the sleeve until it locks into place 9 To furt...

Page 7: ...r N Nissan located on both sides of the unit to fasten the unit to the factory radio mounting brackets supplied with your car Fasten the unit to the factory radio mounting brackets Align the screw holes on the bracket with the screw holes on the unit and then tighten the screws 5x5mm on each side Note The outer trim ring sleeve and the metal strap are not used for method B installation Using the D...

Page 8: ...e parking brake is engaged If the parking brake is not engaged the screen will display the message DISABLED WHILE DRIVING This is a safety feature designed to prevent the driver from watching a video while driving The video output of this unit is not affected by this Note In Radio Mode or CD MP3 Mode images will be displayed on the monitor whether or not the parking brake is engaged Connecting the...

Page 9: ...VOL 3 IR Sensor 4 1 5 2 INTRO Intro Scan 6 3 RPT Repeat Mode select 7 6 GO TO 8 5 STOP 9 4 RDM Random Playback Mode select 10 USB Port 11 BAND 12 RELEASE 13 DISP Display 14 Fast Reverse TUNE TRACK Down 15 MUTE turns audio off 16 Fast Forward TUNE TRACK Up 17 ST Stereo Mono select LOC Local Distance select 18 MENU 19 AS PS Automatic Search Program Search 20 A V Input Connector ...

Page 10: ... select 17 MUTE turns audio off 18 ANGLE Camera angle selection for some DVDs 19 VOL 20 MENU 21 Fast Forward 22 Fast Reverse 23 GO TO AS PS Automatic Search Program Search 24 STOP 25 PROG Programmed Play mode LOC Local Distance select 26 RDM Random Playback mode MO ST Stereo Mono select 27 BAND Numeric button 0 Using the Remote Control Preparing The Remote Control Before using the remote control f...

Page 11: ... be activated with either a ballpoint pen or similar pointed object The RESET button is to be activated for the following reasons Initial installation of the unit when all wir ing is completed Some the function buttons do not operate Error symbol appears on the display Turning power on and off Turn on the unit by pressing button or inserting a disc in the DISC SLOT 22 When system is on press and h...

Page 12: ...t to be received well try switching to DISTANT mode by pressing and holding ST LOC or pressing LOC on the remote control Press it again to return to LOCAL mode Selecting Stations Press preset station button 1 6 to select a station which has been stored in the memory Press and hold the or buttons until MANUAL appears on the screen then press or buttons to select a station If both buttons have not b...

Page 13: ... Press VOL button to increase or decrease the parameter you have selected 4 Repeat steps 2 and 3 to adjust other items if necessary 5 Press ZOOM or MODE to return to previous menu 6 Press MENU to finish the procedure AUDIO SYSTEM TIME ON TIME M 12 AM 11 00 PICTURE SETUP MAIN MENU SETUP MENU PICTURE MENU BRIGHT 00 TINT 00 CONTRAST 00 DISP M 4 3 COLOR 00 DEFAULT OFF AUDIO MENU VOLUME 00 FADER R F BAS...

Page 14: ...evel 7 to 7 Balance 15L to 15R This setting adjusts the balance between the left and right speakers Fader 15R 15F This setting adjusts the balance between the front and rear speakers Equalization Flat Classic Jazz Pop Loudness ON OFF Loudness introduces a special low and high frequency emphasis at low listening levels Sub woofer ON OFF This unit is equipped with a subwoofer output If you connect t...

Page 15: ...f the picture Color 0 to 63 Use this setting to adjust the color of the picture Tint 0 to 63 Use this setting to adjust the tint to make colors appear most natural Disp M Display monitor type Select a setting which is appropriate to the monitor you are using Monitor Type 16 9 Select this when the aspect ratio of your monitor is 16 9 widescreen 4 3 Select this when the aspect ratio of your monitor ...

Page 16: ... Press VOL button to adjust the item selected 3 Repeat steps 1 and 2 to adjust other items if necessary 4 Press ZOOM or MODE to return to previous menu Time ON OFF Turns the clock display on off Time M 12 24 Use this setting to select 12 hour clock mode or 24 hour clock mode Clock setting Use this menu item to set or make changes to the time displayed on the clock ...

Page 17: ...ast forward Return to normal mode by releasing this button Pause playback Press button to pause disc playback Press it again to resume playback Stopping playback Press the stop briefly to stop playback Press button to resume playback Press button twice and then press but ton to stop playback and return to the first track on the disc Fast Forward Fast Reverse 1 Fast Forward Press button repeatedly to...

Page 18: ...acks Intro scan Press the INTRO button to play the first several seconds of each track on the cur rent disc Press the button again to stop intro scan and return to normal mode Special Disc Operations Disc menu operations Menu driven playback is possible while playing a disc with menu driven features or when playing a VCD with PBC Playback Control 1 Press the TITLE PBC and a title list or disc menu ...

Page 19: ...ack The follow ing information will be shown This example indicates that you are cur rently viewing the first of three available camera angles Press the ANGLE button to select a different angle Notes Some time may be required for the angle to change Depending on the disc the viewing angle may switch in one of two ways 1 Seamless The angle switches smoothly 2 Non seamless When the angle is switched ...

Page 20: ...laying time of the current title T Remaining time of the current title C Elapsed playing time of the current chapter C Remaining time of the current chapter Audio language or audio channel indication Subtitle language indication View angle indication Mute indication PBC indication only for VCD with PBC Repeat playback indication One track repeat playback One directory repeat playback The whole dis...

Page 21: ...ally The unit gives priority to a disc or SD MMC card If you insert a disc into the disc slot or insert a SD MMC card into the SD MMC in terface while playing from the USB device the unit will play the disc or the SD MMC Press the button to enter PRE STOP mode then press the GOTO button to switch to the USB playback mode Note When reading the USB device please don t unplug it If the player is unab...

Page 22: ...video game digital camera camcorder or other units you wish to use in your mobile audio video system To connect a video device to the auxiliary A V input first connect it with the cable provided Then press the MODE button to turn AV IN mode ON or OFF TV Operation To watch TV press the MODE button to enter the TV mode Setting up TV Channels Press the GO TO button on the remote to enter the automatic...

Page 23: ...ense the type of monitor at tached to the output and select NTSC or PAL as needed If you know the type of monitor you should choose the type in this menu rather than letting AUTO SELECT do it for you This is because there may be an undesirable small delay and some flicker ing of the screen during the AUTO SELECT process SCREEN SAVER Like a computer monitor video screens can burn in if a still image...

Page 24: ... button to select RATING then press the ENTER button The restric tion level parental level input display appears 4 Press the button to select the restriction level 1 to 8 and then press the ENTER button 5 When the setting is complete press the SETUP button to return to normal mode DEFAULT Select DEFAULT and confirm it to restore all the System Settings to those pro grammed at the factory except the...

Page 25: ...system and corresponding Parental Control ratings for the USA The player can be set in a similar way If the player s parental level is set to 8 it will play all discs If the player s parental level is set below 8 only discs with a lower or equal parental level will play For example if the player is set to 5 only discs with parental control ratings of 1 5 will play To play a disc with a higher numb...

Page 26: ...ing guidelines The recommended image size is 640 x 480 pixels If a file is recorded at a higher resolution the player must resample it which will cause delays in displaying the image Only baseline type JPEG images can be displayed on this player Ths is the typical format used in digital cameras and web cameras Progressive typically used for website display or lossless an older format which is rarel...

Page 27: ...10 dB Maximum Output Power 80W X 4CH Current Consumption 15 Ampere max DVD PLAYER Signal to Noise Ratio 50 dB Channel Separation 40 dB Frequency Response 20Hz 20 KHz MONITOR SCREEN Screen 3 2 inch TFT LCD Number of pixels 16 777 216 pixels Resolution 959 X 240 pixels RADIO FM TUNER Frequency range 87 5 107 9 MHz IF 10 7 MHz Stereo Separation 25dB AM TUNER Frequency range 530 1710 KHz IF 450 KHz ...

Page 28: ...lfunction Completely Distorted Picture The disc format is not the same as the TV set used PAL NTSC Select the proper setting in the TV SYSTEM menu see page 21 No Color in Picture The disc format is not the same as the TV set used PAL NTSC Select the proper setting in the TV SYSTEM menu see page 21 Disc Does Not Play Be sure that the disc label faces up Clean the disc Check if the disc is defective...

Page 29: ...Notes ...

Page 30: ...Notes IB 005903 07 01 ...

Page 31: ......

Page 32: ......

Reviews: