background image

2610916457 11/02

Printed in Taiwan

LIMITED WARRANTY OF BOSCH PORTABLE AND BENCHTOP POWER TOOLS

Robert Bosch Tool Corporation (“Seller”) warrants to the original purchaser only, that all BOSCH portable and benchtop power tools will be free from defects in
material or workmanship for a period of one year from date of purchase. SELLER’S SOLE OBLIGATION AND YOUR EXCLUSIVE REMEDY under this Limited
Warranty and, to the extent permitted by law, any warranty or condition implied by law, shall be the repair or replacement of parts, without charge, which are
defective in material or workmanship and which have not been misused, carelessly handled, or misrepaired by persons other than Seller or Authorized Service
Station. To make a claim under this Limited Warranty, you must return the complete portable or benchtop power tool product, transportation prepaid, to any
BOSCH Factory Service Center or Authorized Service Station.  For Authorized BOSCH Power Tool Service Stations, please refer to your phone directory.

THIS LIMITED WARRANTY DOES NOT APPLY TO ACCESSORY ITEMS SUCH AS CIRCULAR SAW BLADES, DRILL BITS, ROUTER BITS, JIGSAW BLADES,
SANDING BELTS, GRINDING WHEELS AND OTHER RELATED ITEMS.

ANY IMPLIED WARRANTIES SHALL BE LIMITED IN DURATION TO ONE YEAR FROM DATE OF PURCHASE. SOME STATES IN THE U.S., SOME CANADIAN PROV-
INCES DO NOT ALLOW LIMITATIONS ON HOW LONG AN IMPLIED WARRANTY LASTS, SO THE ABOVE LIMITATION MAY NOT APPLY TO YOU.

IN NO EVENT SHALL SELLER BE LIABLE FOR ANY INCIDENTAL OR CONSEQUENTIAL DAMAGES (INCLUDING BUT NOT LIMITED TO LIABILITY FOR LOSS OF
PROFITS) ARISING FROM THE SALE OR USE OF THIS PRODUCT. SOME STATES IN THE U.S. AND SOME CANADIAN PROVINCES DO NOT ALLOW THE
EXCLUSION OR LIMITATION OF INCIDENTAL OR CONSEQUENTIAL DAMAGES, SO THE ABOVE LIMITATION OR EXCLUSION MAY NOT APPLY TO YOU.

THIS LIMITED WARRANTY GIVES YOU SPECIFIC LEGAL RIGHTS, AND YOU MAY ALSO HAVE OTHER RIGHTS WHICH VARY FROM STATE TO STATE IN THE
U.S., PROVINCE TO PROVINCE IN CANADA AND FROM COUNTRY TO COUNTRY.

THIS LIMITED WARRANTY APPLIES ONLY TO PORTABLE AND BENCHTOP ELECTRIC TOOLS SOLD WITHIN THE UNITED STATES OF AMERICA, CANADA AND
THE COMMONWEALTH OF PUERTO RICO.  FOR WARRANTY COVERAGE WITHIN OTHER COUNTRIES, CONTACT YOUR LOCAL BOSCH DEALER OR IMPORTER.

GARANTIA LIMITADA PARA HERRAMIENTAS MECANICAS PORTATILES Y PARA TABLERO DE BANCO BOSCH

Robert Bosch Tool Corporation ("el Vendedor") garantiza, únicamente al comprador original, que todas las herramientas mecánicas portátiles y para tablero de
banco BOSCH estarán libres de defectos de material o de fabricación durante un período de un año a partir de la fecha de compra. LA UNICA OBLIGACION DEL
VENDEDOR Y EL RECURSO EXCLUSIVO QUE USTED TIENE bajo esta Garantía Limitada y, hasta donde la ley lo permita, bajo cualquier garantía o condición
implícita por ley, consistirá en la reparación o sustitución sin costo de las piezas que presenten defectos de material o de fabricación y que no hayan sido
utilizadas incorrectamente, manejadas descuidadamente o reparadas incorrectamente por personas que no sean el Vendedor o una Estación de servicio
autorizada. Para efectuar una reclamación bajo esta Garantía Limitada, usted debe devolver el producto, que consiste en la herramienta mecánica portátil o para
tablero de banco completa, con el transporte pagado, a cualquier Centro de servicio de fábrica o Estación de servicio autorizada BOSCH.  Para Estaciones de
servicio autorizadas de herramientas mecánicas BOSCH, por favor, consulte el directorio telefónico.

ESTA GARANTIA LIMITADA NO SE APLICA A ARTICULOS ACCESORIOS TALES COMO HOJAS PARA SIERRAS CIRCULARES, BROCAS PARA TALADROS,
BROCAS PARA FRESADORAS, HOJAS PARA SIERRAS DE VAIVEN, CORREAS PARA LIJAR, RUEDAS DE AMOLAR Y OTROS ARTICULOS RELACIONADOS.

TODAS LAS GARANTIAS IMPLICITAS TENDRAN UNA DURACION LIMITADA A UN AÑO A PARTIR DE LA FECHA DE COMPRA. ALGUNOS ESTADOS DE LOS
EE.UU., ALGUNAS PROVINCIAS CANADIENSES NO PERMITEN LIMITACIONES EN CUANTO A LA DURACION DE UNA GARANTIA IMPLICITA, POR LO QUE ES
POSIBLE QUE LA LIMITACION ANTERIOR NO SEA APLICABLE EN EL CASO DE USTED.

EL VENDEDOR NO SERA RESPONSABLE EN NINGUN CASO DE NINGUN DAÑO INCIDENTAL O EMERGENTE (INCLUYENDO PERO NO LIMITADO A
RESPONSABILIDAD POR PERDIDA DE BENEFICIOS) QUE SE PRODUZCA COMO CONSECUENCIA DE LA VENTA O UTILIZACION DE ESTE PRODUCTO.
ALGUNOS ESTADOS DE LOS EE.UU. Y ALGUNAS PROVINCIAS CANADIENSES NO PERMITEN LA EXCLUSION O LIMITACION DE LOS DAÑOS INCIDENTALES O
EMERGENTES, POR LO QUE ES POSIBLE QUE LA LIMITACION O EXCLUSION ANTERIOR NO SEA APLICABLE EN EL CASO DE USTED.

ESTA GARANTIA LIMITADA LE CONFIERE A USTED DERECHOS LEGALES ESPECIFICOS Y ES POSIBLE QUE USTED TAMBIEN TENGA OTROS DERECHOS QUE
VARIAN DE ESTADO A ESTADO EN LOS EE.UU., DE PROVINCIA A PROVINCIA EN CANADA.

ESTA GARANTIA LIMITADA SE APLICA SOLAMENTE A HERRAMIENTAS ELECTRICAS PORTATILES Y PARA TABLERO DE BANCO VENDIDAS EN LOS
ESTADOS UNIDOS DE AMERICA, CANADA Y EL ESTADO LIBRE ASOCIADO DE PUERTO RICO. PARA COBERTURA DE GARANTIA EN OTROS PAISES,
PONGASE EN CONTACTO CON SU DISTRIBUIDOR O IMPORTADOR LOCAL DE BOSCH.

GARANTIE LIMITÉE DES OUTILS ÉLECTRIQUES PORTATIFS ET D'ÉTABLI BOSCH

Robert Bosch Tool Corporation (le « vendeur ») garantit à l'acheteur initial seulement que tous les outils électriques portatifs et d'établi BOSCH seront exempts
de vices de matériaux ou d'exécution pendant une période d'un an depuis la date d'achat. LA SEULE OBLIGATION DU VENDEUR ET LE SEUL RECOURS DE
L’ACHETEUR sous la présente garantie limitée, et en autant que la loi le permette sous toute garantie ou condition implicite qui en découlerait, sera l’obligation de
remplacer ou réparer gratuitement les pièces défectueuses matériellement ou comme fabrication, pourvu que lesdites défectuosités ne soient pas attribuables à
un usage abusif ou à quelque réparation bricolée par quelqu’un d’autre que le vendeur ou le personnel d’une station-service agréée. Pour présenter une
réclamation en vertu de cette garantie limitée, vous devez renvoyer l'outil électrique portatif ou d'établi complet, port payé, à tout centre de service agréé ou
centre de service usine BOSCH.  Veuillez consulter votre annuaire téléphonique pour les adresses.

LA PRÉSENTE GARANTIE NE S’APPLIQUE PAS AUX ACCESSOIRES TELS QUE LAMES DE SCIES CIRCULAIRES, MÈCHES DE PERCEUSES, FERS DE TOUPIES,
LAMES DE SCIES SAUTEUSES, COURROIES DE PONÇAGE, MEULES ET AUTRES ARTICLES DU GENRE.

TOUTE GARANTIE IMPLICITE SERA LIMITÉE COMME DURÉE  À UN AN À COMPTER DE LA DATE D’ACHAT. CERTAINS ÉTATS AMÉRICAINS, CERTAINES
PROVINCES CANADIENNES N’ADMETTANT PAS LE PRINCIPE DE LA LIMITATION DE LA DURÉE DES GARANTIES IMPLICITES, IL EST POSSIBLE QUE LES
LIMITATIONS CI-DESSUS NE S’APPLIQUENT PAS À VOTRE CAS.

EN AUCUN CAS LE VENDEUR NE SAURAIT ÊTRE TENU POUR RESPONSABLE DES INCIDENTS OU DOMMAGES INDIRECTS (INCLUANT, MAIS NE SE
LIMITANT PAS AUX PERTES DE PROFITS) CONSÉCUTIFS  À LA VENTE OU L’USAGE DE CE PRODUIT. CERTAINS ÉTATS AMÉRICAINS ET CERTAINES
PROVINCES CANADIENNES N’ADMETTANT PAS LE PRINCIPE DE LA LIMITATION NI L’EXCLUSION DES DOMMAGES INDIRECTS ET CONSÉQUENTIELS, IL
EST POSSIBLE QUE LES LIMITATIONS OU EXCLUSIONS CI-DESSUS NE S’APPLIQUENT PAS À VOTRE CAS.

LA PRÉSENTE GARANTIE VOUS ACCORDE DES DROITS BIEN DÉTERMINÉS, Y COMPRIS POSSIBLEMENT CERTAINS DROITS VARIABLES DANS LES
DIFFÉRENTS ÉTATS AMÉRICAINS, PROVINCES CANADIENNES.

CETTE GARANTIE LIMITÉE NE S'APPLIQUE QU'AUX OUTILS ÉLECTRIQUES PORTATIFS ET D'ÉTABLI VENDUS AUX ÉTATS-UNIS D'AMÉRIQUE, AU CANADA
ET AU COMMONWEALTH DE PORTO RICO. POUR COUVERTURE DE GARANTIE DANS LES AUTRES PAYS, CONTACTEZ VOTRE IMPORTATEUR OU
REVENDEUR BOSCH LOCAL.

© Robert Bosch Tool Corporation 1800 W. Central Road Mt. Prospect, IL 60056 -2230

Exportado por: Robert Bosch Tool Corporation Mt. Prospect, IL 60056 -2230, E.U.A.

Importado en México por: Robert Bosch S.A. de C.V., Calle Robert Bosch No. 405, Zona

Industrial, Toluca Edo. de México. C.P. 50070 Tel. (72) 792300

Summary of Contents for 3924-24

Page 1: ...onctionnement sécurité Instrucciones de funcionamiento y seguridad Consumer Information Renseignement des consommateurs Información para el consumidor Toll Free Number Appel gratuit Número de teléfono gratuito 1 877 BOSCH99 1 877 267 2499 http www boschtools com IMPORTANT IMPORTANT IMPORTANTE Read Before Using Lire avant usage Leer antes de usar ...

Page 2: ... non skid footwear are recommended when working outdoors Avoid accidental starting Be sure switch is in the locked or off position before inserting battery pack Carrying tools with your finger on the switch or inserting the battery pack into a tool with the switch on invites accidents Remove adjusting keys or wrenches before turning the tool ON A wrench or a key that is left attached to a rotating...

Page 3: ...oducts they cannot be used with abrasive cutoff wheels for cutting ferrous material such as bars rods studs etc However if cutting materials like aluminum or other non ferrous metals use only saw blades specifically recommended for non ferrous metal cutting Cutting ferrous materials causes excessive sparking and will damage the lower guard and will overload the motor NOTE Robert Bosch Tool Corpora...

Page 4: ...he switch hold the saw arm down and wait for blade to stop before removing work or cutoff piece If blade does not stop within five 5 seconds remove battery pack from tool and follow the instructions in the Troubleshooting section REACHING WITH YOUR HAND UNDER A COASTING BLADE IS DANGEROUS Do not allow familiarity gained from frequent use of your miter saw to become commonplace Always remember that...

Page 5: ...WNER S MANUAL THEY SERVE AS A REMINDER OF ALL SAFETY RULES NEEDED FOR SAFE OPERATION OF THIS MITER SAW Safety READ ALL INSTRUCTIONS Failure to follow the SAFETY RULES identified by BULLET symbol listed BELOW and other safety precautions may result in serious personal injury DESIGNATED DANGER ZONE AVOID POSITIONING HANDS FINGERS OR ARMS IN THE AREA DESIGNATED BY THIS SYMBOL WARNING WARNING ...

Page 6: ...ery pack The charger and battery pack heat during charging Carpeting and other heat insulating surfaces block proper air circulation which may cause overheating of the charger and battery pack If smoke or melting of the case are observed unplug the charger immediately and do not use the battery pack or charger Use of an attachment not recommended or sold by Bosch may result in a risk of fire elect...

Page 7: ...he trigger switch It is useful when making certain cuts in wood where a coasting blade would result in a wide imprecise cut The electric blade brake of your miter saw has been designed for highest degree of reliability but unexpected circumstances such as contamination on the commutator and brushes or failure of motor s components can cause the brake not to activate If this condition occurs turn t...

Page 8: ...le 5 Power Switch The power switch used with the safety switch energizes the unit 6 Lower Blade Guard Lower Guard Lip The lower blade guard helps protect your hands from the spinning blade It retracts as the blade is lowered Lip can be used to raise the lower guard when guard becomes jammed on a workpiece 7 Blade For best performance use only thin kerf 10 blades with 5 8 arbor hole 8 Fence Support...

Page 9: ...from entering the upper guard 26 Lower Guard Actuation Link Allows for smooth movement of the lower guard 27 Upper Blade Guard Covers upper portion of the blade 28 Blade Wrench Used for tightening loosening blade and adjusting bevel stops Blade wrench is stored in the handle housing 29 Bevel Detent Pin Crown Molding Setting Allows you to easily move the head assembly to the bevel angle of 33 9 30 ...

Page 10: ...haussures à semelle antidérapante est recommandé si vous travaillez à l extérieur Évitez la mise en marche accidentelle Assurez vous que l interrupteur est en position de blocage ou d arrêt avant d insérer le bloc pile Il est dangereux de transporter l outil avec le doigt sur l interrupteur ou d insérer le bloc pile dans un outil alors que l interrupteur est en position de marche Enlevez les clés ...

Page 11: ... ou de ranger l outil Ces mesures de sécurité préventives réduisent le risque d une mise en marche accidentelle Les scies à onglet sont destinées principalement à couper le bois ou des produits similaires on ne peut les utiliser avec des meules à tronçonner pour couper des matériaux ferreux tels que barres tiges poteaux etc Cependant pour couper des matériaux tels que l aluminium ou autres métaux ...

Page 12: ...e relâchez l interrupteur tenez le bras de la scie en bas et attendez que la lame s arrête avant de retirer l ouvrage ou la pièce tronçonnée Si la lame ne s arrête pas dans un délai de cinq 5 secondes débranchez le bloc pile de l outil et suivez les consignes apparaissant dans la section Dépannage IL EST DANGEREUX D INSÉRER LA MAIN SOUS UNE LAME EN TRAIN DE S IMMOBILISER Ne laissez pas la familiar...

Page 13: ...TÉ NÉCESSAIRES À UNE UTILISATION SÛRE DE CETTE SCIE À ONGLET CONSERVEZ CES INSTRUCTIONS ZONE DÉSIGNÉE DE DANGER ÉVITER DE PLACER LES MAINS LES DOIGTS OU LES BRAS DANS LA ZONE DÉSIGNÉE PAR CE SYMBOLE Sécurité LISEZ TOUTES LES INSTRUCTIONS L utilisateur qui négligerait de suivre les CONSIGNES DE SÉCURITÉ précédées d un point noir ci dessous et de prendre d autres précautions élémentaires risquerait ...

Page 14: ...male de l air ce qui peut provoquer une surchauffe du chargeur et du bloc piles S il y a dégagement de fumée ou si le boîtier fond débranchez le chargeur immédiatement et n utilisez ni le chargeur ni le bloc piles L utilisation d un accessoire non recommandé ni vendu par Bosch peut causer des risques d incendie de chocs électriques ou de lésions corporelles Chargeur de pile Entretien des piles Lor...

Page 15: ...mais il se peut que le frein ne soit pas actionné sous l effet de circonstances imprévues telles que la contamination sur le commutateur et les balais ou la défaillance des composants du moteur Dans ce cas mettez la scie en marche et à l arrêt quatre ou cinq fois en évitant tout contact entre la scie et le matériau Si l outil fonctionne mais le frein n arrête pas uniformément la lame en environ ci...

Page 16: ...curité met l appareil sous tension 6 Protecteur inférieur de lame rebord de protecteur inférieur Le protecteur inférieur de lame aide à protéger vos mains contre la lame en rotation Il se rétracte au fur et à mesure que la lame est abaissée Le rebord peut être utilisé pour lever le protecteur inférieur lorsque le protecteur se coince sur un ouvrage 7 Lame Pour la meilleure exécution utilisez uniqu...

Page 17: ...protecteur supérieur 26 Raccord d actionnement du protecteur inférieur Permet un mouvement en douceur du protecteur inférieur 27 Protecteur supérieur de lame Couvre la partie supérieure de la lame 28 Clé à lame Sert à serrer desserrer la lame et à régler les butées de biseau La clé à lame est rangée dans le boîtier à poignée 29 Cheville d arrêt de biseau réglage moulures en couronne Vous permet de...

Page 18: ...ando se trabaja a la intemperie Evite el arranque accidental Asegúrese de que el interruptor esté en la posición fijada o de apagado antes de introducir el paquete de baterías Llevar herramientas con el dedo en el interruptor o introducir el paquete de baterías en una herramienta con el interruptor en la posición de encendido invita a que se produzcan accidentes Quite las llaves de ajuste o las ll...

Page 19: ...e la línea de corte prevista Es muy peligroso soportar la pieza de trabajo con las manos cruzadas es decir sujetando el lado izquierdo de la pieza de trabajo con la mano derecha Desconecte el paquete de baterías de la herramienta antes de realizar cualquier ensamblaje ajuste o cambio de accesorios o de almacenar la herramienta Dichas medidas preventivas de seguridad reducen el riesgo de arrancar l...

Page 20: ...r ingletes compuestos La acción de frenado de la sierra hace que el cabezal de la sierra dé sacudidas hacia abajo Este preparado para esta reacción al hacer un corte incompleto o al soltar el interruptor antes de que el cabezal esté en la posición completamente hacia abajo Después de terminar el corte suelte el interruptor sujete el brazo de la sierra hacia abajo y espere a que la hoja se detenga ...

Page 21: ...EGURIDAD NECESARIAS PARA LA UTILIZACION CON SEGURIDAD DE ESTA SIERRA PARA CORTAR INGLETES Seguridad LEA TODAS LAS INSTRUCCIONES El incumplimiento de las NORMAS DE SEGURIDAD identificadas por el símbolo del PUNTO NEGRO que se indican A CONTINUACION y otras precauciones de seguridad puede dar lugar a lesiones personales graves CONSERVE ESTAS INSTRUCCIONES ZONA DESIGNADA DE PELIGRO EVITE SITUAR LAS M...

Page 22: ... desenchufe inmediatamente el cargador y no utilice el paquete de baterías ni el cargador El uso de un accesorio no recomendado ni vendido por Bosch puede constituir un peligro de incendio sacudidas eléctricas o lesiones a las personas Seguridad LEA TODAS LAS INSTRUCCIONES El incumplimiento de las NORMAS DE SEGURIDAD identificadas por el símbolo del PUNTO NEGRO que se indican A CONTINUACION y otra...

Page 23: ...os cortes en madera donde una hoja que aún gire por inercia podría pro ducir un corte ancho e impreciso El freno eléctrico de la hoja de la sierra ha sido diseñado para proporcionar el más alto grado de confiabilidad pero circunstancias inesperadas tales como presencia de contaminación en el conmutador y en las escobillas o avería de los componentes del motor pueden hacer que el freno no se active...

Page 24: ... el suministro de corriente eléctrica a la unidad 6 Protector inferior de la hoja reborde del protector inferior El protector inferior de la hoja ayuda a proteger las manos del operador contra la hoja que gira Se retrae al bajar la hoja El reborde se puede usar para subir el protector inferior cuando éste se atasque en una pieza de trabajo 7 Hoja Para el mejor funcionamiento utilice solamente hoja...

Page 25: ... en el protector superior 26 Eslabón de accionamiento del protector inferior Permite un movimiento suave del protector inferior 27 Protector superior de la hoja Cubre la porción superior de la hoja 28 Llave de tuerca para la hoja Se usa para apretar aflojar la hoja y ajustar los topes de bisel La llave de tuerca para la hoja se almacena en la carcasa del mango 29 Pasador de retén de bisel ajuste p...

Page 26: ...otted Position Draw Light Line on Board Along this Edge Hex L Wrench supplied 6mm Straight Edge of Board 3 4 Thick This Edge Must be Perfectly Straight Blade Wrench supplied Combination Square Must be True Phillips Screwdriver Combination Square Hex L Wrench supplied 3mm Tournevis à empreinte cruciforme Équerre à combinaison Clé hexagonale en L fournie de 6 mm Clé à lame fournie L équerre à combin...

Page 27: ...f Board 3 4 Thick This Edge Must be Perfectly Straight Blade Wrench supplied Combination Square Must be True Phillips Screwdriver Combination Square Hex L Wrench supplied 3mm Destornillador Phillips Escuadra de combinación Llave hexagonal en L de 6 mm suministrada Llave de tuerca para la hoja suministrada La escuadra de combinación debe estar alineada Trace una línea ligera sobre la tabla a lo lar...

Page 28: ...ny packing material 2 Loose parts Quick Action Clamp Used to clamp work pieces 6 mm Hex Wrench Stored in the base 3 mm Hex Wrench Stored in the handle Blade Wrench Stored in the handle Miter Lock Knob Dust Bag 24 V Battery Pack Not included with model 3924B 24 Charger Not included with model 3924B 24 Operating Safety Instructions If any parts are missing do not turn the switch on until the missing...

Page 29: ... de la table illustré Figure 1 Ne serrez pas excessivement Ensamblaje Desempaquetado y comprobación del contenido Antes de mover la sierra Fije el pomo de fijación de inglete en la posición de 45 a la derecha o a la izquierda Fije el mango de fijación de bisel Fije el ensamblaje del cabezal en la posición hacia abajo Nunca lleve la herramienta por el mango del interruptor de encendido La sierra pa...

Page 30: ...the arbor shaft 9 Figure 3 4 NOTE Make sure the rotation arrow on the blade matches the clockwise rotation arrow on the lower guard To avoid injury do not use a blade larger or smaller than 10 diameter and 5 8 arbor 6 Replace the outer washer 5 in the proper orientation and tighten blade bolt 4 finger tight Press the arbor lock and tighten blade bolt 4 securely but do not overtighten 7 Rotate cove...

Page 31: ...orio de inserción nuevo para proporcionar un espacio libre para la hoja Esto debe hacerse realizando cuidadosamente un corte recto a través del accesorio de inserción Ensamblaje Pose et dépose de la lame Débranchez le bloc pile de l outil avant d effectuer tout assemblage ou réglage ou de changer les accessoires ou de ranger l outil Ces mesures de sécurité préventives réduisent le risque d une mis...

Page 32: ...ing the bag Zip the bag before installing on the dust port Be extremely careful of dust disposed materials in fine particle form may be explosive Do not throw sawdust on an open fire Spontaneous combustion may in time result from mixture of oil or water with dust particles When sawing chemically pressure treated lumber paint that may be lead based or any other materials that may contain carcinogen...

Page 33: ... las personas no protegidas hasta que el área de trabajo esté bien limpia Ensamblaje Assemblage du sac à poussière 1 Une fois le bras d onglet verrouillé dans la position du bas poussez le sac à poussière 1 sur le raccord d aspiration 2 pour ramasser le bran de scie Figure 5 2 Placez le sac à poussière 1 de manière à éviter les interférences avec l outil pendant les sciages pour tous les réglages ...

Page 34: ...o check blade squareness to table Place the square on the table and press it against the blade If the blade does not contact the full length of the square Figure 6 follow the alignment procedure 90 Blade Alignment a Move sliding fence to proper position See Sliding Fence on page 54 b Loosen bevel lock handle 5 c Loosen jam nut 6 using blade wrench supplied in the handle and lower 0 stop screw 7 wi...

Page 35: ... hoja hace contacto con toda la longitud de la escuadra Apriete la contratuerca 6 Figura 7 Ajustes Débranchez le bloc pile de l outil avant d effectuer tout assemblage ou réglage ou de changer les accessoires ou de ranger l outil Ces mesures de sécurité préventives réduisent le risque d une mise en marche accidentelle Remarque Enlevez tout excédent d huile sur la lame avant la pose REMARQUE Votre ...

Page 36: ...ade wrench supplied in the handle and lower the 45 bevel stop screw 5 with the 3 mm hex wrench provided b Grasp carrying handle move the head assembly left or right until blade makes contact with the full length of the square c Tighten the bevel lock handle 6 d Adjust 45 bevel stop screw 5 so that the hex screw head hits the 45 stop at the same time the blade makes contact with the full length of ...

Page 37: ... la mesa y la alineación del indicador de bisel de 0 Luego repita la operación para la alineación de la hoja a 45 y haga los ajustes adecuados Ajustes Lame à 45 par rapport à la table 1 Tournez la table 1 à la position 0 et bloquez en place 2 Déplacez le guide à glissière à sa position appropriée Voir Guide à glissière à la page 55 3 Abaissez la tête Bloquez en place 4 Desserrez la poignée de bloc...

Page 38: ...erly so it does not contact the tooth of saw blade The saw blade should contact the full length of the square Figure 10 2 If blade does not contact the square follow the fence alignment procedure Fence Alignment a The head assembly should remain in lowered position b Loosen the three 3 hex cap screws 4 behind fence 5 using the 6 mm hex wrench provided Figure 11 c Adjust fence until blade and the f...

Page 39: ... el tope guía hasta que la hoja y el tope guía hagan contacto completo con la escuadra d Apriete los tornillos de casquete hexagonales Ajustes Lame d équerre par rapport au guide 1 Abaissez la tête et enfoncez la cheville de blocage pour bloquer en position abaissée Assurez vous que la table est au cran d arrêt 0 et serrez le bouton de blocage d onglet Placez une équerre à combinaison 1 contre le ...

Page 40: ...s over the 43 scale mark 40 1 4 Vernier Miter Indicator Miter Scale The 1 4 Vernier mark first line to right of center indicator is over the 41 scale mark 40 1 2 The 1 2 Vernier mark is over the 42 scale mark 40 Exactly The center indicator is directly over the 40 scale mark Utilisation de l échelle graduée Vernier et d onglet Utilisation de l échelle graduée d onglet et de l échelle graduée Verni...

Page 41: ... the 40 scale mark Uso de la escala Vernier y la escala de ingletes Uso de la escala de ingletes y la escala Vernier La escala de ingletes Vernier puede ayudarle a ajustar el inglete en cualquier incremento de 1 4 Escala de ingletes Indicador de inglete Vernier 40 1 4 La marca Vernier de 1 4 la primera línea a la derecha del indicador central está sobre la marca de la escala a 41 40 3 4 La marca V...

Page 42: ...wn molding 3 Loosen bevel lock handle 6 Rotate head assembly until the stop pin 5 rests on top of the crown molding adjustment bolt 8 and the pointer is indicating 33 9 on the bevel scale Tighten the bevel lock handle 6 Figure 13 4 Measure the angle between the blade and the table If it is not 33 9 follow the procedures for the crown molding detent adjustment Crown Molding Detent Adjustment a Loos...

Page 43: ...neada en la escuadra a 33 9 d Apriete el mango de fijación de bisel 6 e Apriete la contratuerca 7 Réglages Réglage de l indicateur de l échelle graduée d onglet Vernier 1 Levez la tête jusqu à sa position entièrement levée 2 Par le biais de la fente 1 pratiquée dans l insert d encoche des serrez la vis à empreinte cruciforme 2 qui tient l indicateur 3 en place Figure 12 3 Positionnez l indicateur ...

Page 44: ...un mouvement inattendu de la scie observez les mesures suivantes Débranchez le bloc pile de l outil Avant de transporter la scie tournez la tête à l onglet 45 bloquez dans le cran d arrêt et bloquez la tête en position abaissée Pour éviter des lésions au dos tenez l outil à proximité de votre corps lorsque vous le soulevez Pliez vos genoux de manière à pouvoir le lever avec les jambes et non avec ...

Page 45: ...te la herramienta usando los mangos de transporte fundidos que se encuentran a los lados de la parte inferior de la base o usando el mango de transporte Nunca lleve la sierra para cortar ingletes por el mango operativo Fíjese en la posición de la sierra Las personas que se encuentren detrás de ella podrían resultar lesionadas por residuos que salgan despedidos Coloque la sierra sobre una superfici...

Page 46: ...efully after mounting to insure that no movement can occur during use If any tipping or walking is noted secure the workbench or stand before operating the compound miter saw Portable Mounting Using Clamps If necessary clamp the compound miter saw to a workbench or table top Place two 2 or more C clamps 3 on the clamping areas and secure Figure 17 Portable Mounting Using 1x4 s In order to avoid an...

Page 47: ...co de trabajo Monte la sierra en el banco de trabajo usando los cuatro agujeros para pernos 7 16 1 o los cuatro agujeros para clavos 2 Compruebe que haya espacio libre a la izquierda y a la derecha de la sierra Figura 16 1 Cada uno de los cuatro agujeros de montaje debe atornillarse firmemente usando tornillos de cabeza plana de 7 16 arandelas de seguridad y tuercas hexagonales no se incluyen 2 Lo...

Page 48: ...rmly on the floor and maintain proper balance Follow the miter arm when mitering left or right Stand slightly to the side of the saw blade Sight through the lower guard if following a pencil line Before making any cut with the power off lower the blade to preview the blade path The lower guard may not automatically open under certain cutting conditions If this occurs Typically this may occur when ...

Page 49: ... protecteur et il continuera à lever automatiquement au fur et à mesure que vous coupez Posición del cuerpo y de las manos Posicione el cuerpo y las manos de modo adecuado para hacer que las operaciones de corte sean más fáciles y seguras Siga las instrucciones siguientes Figura 17 A B C y D Nunca ponga las manos cerca del área de corte Mantenga las manos fuera de la Zona de no tocar con la mano L...

Page 50: ...uts where clamp cannot be used Support with hand outside No Hands Zone Do not try to cut short pieces that cannot be clamped and cause your hand to be in the No Hands Zone Conventional Clamps and other hold down devices can be used to hold the workpiece firmly against the table and the fence Long Workpiece Support Blocks Long pieces need extra support Boards can be used to create auxiliary support...

Page 51: ... scie Soporte de la pieza de trabajo Las piezas de trabajo largas tienen ten dencia a inclinarse a menos que estén su jetas con abrazaderas y soportadas adecuadamente desde debajo Abrazaderas Abrazadera de acción rápida Esta abrazadera fija fácilmente una pieza de trabajo en cualquiera de los ocho 8 agujeros para abrazadera alrededor de la sierra Figura 19 Introduzca el poste de la abrazadera en e...

Page 52: ...ke a full depth cut to create the blade slot 5 Check for interference between the auxiliary fence and the lower blade guard Make adjustments as necessary Check for interference from any components Switch Activation To reduce the likelihood of accidental start up the switch is equipped with a safety button 6 that must be depressed before the trigger 7 can be activated The safety button is designed ...

Page 53: ...ée à onglet afin de prévenir l utilisation non autorisée Operaciones básicas de la sierra Tope guía auxiliar Ciertos tipos de moldura necesitan una extensión de la cara del tope guía debido al tamaño y la posición de la pieza de trabajo El tope guía cuenta con agujeros para sujetar un tope guía auxiliar El tope guía auxiliar se usa con la sierra en la posición de bisel de 0 solamente 1 Coloque un ...

Page 54: ...ng base fence when making severe bevel severe miter or compound cuts to provide sufficient minimum 6 spacing from hand to saw blade Sliding Base 1 Remove hex wrench from storage position on left rear leg 2 Loosen two 2 socket cap screws 5 in sliding base channel with the 6 mm hex wrench provided Figure 25 3 Extend sliding base fence 6 to the desired position 4 Tighten screws Store hex wrench Slidi...

Page 55: ... doit toujours être maintenue solidement en position entièrement rentrée Operaciones básicas de la sierra Sobrecontrol del retén Para acoplarlo 1 Suba el gatillo del retén de inglete 1 Figura 24 2 Empuje el clip de sobrecontrol del retén 2 hacia adelante y acó plelo en su sitio sobre el borde Suelte el gatillo del retén de inglete 1 3 Mueva el brazo de inglete 3 hasta cualquier posición en la esca...

Page 56: ... 4 angles use the vernier scale along with the detent override see Vernier Scale for details Follow these instructions for making your miter cut 1 Loosen miter lock knob 1 Lift miter detent trigger and move the saw to the desired angle using either the detents 2 or the miter scale 3 Tighten miter lock knob Figure 27 2 Properly position workpiece 4 Make sure workpiece is clamped 5 firmly against th...

Page 57: ...lètement avant de remettre la tête à la position levée et ou de retirer l ouvrage Opérations de la scie Corte a inglete Un corte a inglete se hace a un bisel de 0 y cualquier ángulo de inglete en el intervalo de 48 a la izquierda a 48 a la derecha La escala de ingletes está fundida sobre la mesa para poder leerla fácilmente Se han provisto retenes positivos para un ingleteado rápido y preciso a 0 ...

Page 58: ...ee Sliding Base Fence Extension page 54 Follow these instructions for making your bevel cut 1 Move the sliding fence to proper position 1 See Sliding Fence on page 54 2 Loosen the bevel lock handle Tilt the head assembly to desired bevel angle 2 Tighten the bevel lock handle Figure 28 3 Properly position workpiece 3 Make sure work piece is clamped 4 firmly against the table and the fence 5 Use cla...

Page 59: ... position levée et ou de retirer l ouvrage Corte en bisel Un corte en bisel se hace a un inglete de 0 y cualquier ángulo de bisel en el intervalo de 2 a 47 Hay muchos topes de bisel ajustados en fábrica a 0 y 45 Vea la sección Ajuste si es necesario realizar ajustes La escala de biseles fundida está orientada hacia el operador para poder leerla fácilmente Hay un tope positivo para moldura de techo...

Page 60: ... desired miter and bevel angles 3 Figure 29 See Miter Cut and Bevel Cut on pages 56 and 58 3 Properly position workpiece 4 Make sure workpiece is clamped 5 firmly against the table and the fence 4 Make sure all controls are locked before cutting Use clamping position that does not interfere with operation Before switching on lower head assembly to make sure clamp clears guard and head assembly 4 A...

Page 61: ...levée et ou de retirer l ouvrage Opérations de la scie Cortes compuestos Un corte compuesto es un corte que requiere tanto una posición de inglete como una de bisel Como puede que se necesiten varios intentos para lograr el ángulo compuesto deseado realice cortes de prueba en material de desecho antes de hacer el corte Siga estas instrucciones para hacer un corte compuesto 1 Mueva el tope guía des...

Page 62: ...ding position Left Side Right Side Left Side Right Side Inside Miter Angle Left at 45 Right at 45 0 0 corner of wall Molding Bottom Bottom Top against Bottom position against table against table fence against fence Finished Keep left Keep right Keep left Keep left side side of cut side of cut side of cut side of cut Outside Miter Angle Right at 45 Left at 45 0 0 corner of wall Molding Bottom Botto...

Page 63: ...ition de moulure Côté gauche Côté droit Côté gauche Côté droit Coin intérieur Angle d onglet Gauche à 45 Droit à 45 0 0 du mur Position de Fond contre Fond contre Dessus contre Fond contre moulure la table la table le guide le guide Côté Gardez le côté Gardez le côté Gardez le côté Gardez le côté fini gauche de la coupe droit de la coupe gauche de la coupe gauche de la coupe Coin extérieur Angle d...

Page 64: ... guía contra el tope guía Lado Conservar el lado Conservar el lado Conservar el lado Conservar el lado acabado izquierdo del corte derecho del corte izquierdo del corte derecho del corte Esquina exterior Angulo de inglete Derecha a 45 Izquierda a 45 0 0 de la pared Posición de Parte inferior Parte inferior Parte inferior Parte superior la moldura contra la mesa contra la mesa contra el tope guía c...

Page 65: ... et un cran d arrêt de biseau de 33 9 pour couper les moulures en couronne à plat sur la table Ces angles de crans d arrêt spéciaux ont été incorporés dans votre scie à onglet composée pour les moulures en couronne standard utilisées aux États Unis avec les angles suivants 52 entre l arrière de la moulure et la surface plate supérieure qui repose contre le mur 38 entre l arrière de la moulure et l...

Page 66: ...n place using the workpiece clamp Use clamping position that does not interfere with operation Before switching on lower head assembly to make sure clamp clears guard and head assembly 4 Activate the switch Lower the head assembly and make your cut 5 Wait until blade comes to a complete stop before returning head assembly to the raised position and or removing workpiece 6 ALWAYS TAKE A TEST CUT US...

Page 67: ...s immobilise complètement avant de remettre la tête à la position levée et ou de retirer l ouvrage 6 PROCÉDEZ TOUJOURS À UNE COUPE D ESSAI À L AIDE DE MATÉRIAUX DE REBUT POUR CONFIRMER LES ANGLES CORRECTS COUPES DE MOULURES EN COURONNE MOULURE À PLAT SUR LA TABLE MOULURE EN COURONNE STANDARD U S PLAFOND M U R COIN EXTÉRIEUR COIN INTÉRIEUR MOULURE À PLAT SUR LA TABLE G U I D E DIMENSION MAX 4 1 4 p...

Page 68: ...olocar el ensamblaje del cabezal en la posición subida y o retirar la pieza de trabajo 6 HAGA SIEMPRE UN CORTE DE PRUEBA USANDO MADERA DE DESECHO PARA CONFIRMAR QUE LOS ANGULOS SON CORRECTOS CORTES DE MOLDURA DE TECHO MOLDURA HORIZONTAL SOBRE LA MESA MOLDURA DE TECHO ESTANDAR EN LOS EE UU TECHO P A R E D ESQUINA EXTERIOR ESQUINA INTERIOR MOLDURA HORIZONTAL SOBRE LA MESA T O P E G U I A TAMAÑO MAXI...

Page 69: ...tions NOTE Crown Molding Support accessory BB1203 assists in holding crown molding in place during the cutting operation Refer to the accessory instruction sheet for details See page 76 for a complete accessory list 2 Set the miter angle using the chart below Tighten the miter lock knob Figure 31 3 Activate the switch Lower the head assembly and make your cut Saw Operations 4 Wait until blade come...

Page 70: ...s Serrez le bouton de blocage d onglet Figure 31 Opérations de la scie Tableau 2 Moulure en couronne à angle par rapport à la table et au guide BAS DE LA MOULURE COUPES DE MOULURES EN COURONNE À ANGLE PAR RAPPORT À LA TABLE ET AU GUIDE MOULURE EN COURONNE STANDARD U S PLAFOND M U R COIN INTÉRIEUR COIN EXTÉRIEUR G U I D E TABLE DIMENSION MAX 4 1 4 po SUPPORT DE MOULURE EN COURONNE COIN INTÉRIEUR CO...

Page 71: ...e Figura 31 3 Active el interruptor Baje el ensamblaje del cabezal y haga el corte Operaciones de la sierra Cuadro 2 Moldura de techo en ángulo respecto a la mesa y al tope guía PARTE INFERIOR DE LA MOLDURA CORTES DE MOLDURA DE TECHO EN ANGULO RESPECTO A LA MESA Y AL TOPE GUIA MOLDURA DE TECHO ESTANDAR EN LOS EE UU TECHO P A R E D ESQUINA INTERIOR ESQUINA EXTERIOR T O P E G U I A MESA TAMAÑO MAXIM...

Page 72: ...while cutting Figure 32 Cutting Round or Irregularly Shaped Material For round material 5 such as dowel rods or tubing always use a clamp 6 or a fixture designed to clamp the workpiece firmly against the fence 7 and table Rods have a tendency to roll while being cut causing the blade to bite and pull the work with your hand into the blade Figure 33 Cutting thin wide Material If workpiece 10 is thi...

Page 73: ...e la scie Operaciones de la sierra Cortes especiales Los cortes de material arqueado y de material redondo son solamente ejemplos de cortes especiales Corte de material arqueado Si la pieza de trabajo 1 está arqueada o combada fíjela con abrazadera 2 con la cara exterior arqueada orientada hacia el tope guía 3 Asegúrese siempre de que no haya espacio libre entre la pieza de trabajo el tope guía y ...

Page 74: ... only about 80 of its maximum capacity with its first few charge cycles However after the first few charge cycles the battery will charge to full capacity 2 The charger was designed to fast charge the battery only when the battery temperature is between 40 F 4 C and 105 F 41 C 3 A substantial drop in operating time per charge may mean that the battery pack is nearing the end of its life and should...

Page 75: ...st destiné qu à la charge rapide des bloc piles dont la température se situe entre 4 C 40 F et 41 C 105 F 3 Une diminution marquée de la réserve énergétique entre les charges peut signaler l épuisement du bloc piles et le besoin d un remplacement 4 Si vous prévoyez de longues périodes à savoir un mois ou plus de non utilisation de votre outil il est préférable d utiliser votre outil jusqu à ce que...

Page 76: ...sière pour aider à maintenir la surface de travail propre Serre joint à action rapide BB1206 Permet un cramponnage rapide de l ouvrage Coude de poussière BB1209 Se fixe au raccord d aspiration et permet de contrôler la direction du bran de scie de même que de fixer un flexible de dépression de 2 1 2 po Sac de manutention BB1210 Sac étanche pour transporter et protéger votre outil Chargeur d une he...

Page 77: ... BB1209 Se acopla a la boquilla para polvo y permite el control direccional del serrín y además le permite acoplar una manguera de aspiradora de taller de 2 1 2 pulgadas Bolsa de transporte BB1210 Bolsa resistente al agua para transportar y proteger la herramienta Cargador de 1 hora BC004 Carga de 9 6 a 24 V Cargador automotriz de 1 hora BC006 Carga de 9 6 a 24 V Cargador de 15 minutos BC016 Carga...

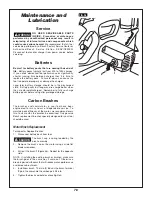
Page 78: ...rged Remember to fully re charge battery packs before using after prolonged storage Carbon Brushes The brushes and commutator in your tool have been engineered for many hours of dependable service To maintain peak efficiency of the motor we recommend every two to six months the brushes be examined Only genuine Bosch replacement brushes specially designed for your tool should be used Motor Brush Re...

Page 79: ...balais de moteur Mantenimiento y lubricación Servicio NO HAY PIEZAS EN EL INTERIOR QUE PUEDAN SER AJUSTADAS O REPARA DAS POR EL USUARIO El mantenimiento preventivo realizado por personal no autorizado pude dar lugar a la colocación incorrecta de cables y componentes internos que podría constituir un peligro serio Recomendamos que todo el servicio de las herramientas sea realizado en un Centro de s...

Page 80: ...il est à l aide d air sec comprimé Portez toujours des lunettes de sécurité en nettoyant les outils à l air comprimé Gardez les prises d air et les interrupteurs propres et libres de débris N essayez pas de les nettoyer en introduisant des objets pointus dans leurs ouvertures Vérifiez régulièrement pour vous assurer que le protecteur inférieur fonctionne adéquatement Nettoyez le protecteur inférie...

Page 81: ...dado de las hojas Las hojas se desafilan incluso al cortar madera normal Si usted tiene que forzar la sierra hacia adelante para que corte en vez de simplemente guiarla a través del corte lo más probable es que la hoja esté desafilada o cubierta de resina de madera Cuando limpie la hoja para quitarle la goma y la resina de madera desconecte el paquete de baterías de la herramienta y quite la hoja ...

Page 82: ...the Adjustments section PROBLÈME LE FREIN N ARRETE PAS LA LAME DANS UN DÉLAI DE 5 SECONDES CAUSE 1 Les balais ne sont pas calés ou ils adhèrent légèrement 2 Le moteur a surchauffé en raison de l utilisation d un accessoire non recommandé ou de la mise en marche et à l arrêt rapide 3 Boulon de lame desserré 4 Autre ACTION CORRECTRICE 1 Inspectez nettoyez ou remplacez les balais voir Section de main...

Page 83: ...AUSA 1 Compruebe si el paquete de baterías está completamente acoplado 2 Compruebe si el paquete de baterías está completamente cargado 3 Escobillas desgastadas 4 Otra MEDIDA DE CORRECCION 1 Reasiente el paquete de baterías 2 Cargue el paquete de baterías 3 Vea Cambio de las escobillas en la sección Mantenimiento y lubricación 4 Servicio autorizado PROBLEMA SE PRODUCE UN DESTELLO DE LUZ PROVENIENT...

Page 84: ...ECTRICE 1 Voir Réglage des pivots de biseau dans la section Réglages PROBLÈME LA TETE NE LEVE PAS COMPLETEMENT OU LE PROTECTEUR DE LAME NE SE FERME PAS COMPLETEMENT CAUSE 1 Défaillance de pièces 2 Le ressort de pivot ou le ressort de protecteur n a pas été remis en place adéquatement après l entretien 3 Accumulation de bran de scie ACTION CORRECTRICE 1 Service agréé 2 Service agréé 3 Nettoyez la t...

Page 85: ... del servicio de ajustes y reparaciones 3 Acumulación de serrín MEDIDA DE CORRECCION 1 Servicio autorizado 2 Servicio autorizado 3 Limpie el ensamblaje del cabezal PROBLEMA LA HOJA SE ENGANCHA SE ATASCA QUEMA LA MADERA CORTES BASTOS CAUSA 1 Funcionamiento inadecuado 2 Hoja desafilada 3 Hoja inadecuada 4 Hoja doblada MEDIDA DE CORRECCION 1 Vea la sección Operaciones básicas de la sierra 2 Cambie o ...

Page 86: ...86 Notes Remarques ...

Page 87: ...87 Notas ...

Page 88: ...ECHA DE COMPRA ALGUNOS ESTADOS DE LOS EE UU ALGUNAS PROVINCIAS CANADIENSES NO PERMITEN LIMITACIONES EN CUANTO A LA DURACION DE UNA GARANTIA IMPLICITA POR LO QUE ES POSIBLE QUE LA LIMITACION ANTERIOR NO SEA APLICABLE EN EL CASO DE USTED EL VENDEDOR NO SERA RESPONSABLE EN NINGUN CASO DE NINGUN DAÑO INCIDENTAL O EMERGENTE INCLUYENDO PERO NO LIMITADO A RESPONSABILIDAD POR PERDIDA DE BENEFICIOS QUE SE ...

Reviews: