8
16
17
15
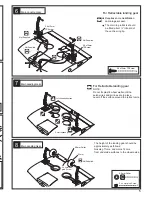
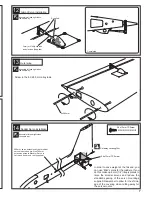
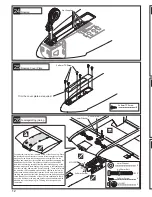
Rudder installation
Assemble left and right sides
the same way
Assemble left and right sides
the same way.
Rudder installation
9
19
18
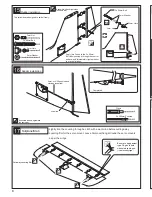
Elevator Servo installation
Assemble left and right sides
the same way.
Right sides
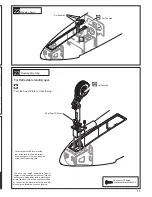
Final Assembly
The tailskids are designed to swivel freely.
2
2 x 200mm Pushrod
2
Clevis
2
2
4
2
3 x 50mm Bolt
3mm Nut
3mm Washer
3mm Horn
3mm
3mm Nut
3mm Washer
3mm Horn
3 x 50mm Bolt
3mm
14mm
54mm
Completed
Apply thin Cyano to the 3 x 50mm.
Bolt after pushing it through the control
surface, and immediately tighten the nut
to prevent rotation.
3mm. or 4/40 pushrod and
clevises (supplied).
supplied
Completed
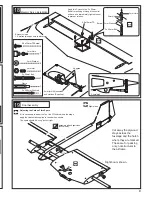
4
2.6 x12mm TP Screw
1
1
2
1
3 x 50mm Bolt
3mm Nut
3mm Washer
3mm Horn
3mm
3mm Nut
3mm Washer
3mm Horn
3 x 50mm Bolt
2.6 x12mm TP
Screw
3mm
Apply thin Cyano to the 3 x 50mm.
Bolt after pushing it through the control
surface, and immediately tighten the nut
to prevent rotation.
Supplied
3mm.(or 4/40)pushrods
and clevises (Supplied)
1
2 x 200mm Pushrod
1
Clevis
Tailplane/Stab
Be sure to apply instant
type CA glue to both
sides of each hinges.
(low viscosity type)
Cut away covering film.
Extension lead
1.5 metres (along booms to elevators)
Right boom shown.
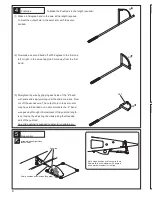
Adjusting the Carbon Fibre Spars.
If it is necessary to adjust the fit of the C/F spars within the wings,
apply the Heatshrink supplied to the spars as shown.
The spars should be “snug”,but not tight.
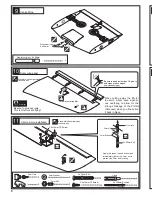
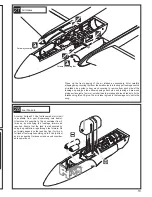
Cut away the plywood
stays across the
fuselage and the hatch
where they are marked.
These are for packing
only, not structural to
the airframe.
Lightly iron the covering through a cloth with a warm iron before cutting away
covering film for the servo mount. Leave 3mm overhang all round the servo mounts
as per the wings.


