8
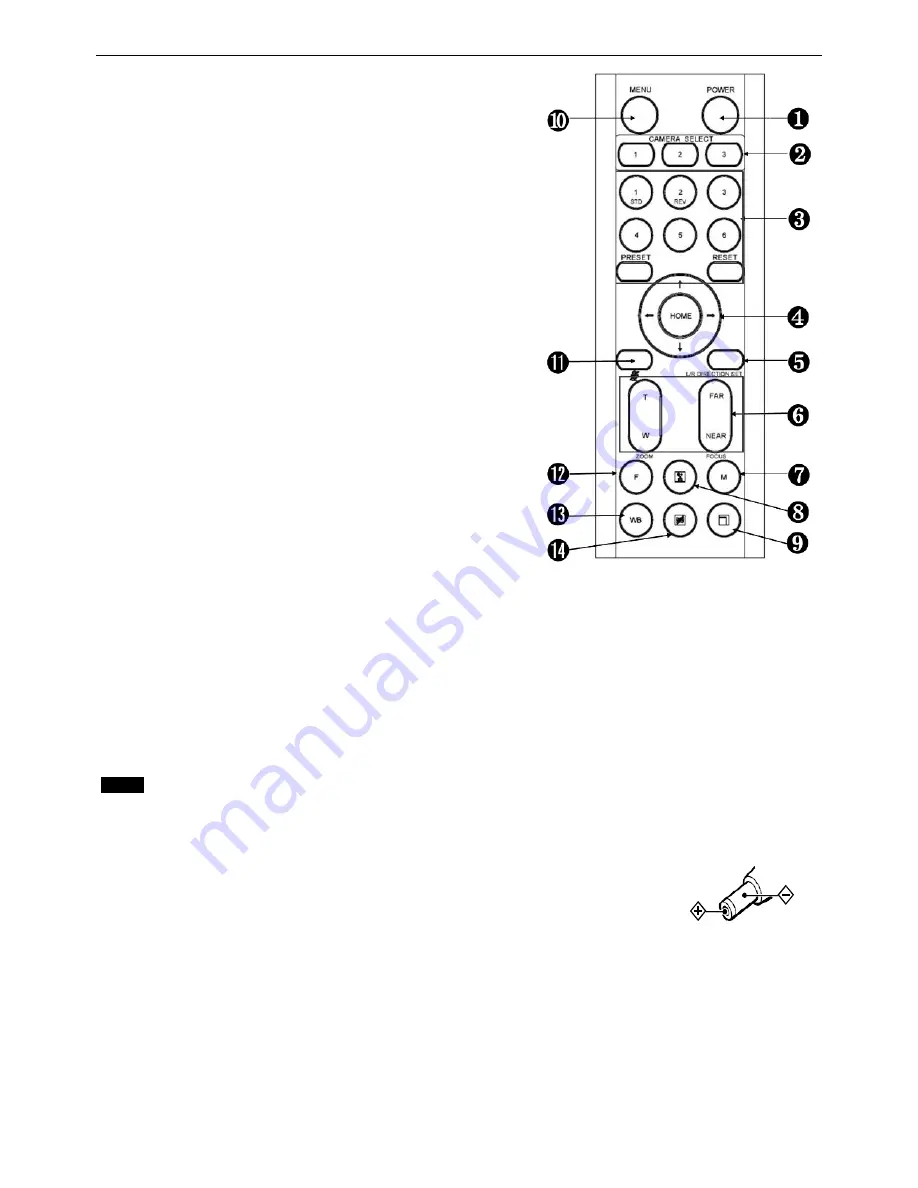
Remote Controller
1.
Power
Power ON the camera to turn the camera in
operation status.
Power OFF the camera to turn the camera in standby
status.
When the camera is powered OFF, the camera turns to
the back and would be on standby mode.
When the camera is powered ON, the camera turns to
the front.
Powering the camera ON/OFF would not restart the
camera.
2. Camera ID (Total 3) Selector
3. Preset Position (Total 6) Calling and Setting
4. PAN-TILT
Pan and Tilt direction control
HOME: Home position, Resolution reset
5. L/R Direction Set
Left and right orientation setting
6. ZOOM/FOCUS
Far
Near
7. Auto/Manual Focus
8. Back Light
9. Video Format Switching
You can change the video format by keep
pressing the button
– A list of available
resolutions will appear. Use the arrow keys to
navigate, and press the Home b
utton to make a selection. The OSD will show “CHANGING…”.
Press the Menu button to exit this menu.
10. MENU
On screen menu display ON/OFF
11. Audio Switch
You can turn the Mic built in the camera Off/ON by pressing the button once.
12. Fast/Slow Zoom Switching
13. White Balance
Change the White Balance setting by pressing the button.
14. De-Flicker
When you find the video flicking, press the button once to eliminate the flickers.
Notes
3V CR2032 Coin lithium Battery is not included with remote controller, you should purchase it at your local market.
3V CR2032 Coin lithium batteries are not interchangeable.
Power
Use the DC power adaptor (JEITA type4) supplied with the unit. Do not use any other DC
power adaptor.


