background image

English

- 5 -

Before first use
Thoroughly clean the parts that will come in contact with food before you use the appliance for 

the first time (see chapter “Cleaning”)

How to use

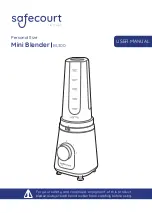
This appliance is intended for making fruit juice, smoothies, mix fruit and vegetables without hard 

pieces such as shells, seeds, stalks, etc..
1. Place the main housing on the level-surface.
2.  Put the ingredients into the bottle or jar. Don’t put the ingredients more than “Max” level. Never 

put the hot ingredient into the bottle or jar (below 60 ºC). 

3. Screw the blade holder onto the bottle by clockwise direction until it is fixed properly.
4. Place the blade holder with fixed bottle / jar into the main housing. 
5. Hold the bottle and turn it by clockwise direction until to the end (hear a ‘click’).
6. Put the plug in the wall socket.
7. Turn the rotary switch to setting “P” “1” or “2”. The appliance is start working.

Noted:

 Do not let the appliance run for more than 1 minute at a time. If you have not finished 

processing after 1 minute, switch off the appliance and let it cool down to room temperature (at 

least 1 minute) before run again.
8. Once finished processing, turn the switch to setting “0”.
9. Unplug the power cord from the wall socket.
10. Turn the bottle by anti-clockwise direction and remove it in an upwards.
11.  Place the bottle up side down (blade holder on top), screw the blade holder on the bottle by 

anti-clockwise direction until it is removed.

12.  Put the lid on the bottle by clockwise direction until to fix properly. Also make sure the juice 

outlet cap is tightly locked until to hear ‘click’ in order to avoid juice leakage.

13.  If you want to drink your juice directly, unlock a juice outlet cap and juice can be pour out 

through lid juice outlet for drinking. 

Rotary switch speed setting

This appliance has 0 1 2 P setting for selection.
1 – Low speed
2 – High speed
P – Pulse 
0 – Appliance Off

Tips: 

•  The blender is intended for prepare the fruit and fitness drinks, milk shakes, cocktails, smoothie 

etc… It is better to pre-cut the large piece of ingredient to small piece (approx. 1 x 1 x 1 cm) then 

put into the bottle. Never allow pour boiled / hot water into the bottle for ingredients preparation.

Summary of Contents for 05170104

Page 1: ...USER MANUAL MANUAL DE USO MANUAL DE INSTRU ES MANUEL D UTILISATION S P O R T B L E N D E R Batidora Sport Liquidificador Sport Mixeur Sport SB 600X...

Page 2: ......

Page 3: ...facturer or its service agent or a similarly qualified person in order to avoid a hazard Never move the appliance by pulling the cord and make sure the cord can not become entangled The user must not...

Page 4: ...bottle otherwise leakage will occur Always make sure the bottle is properly assembled on the main body before you switch on the appliance Important Do not let the appliance run for more than 1 minute...

Page 5: ...fter 1 minute switch off the appliance and let it cool down to room temperature at least 1 minute before run again 8 Once finished processing turn the switch to setting 0 9 Unplug the power cord from...

Page 6: ...of Do not rinse the main housing by tap Do not use abrasive cleaning agents scourers alcohol etc to clean the main housing 1 Unplug the appliance 2 Disassemble all removable parts before cleaning them...

Page 7: ...r remplazado por el fabricante por su agente de servicio o por una persona cualificada para evitar cualquier peligro Nunca mueva el aparato tirando del cable y aseg rese de que el cable no se enreda E...

Page 8: ...fugas Aseg rese siempre de que la botella est bien ensamblada en la parte principal antes de encender el aparato Importante No haga funcionar el aparato durante m s de 1 minuto seguido Si tras 1 minut...

Page 9: ...n a la posici n P 1 o 2 El aparato empezar a funcionar Nota No haga funcionar el aparato durante m s de 1 minuto seguido Si tras 1 minuto no ha terminado de utilizarlo apague el aparato y deje que se...

Page 10: ...Nota Evite tocar las cuchillas Las cuchillas est n muy afiladas Todas las piezas menos la carcasa principal pueden lavarse en el lavavajillas No enjuague la carcasa principal bajo el grifo No utilice...

Page 11: ...er substitu do pelo fabricante pela sua assist ncia t cnica ou por uma pessoa igualmente qualificada a fim de evitar qualquer perigo Nunca mova o aparelho puxando pelo cabo e certifique se que o cabo...

Page 12: ...r caso contr rio ocorrer vazamentos Certifique se sempre que o frasco est devidamente montado no corpo principal antes de ligar o aparelho Importante N o deixe o aparelho funcionar por mais de 1 minut...

Page 13: ...a N o deixe o aparelho funcionar por mais de 1 minuto por vez Se n o tiver terminado o processamento ap s 1 minuto desligue o aparelho e deixe o arrefecer at a temperatura ambiente mais 1 minuto antes...

Page 14: ...es remov veis imediatamente ap s a utiliza o Nota Evite tocar nas l minas As l minas s o muito afiadas Todas as pe as exceto o corpo principal podem ser lavadas no lava loi as N o lave o corpo princip...

Page 15: ...c ble d alimentation est endommag il doit tre remplac par le fabricant l un des techniciens de son service apr s vente ou une personne qualifi e similaire afin d viter tout danger Ne d placez jamais l...

Page 16: ...e teignez l appareil et d branchez le Utilisez ensuite une spatule pour retirer la nourriture de la paroi N oubliez jamais de placer la bague d tanch it sur le corps de la lame avant d assembler la bo...

Page 17: ...r cipient fix e au corps principal 5 Tenez la bouteille et tournez la dans le sens des aiguilles d une montre jusqu au bout il faut entendre un clic 6 Branchez la fiche dans la prise murale 7 Tournez...

Page 18: ...p ration de 3 6 fois selon le degr d homog n it que vous souhaitez pour la boisson Nettoyage Nous vous conseillons de nettoyer les parties amovibles imm diatement apr s utilisation Remarques vitez de...

Page 19: ...19...

Page 20: ...20 8 0 9 10 11 12 13 14 P 2 1 0 1 2 P 0 1 1 1 4 P 6 3 1 2 3 4...

Page 21: ...21 1 Max 2 60 3 4 5 6 2 1 P 7 600 1 2 3 4 5 6 7 8 1 2 3 4 5 6 8 7...

Page 22: ...22...

Page 23: ......

Page 24: ...de Instrucciones O fabricante reserva se os direitos de modificar os modelos descritos neste Manual de Instru es Le fabricant se r serve le droit de modifier d crits dans ce mode d emploi BOJ OLA ETA...

Reviews: