background image


General


[ G ] 


Intended use 

The freeAir100 is a decentralized fresh air ventilation system with heat recovery. The purpose of 

the device is to ventilate one or more rooms in apartments or houses. The device is installed in 

an outside wall. 

Expended air is drawn from the room the device is installed in. The air is drawn from other 

rooms (such as kitchen or bathroom) in case the 2nd room extract option is installed. 

Fresh and filtered air is returned to the room the device is installed in. The addition of the 2nd 

room supply option enables fresh and filtered air return to an additional room for instance a bed 

room. 


Inappropriate use 

The device is exclusively to be used for ventilation purposes. 


DANGER   


Only air not containing flammable, explosive or corrosive components or air not containing any 

other dangerous or hazardous components must be used for ventilating purposes. 


Disposal 

Dispose of the freeAir100 in accordance with your local rules, regulations or guide lines. 

Please pay special attention to correctly sorted metal, plastics and electronics. 


Summary of Contents for freeAir 100

Page 1: ...www bluMartin de Operating Manual G General O Operation I Installation S Service ...

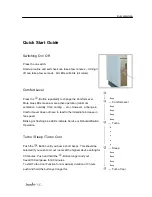
Page 2: ...evel does not have to lead to the immediate increase in fan speed Blinking or flashing blue LEDs indicate Service or Dehumidification Operation Turbo Sleep Turbo Cool Push the Button until you hear 4 short beeps This should be selected if you wish to air out rooms at the highest device setting for 30 minutes Push and hold the Button longer and your freeAir100 will pause for 90 minutes To start Tur...

Page 3: ... read and follow this manual After successful installation please select the desired Comfort Level to activate the device Proper operation is now taken care of by the sensors and the intelligent controller of your freeAir Enjoy the ambiance offered by the right amount of fresh air Your bluMartin Team ...

Page 4: ...nstallation commissioning and servicing must only be performed by sufficiently qualified persons Neglect to adhere to this manual will void the warranty Please also observe our general terms and conditions Please see www bluMartin de cos Safety Icon DANGER This sign indicates danger by potentially deadly electrical shock DANGER This sign indicates that instructions must be followed precisely in or...

Page 5: ...on has to be in accordance with the appropriate national association or electrical code The device may only be operated in good condition and unaltered condition All instructions and notes with respect to maintenance see Service paragraph are to be implicitly followed Only operate if device is in good technical order In case of error or damages that constitute a safety issues turn the device off P...

Page 6: ...ered air is returned to the room the device is installed in The addition of the 2nd room supply option enables fresh and filtered air return to an additional room for instance a bed room Inappropriate use The device is exclusively to be used for ventilation purposes DANGER Only air not containing flammable explosive or corrosive components or air not containing any other dangerous or hazardous com...

Page 7: ...sported in the intended packaging To protect the device from mechanical shock the freeAir100 has to be shipped in its original packaging and strapped to a pallet Packaging must be protected from moisture Included in Shipping freeAir 100 Front plate Outside hood Bare brickwork set ...

Page 8: ...in room 20 m3 h 17 dB A distance of 1 m 30 m3 h 22 dB A 50 m3 h 34 dB A 100 m3 h 51 dB A Noise dampening Standby 52 dB Operation 46 dB DIN EN 20140 10 Dn e w Control Intelligent 5 step Comfort Control Air stream control Automatic 8 speeds volume constant balanced ventilation CO2 control Automatic Dehumidification Automatic and special operation Summer cooling Automatic and with Turbo Cool Anti fre...

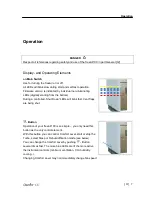
Page 9: ...om the bottom During a controlled Shut Down LEDs will blink fast Vent flaps are being shut Button Operation of your freeAir100 is so simple you only need this button as the only control element With this button you can control Comfort Level start or stop the Turbo select Sleep or Dehumidification mode see below You can change the Comfort Level by pushing Button several times fast The more blue LED...

Page 10: ...ating room air humidification or the freeAir pauses because outside air is so humid that room air condensation could occur because outside temperatures are below 22 C 30 F this LED will blink fast during Turbo Cool operation Blue LEDs The number of illuminated blue LEDs indicates the selected Comfort Level These LEDs will blink slowly during Sleep mode These LEDs will flash during Dehumidification...

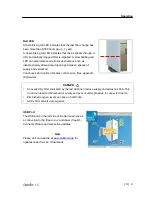
Page 11: ... air Continuous illumination indicates control error See appendix S Service DANGER An overly dirty filter indicated by the red LED can reduce supply and extract air flow This in turn can lead to diminished air quality and over or under pressure in connected rooms Diminished oxygen levels can pose a health risk A dirty filter can also grow germs USB Port The USB port on the left side of the device ...

Page 12: ...ection DANGER Do not insert any foreign objects into the supply opening Notes Due to the optional 2nd room air supply connection air is only supplied from the left part of the air discharge In case the included supply air outlet for wide through results in drafty condition alternative supply air outlet hardware is available ...

Page 13: ...uiet setting for instance for bed rooms Level 3 3 LEDs are lit is the normal setting for living rooms Turbo Operation Push the Button until you hear 4 short beeps This model should be selected if you wish to air out rooms at the highest device setting for 30 minutes Comfort operation will be restored automatically after 30 minutes Comfort Level can also be restored via the Button Sleep Mode Push a...

Page 14: ...automatically when outside air temperature is too hot Dehumidification Operation Push and hold the Button for 15 seconds to activate this mode This operation can be used in case of an application where the usual dehumidification level provided by the Comfort mode is not sufficient for instance in a basement room The freeAir100 will beep three times and blue LEDs will flash Dehumidification will wo...

Page 15: ...2nd room connection the below stated decrease in pressure must not be exceeded The supply air conduits must not exceed the below noted length Type of Conduit Max Air Flow for 2nd Room Exhaust DIP switch setting Max Pressure drop 2nd Room Exhaust at max air flow Max Length pressure drop for turns and valves included 1 x Flat Flex 51 x 138 mm 30 m3 h 15 Pa ca 8 m 1 x Round Flex 75 mm 30 m3 h 15 Pa c...

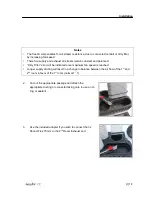
Page 16: ... error will be indicated once maximum fan speed is reached Longer supply ducting will result in a change in balance between the air flow of the 1st and 2nd room in favor of the 1st room normal 1 1 2 Cut out the appropriate passage and attach the appropriate ducting or connector taking care to use an O ring or sealant 3 Use the included adapter if you wish to connect the 3x Round Flex 75 mm to the ...

Page 17: ...gs between rooms clearance between door frame and door leaf and sufficiently sized supply and exhaust valves Air Flow Minimal Cross Section Area 30 m3 h 30 cm2 Valve Ø 125 mm 60 m3 h 60 cm2 Valve Ø 125 mm fully opened 100 m3 h 100 cm2 Valve Ø 200 mm ...

Page 18: ...tion wood stove fire place etc Select installation location that allows condensing moisture to flow off freely while preventing any danger through the formation of icicles and or icy spots on the ground Notes The condensate may be drained through a hose with the extra Condensate drain outside article FA00 2005 outside between wall and insulation or inside The formation of ice can be reduced with t...

Page 19: ...y In such locations condensate could result on the inside part of the device the freeAir will pause in these cases The system has jet no design features allowing drainage from the inside Room temperature during operation should be between 0 C and 40 C Outside temperature should be between 40 C and 50 C ...

Page 20: ...Installation 18 I Drawings ...

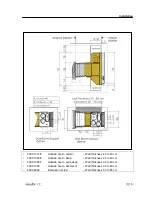
Page 21: ...l thickness 40 to 53 cm FA00 1020 2 Outside hood deep Wall thickness 35 to 40 cm FA00 1025 7 Outside hood extra deep Wall thickness 32 to 40 cm FA00 1030 Outside hood basement Wall thickness 32 to 46 cm FA00 2003 Extension 1x 2x Wall thickness 53 to 85 cm ...

Page 22: ...Installation 20 I ...

Page 23: ...Installation 21 I ...

Page 24: ...Installation 22 I ...

Page 25: ...Installation 23 I ...

Page 26: ...Installation 24 I ...

Page 27: ...nce However for best aesthetics we recommend installing the device such that the top edge is level with the top edge of your window lintel 2 An additional 12 cm space in height is required for the 2nd Room adapter and duct connection Note During construction protect the inside air connections and cable ends of all ducting from dust 3 Sketch up the inside wall cut out of 27 x 27 cm Note 27 cm is th...

Page 28: ...ange width of the telescopic adapter is 30 cm If you want to hang up the flange exactly on the plaster the opening is 27 5 x 24 5 cm 6 Shorten the telescopic adapter in case your wall thickness including stucco is less than 45 cm Note You will need a deep or extra deep hood for wall thicknesses of less than 40 cm 45 53 cm 35 45 cm 32 35 cm ...

Page 29: ...n for the separating plate in the correct position in case existing walls are thicker than 44 cm including stucco Note You will need additional telescopic adapter extensions for wall thicknesses of over 53cm The part number is FA00 2003 44 49 cm 49 53 cm 1x extension 53 57 cm middle plate 57 61 cm middle plate 61 65 cm long plate 65 69 cm long plate ...

Page 30: ...me may protrude up to 5 mm above the wall box 10 After the wall cut out is completed install the electrical cable 3 x 1 5 mm2 in the upper part of the wall box Affix the wall box flush with plaster and secure with wedges 11 Use appropriate polyurethane foam to fasten corners of wall box Once the foam has hardened add additional layers of foam Take care not to allow expanding foam to deform the box...

Page 31: ...por proof connection between wall box and wall 12 Push in the finger tabs to remove box bracing Note The electrical connector located inside is attached to the brace 13 Only an authorized Electrician should connect the electrical wire 3 x 1 5 mm to power mains ATTENTION Metal tab and connector must be installed straight to allow the trouble free installation of the freeAir100 during a later instal...

Page 32: ...Remove the protective cover from the outside cap after all plaster and painting work is done 15 The outside protective cap can now be removed 16 Install telescoping adapter flush with stucco Use water prove sealant as shown ...

Page 33: ...se sealants approved for ventilation systems such as Ottocoll M500 or similar 18 When installing the metal outside air divider make sure that the metal lip of the outside air divider seals properly against the interior air stream divider 19 The metal outside air divider is attached to the telescoping adapter via 6 metal screws ...

Page 34: ...tach with 2 M4 raised head screws 21 Clip the drip hook into the metal brace below the drip edge of the telescope adapter This assures that condensing water drips away from the house wall Note Please see part Service S for installation of the freeAir100 ...

Page 35: ...all references to safety and use of the freeAir100 in part General G Device Test After correct installation turn the freeAir100 on and wait a few minutes while the device executes a test routine Test Turbo operation once either only blue LEDs or no LEDs are illuminated Connect Software For control of device functions and for any update we recommend Laptop Windows 7 or 8 USB cable A on B Our free s...

Page 36: ...reeAir100 from the wall box it is possible that some remaining condensate water will flow from the heat exchanger 2 Push the two metal flaps apart and remove the dirty supply filter Please only use original bluMartin filters Note For allergy sufferers are also filter class F7 available increased air resistance little more noise 3 Pull the extract filter out of the side of the device and replace wi...

Page 37: ...d in front and bottom and slide it straight into the box Slide by pressing the front panel on the unit until it stops Note The device will only be operational if seated completely inside the wall box if necessary beat with your hand on the front panel 6 To reset the filter hour counter shortly change into Service mode To do that turn first the device off Push and hold the button and switch the dev...

Page 38: ...oom Extract m3 h The additional 2nd Room Extract module enables adjustment of max air flow of ventilation for exhaust of the 2nd room Diameter length and number of turns in the ducting as well as air inlet size limit the air stream see table above off No exhaust ducting installed or extract opening blocked 30 One flex duct connected with extract valve 125 60 Two flex ducts installed with extract v...

Page 39: ...vailable in devices with a serial number of 2000 or higher Temperature is set to 22 C in older devices Room Area m2 Enter here the number of square meters to be ventilated Please factor in all connected rooms This input is the basis for minimum ventilation calculations Notes If you find the intermittent operation bothersome adjust the room area to less than 60 m2 at Comfort Level 1 or to less than...

Page 40: ...late onto the device don t damage cables Attach the included M3 screws for grounding of the front panel Then attach the front plate with 4 counter sunk 4 x 20 wood screws Note Please make sure to adjust the DIP switches first see above in this section DANGER A missing grounding screw in the front plate can cause injury or death by electrical shock ...

Page 41: ...etal sheet using two M3 raised head screws Notes The supply air outlet is designed to guide air into the room as far as possible Air direction can be changed by adjusting the air paddles Air outlets guiding air downward are available as an extra Filter Installation Attach the metal bracket for the inlet air filter using four 4x20 flat head screws ...

Page 42: ... Selecting the Service Operation will reset the filter hour counter to zero After switching the device off and back on all functions will be restored to Comfort or Dehumitification operation Prolonged holding of the Button will launch Test Operation the upper middle as well as the lower blue LEDs will be on In Service Operation some functions such as defrost are not available Therefore this operat...

Page 43: ...r both fans indicate an error because the air flow is restricted due to a dirty filter This error message can also be triggered by other air flow obstructions such as under dimensioned opening between supply and extract air DIP switch setting for extract air is set too high or simultaneous operation of a kitchen vent hood while windows are closed CO2 Content CO2 content is measured to be above 350...

Page 44: ...e air flaps Control Error The device will power down and close air flaps Red LED is illuminated yellow LED will flash By pushing the Button the following described error causes are indicated Note Error messages will be erased by switching the device off and back on at the main power switch Piep Piep Piep Piep Piep Piep ...

Page 45: ...ll be indicated 2 Push and hold Button 3 Cause of error display CO2 Sensor Temperature Sensor Outside Air Temperature Sensor Exhaust ______________________ __ __ __ __ __ __ ______________________ __ __ __ __ __ __ ______________________ __ __ __ __ __ __ ...

Page 46: ...error correction __ __ __ __ __ __ ______________________ __ __ __ __ __ __ ______________________ __ __ __ __ __ __ ______________________ ______________________ __ __ __ __ __ __ ______________________ __ __ __ __ __ __ __ __ __ __ __ __ ______________________ __ __ __ __ __ __ ______________________ __ __ __ __ __ __ ______________________ __ __ __ __ __ __ __ __ __ __ __ __ ___________________...

Page 47: ...use as well as the freeAir100 serial number Note Returning the device has to be coordinated with your service partner The device has to be shipped using the appropriate packaging __ __ __ __ __ __ ______________________ __ __ __ __ __ __ __ __ __ __ __ __ ______________________ __ __ __ __ __ __ __ __ __ __ __ __ ______________________ __ __ __ __ __ __ ...

Page 48: ...jammed due to improper transportation Remove the extract filter and carefully push the blade wheel downward For the supply air fan loosen the 4 outer flat head screws and lift up the motor plate by 10mm Blue LEDs blinking continuously Service or Dehumidifying operation is active Service operation is activated by pushing and holding the Button while the device is switched on This can happen by acci...

Page 49: ...he 2nd Room Extract is not set to 100 m h Packaging To extract the device from the packaging use your right hand to reach under the EPP Foam body Note Take care not to reach into the fragile fins of the heat exchanger Transport and Storage Components of the freeAir100 must only be transported in the correct packaging The freeAir100 must be shipped on a pallet to protect it from shock The freeAir10...

Page 50: ...e Service Log Date Signature Date Signature Date Signature Date Signature Date Signature Date Signature Date Signature Date Signature Date Signature Date Signature Date Signature Date Signature Date Signature Date Signature Date Signature Date Signature Note Filter Run Time counter has to be reset ...

Page 51: ...re Date Signature Date Signature Date Signature Date Signature Date Signature Date Signature Date Signature Date Signature Date Signature Date Signature Date Signature Date Signature Date Signature Date Signature Date Signature Date Signature Note Filter Run Time counter has to be reset ...

Page 52: ...essling Germany December 2014 bluMartin GmbH Mail info bluMartin de Software Version 1 22 or newer Phone 49 8153 889033 0 All rights reserved Fax 49 8153 889033 9 Any type of copy only allowed with Web www bluMartin de approval of bluMartin GmbH ...

Reviews: