


Page 12
The following sysetm calibration instructions are for a bass-managed
speaker system, such as Blue Sky’s ProDesk, Sky System One, or Big
Blue system.
There are three steps to the calibration procedure:
1 - Setting the electrical / digital signal level
2 - Setting the reference level (REF)
3 - System Acoustic Level Setting
The instructions included with in this manual detail two sperate ways to
do step 3. One method uses bandwidth limited test files and requires
only a SPL meter. The other method uses full-bandwidth pink noise and
requires the use of a 1/3 octave real time analyzer (RTA), along with a
SPL meter.
Before starting the calibration procedure you will need to download
BlueSkyTestFiles.zip (18MB file) by going to www.abluesky.com/calibration. To
download the test file, “Right Click” the file, select “Save Target As” and the file
will begin downloading. Once downloaded, un-zip the test files and either
burn the test files to a CD or import them into your DAW.
BlueSkyTestFiles.Zip Includes 4 files:
•
1000Hz SINEWAVE -20dBFS.wav – a 1kHz file recorded at -
20dBFS for electrical calibration
•
40-80Hz PINK NOISE -20dBFS.wav – a 40Hz to 80Hz bandwidth
limited pink-noise file recorded at -20dBFS
•
500-2.5kHz PINK NOISE -20dBFS.wav – a 500Hz to 2.5Hz
bandwidth limited pink-noise file recorded at 20dBFS
•
Pink Noise full bw -20dBFS.wav – a full-bandwidth pink-noise file
recorded at - 20dBFS
These test files are all mono files. Please make sure you hard assign
them to the left and then the right (etc.), not both channels at the same
time. If you are using a CD player as your source, use only one channel
of the CD player. All test signals are recorded at –20dBFS including the
1 kHz sine wave tone. The sine wave tone is used to set the electrical
output level throughout the signal path, right up to the point you get to
the speakers, while the various pink noise signals are used for acoustic
measurements and calibration.
THEORY
The purpose of calibration is to adjust the overall electroacoustic system gain
so that 0dBVU of electrical signal level equals a certain acoustic level at the
listening position. Since most recording media is now digital, the reference
electrical signal level is usually –20dBFS with 20dB of headroom. The reference
SPL level however can vary based on the delivery media and speaker type.
Please note that the bandwidth limited signals that have been provided, limit
many of the room interaction affects often associated with measuring SPL using
broadband pink noise.
*Also, please note that the LFE channel gain in a 5.1 system varies from
0dB to +10dB, depending on the encoding format that is being used.
Since the LFE channel is not calibrated as a separate entity, the LFE gain
will not affect system calibration.
For more information about the LFE
channel refer to page 15 [Additional Surround and Setup Information].
T�e common ca�ibration �eve�s
IMPORTANT NOTE: The individual channel level trims (+/- 6dB) in the BMC
MK II, are “OUTPUT” channel level trims, and are used to adjust the relative
level between the SUB and SAT in .5 dB increments. The reason this fact is
important, is because in certain applications, such as in a film setup where the
surrounds may need to be at a lower level as compared to the front speakers,
the level adjustments for the surrounds must be done before the signal hits the
BMC MK II. This is because if you adjust the surround level only with the BMC
main channel output level trims (main channels = L, C, R, LS & RS), the SUB and
SURROUND level may not match.
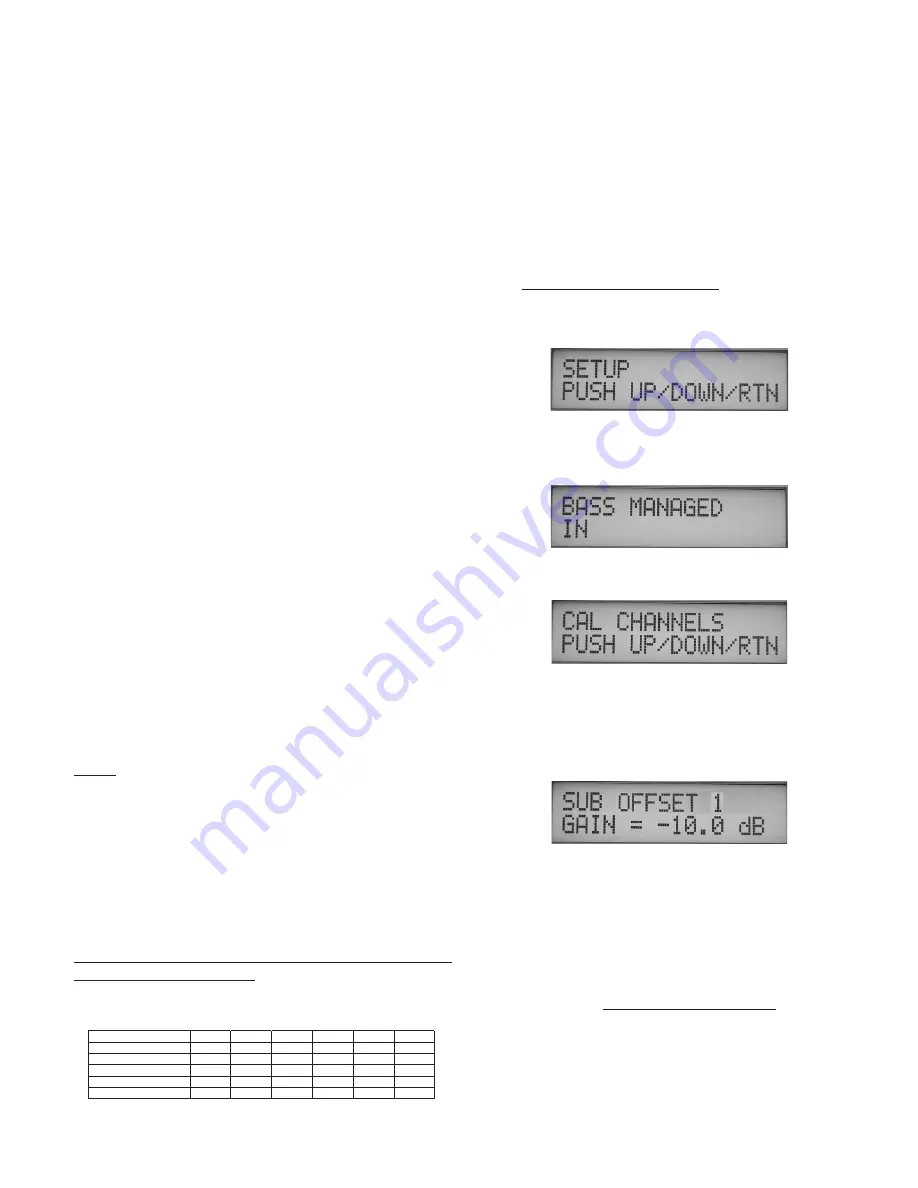
SETTING THE ELECTRICAL / DIGITAL SIGNAL LEVEL
Step 1
TURN OFF THE MONITORING SYSTEM
Step 2
“Bass Managed IN” -
Hold down the SELECT button for 5 seconds
to enter SETUP MODE. Then press select 3 times, or until the
display reads “SETUP” (shown below).
Press the UP or DOWN ARROW keys until the display reads “BASS
MANAGED IN”. If the display reads “BASS MANAGED OUT” then
press the YES button to turn it on.
Step 3
Now press the SELECT button 3 times, or until the display reads
“CAL CHANNELS”.
Press the DOWN arrow button once, or until the display reads
“SUB OFFSET 1” and then use the “-” button to set the offset to
-10dB. This setting will give the subwoofer / LFE summation buss
the greatest amount of electrical headroom. If it turns out that your
subwoofer doesn’t have enough electrical gain to get the desired
output, then you may need to set this back to 0dB of offset.
Step 4
Remove all eq and dynamics from the signal path and set all
controls to zero / unity gain. Play the 1kHz Sine Wave, hard assign
it to the LEFT channel only, and adjust the output fader so that the
output meter reads -20dBFS. If you are using an analog console, set
the output level to 0dB VU. Then hard pan the signal to the center
channel output and repeat for the center channel (then repeat for
the each of the remaining channels).
Once calibrated do not
move the output faders.
Step 5
Mute everything and make sure the 1kHz tone is OFF .
11. 5.1 System Ca�ibration
L
C
R
LS
RS
SUB*
Movie Theatrical release
85dB
85dB
85dB
82dB
82dB
85dB
Movie DVD release
85dB
85dB
85dB
85dB
85dB
85dB
Broadcast / 85dBc or
78dB
78dB
78dB
78dB
78dB
78dB
Music (Stereo)
85dB
85dB
85dB
Music ( 5.1)
85dB
85dB
85dB
85dB
85dB
85dB