


XG1000 CONTROLLER ///
INDICATORS:
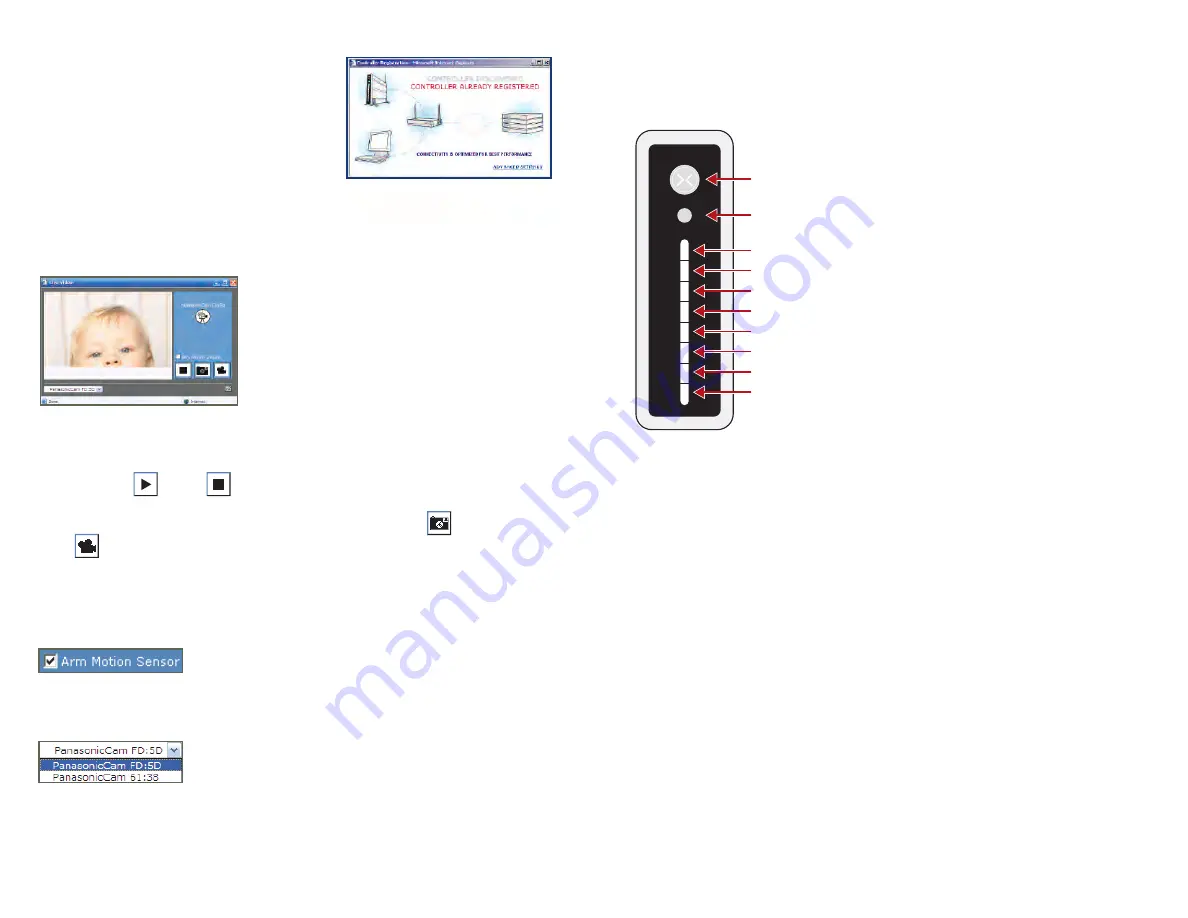
There are ten indicators on the front of the controller.
FROM TOP TO BOTTOM, THE FUNCTIONS ARE:
■
Power Indicator:
Will light up
Blue
when power is applied.
■
Video indicator:
Shows when one or more cameras are in use by flashing
Green
.
■
Not Used
■
LAN Link:
Shows proper Ethernet connection between the controller and the router
with a solid
Green
■
LAN Activity:
Shows network activity between the controller and other devices
by flashing
Green
■
Remote:
Shows the status of the remote service connection
•
Green
indicates good communication with the remote site
•
Amber
indicates that the controller has not been registered with the remote site, yet.
•
Red
indicates no communication between the controller and the remote site.
■
Device Status:
Shows the worst case status of the devices on the
“Monitor”
page.
If all devices are
Green
then this LED will show
Green
. If one or more devices
are
Yellow
or
Red
, the LED will light accordingly.
■
Device Activity:
Flashes
Green
to show when the controller is communicating with
one of the wireless devices.
■
Not Used
■
Not Used
I0
OPTIMIZING YOUR VIDEO PERFORMANCE:
To ensure that your video performance is optimized
you can port forward your router. To do so, please
repeat the controller registration process (refer to
the instructions, steps 1-4, found on pages 5 and 6
of this manual) where you will be prompted with
instructions on port forwarding.
You will be notified during controller registration if
your video performance has already been optimized.
POWER INDICATOR
VIDEO INDICATOR
NOT USED
LAN LINK
LAN ACTIVITY
REMOTE
DEVICE STATUS
DEVICE ACTIVITY
NOT USED
NOT USED
XG1000 CONTROLLER FRONT PANEL
USING THE FEATURES IN THE LIVE VIDEO WINDOW:
The
Live Video
pop-up displays Live Video image along with buttons that will
allow you to start or stop the camera.
You can manually take a snapshot or record a video by clicking the snapshot and
video icons, respectively. Once a
Video Clip
or
Snapshot
is taken, they are stored in
the
Event Archives
section of your account.
Each camera has a built in motion sensor. You can set your camera’s motion sensor to detect
motion by using the
Arm Motion Sensor
checkbox seen below.
You can switch between cameras using the
Camera Selection
drop-down menu.
9
LIVE VIDEO WINDOW
9
Summary of Contents for Home Monitoring Starter Kit
Page 1: ...STARTER KIT USER S MANUAL...