


8
7
USING THE SYSTEM WITH A CORPORATE FIREWALL ///
If you are using the Home Monitoring system in an environment that is protected by a corporate
firewall, you may need to make some settings that will allow you to get the best performance out
of your system. The great majority of users will not need to use these settings.
Select
Account Settings
and then
Details
. In the section labeled
‘HTTP PROXY’
there are fields
for proxy
UserID
and
Password
. These settings will enable the live video window to use the most
efficient method to get data from your camera. If you do not know what to enter in these fields,
you need to ask you System Administrator.
TIME ZONES ///
You must set the time zone in your controller so that events are time stamped with the
correct information. This will also ensure that events you have set up to occur at certain times
will perform as expected.
Because you can access the system from anywhere, there is the possibility that the controller is in
a different time zone than where the remote viewing PC or cell phone is located. The default time zone
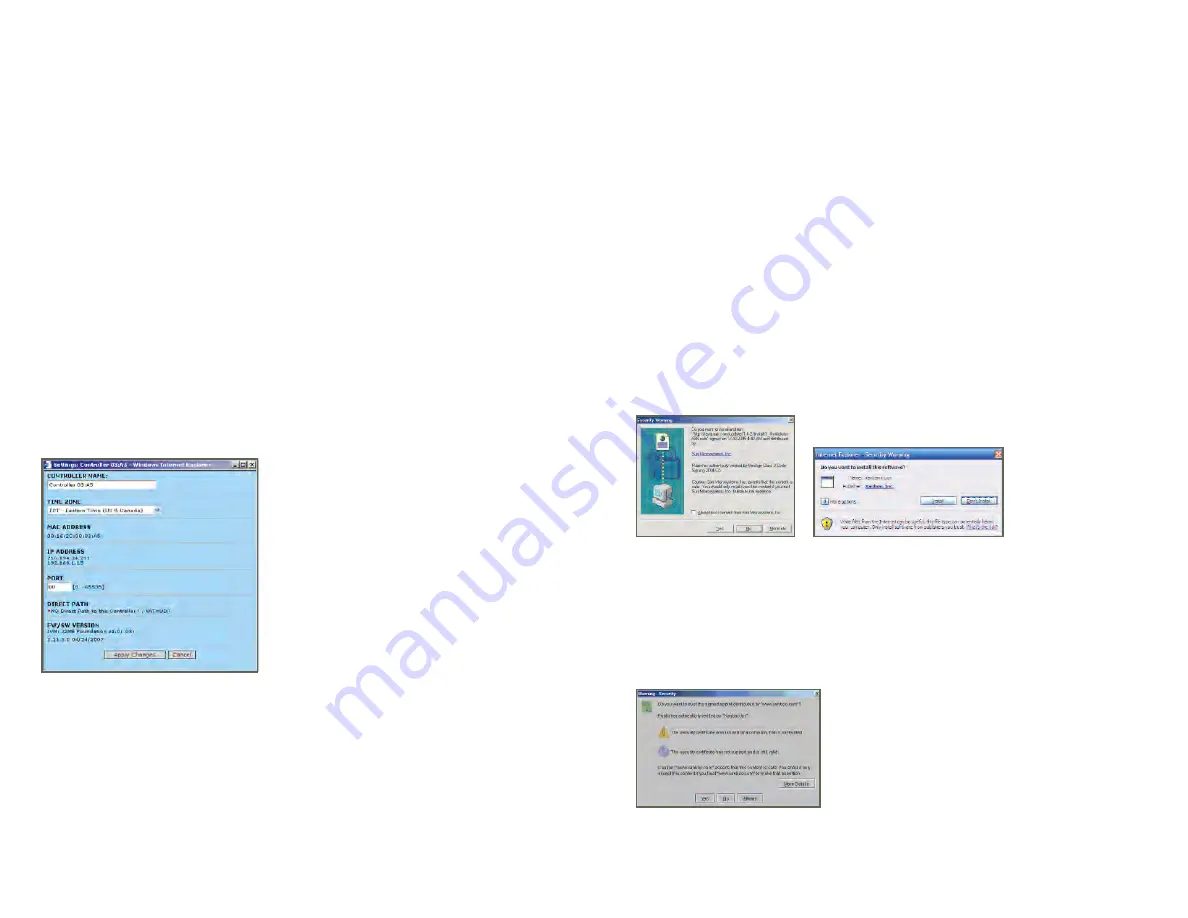
for the controller is United States EST. If you need to change this, select the
Device Overview
tab.
In the bar where the controller name is shown, click on the icon next to the controller name. You will
be shown a pop-up where you can set various controller settings. Select a time zone and click
‘Apply’
.
The controller will be reset after this change, which may take a minute or so.
YOUR HOME MONITORING ACCOUNT! ///
Your account is set up into 4 sections:
Live Video
,
Device Overview
,
Event Archive
and
Account
Settings
. Each section has a specific role, and understanding each role will allow you to maximize
the Home Monitoring experience.
LIVE VIDEO ///
For each discovered camera you will see a
Snapshot
of the view associated with the camera when
you click on the
‘LIVE VIDEO’
tab. This snapshot image is for identifying the camera; it is not updated
in real time. The snapshot view for each camera can be refreshed by clicking the
‘REFRESH’
button in
the upper right corner of the image. Click on a camera snapshot to view live video from that camera.
FROM THE LIVE VIDEO PAGE YOU WILL BE ABLE TO:
■
Take a Snapshot of the Current Camera
■
Start or Stop a Live Video
■
Arm the Motion Sensor
■
Toggle Between Cameras
■
Record a Video Clip
The first time you access your Live Video you may be prompted with a pop-up window like the
one below, to install a JAVA plug-in (if you’re using Netscape or Firefox) or ActiveX plug-in (if you’re
using Internet Explorer). This plug-in is necessary to view your Live Video. The appearance of the
plug-in installer will differ for the two plug-ins, but in both cases you must click
‘YES’
to accept the
download for the plug-in. Follow the instructions provided in the INSTALLATION WIZARD for the plug-in.
The plug-in will take a few minutes to install.
If you’re using Netscape or Firefox, you will also be prompted by a security warning, like the one
displayed below, when you access your Live Video. Answering
‘ALWAYS’
will prevent this pop-up
from being displayed again.
Selecting
‘YES’
will disable the pop up for only that log-in session.
CONTROLLER SETUP POP UP WINDOW
JAVA INSTALL POP UP WINDOW
ACTIVE X INSTALL POP UP WINDOW
SECURITY WARNING POP UP WINDOW
Summary of Contents for Home Monitoring Starter Kit
Page 1: ...STARTER KIT USER S MANUAL...