background image

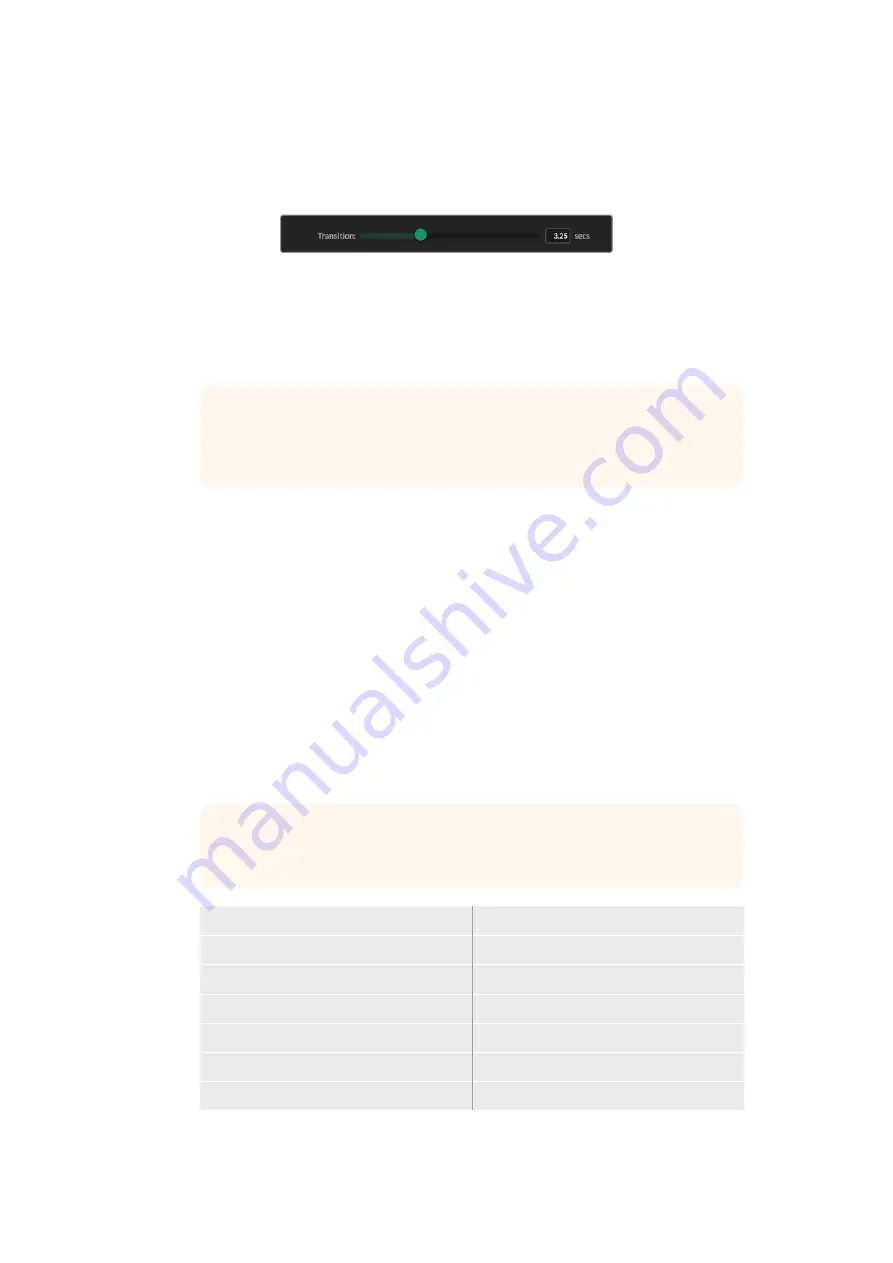
If you are using still images for both the background or layer destinations, then you 
can choose to add a dissolve transition between the two images. To set the duration 
of the transition use the transition slider. Dissolve transitions can be between 0 and 10 
seconds long in 0.25 second increments.

Once you have assigned your still images, click on the ‘close’ button to close the 
media window.

To perform a cut or transition between backgrounds or layers you can use 
the ‘background switch’ or ‘layer switch’ button in the function bar of Ultimate 
Software Control.

TIP

  When you save a preset your Ultimatte will save any assignments that you 

have made in the media pool. Keep reading this manual for more information 
on saving and loading presets.

Supported File Formats for Stills

The Ultimatte media pool can use many different file formats including TGA, PNG, BMP, JPEG 
and TIFF. Embedded alpha channels are supported in TGA, TIFF and BMP file formats. 

Stills Background and Layer Options

Once you have assigned a still image to a background or layer, you have the following options:


‚

Use the RGB content of the still as a background and use the alpha channel of the still 
as a background matte. If the still doesn’t contain an alpha channel, Ultimatte will assign 
a solid white matte.


‚

Use the RGB content of the still as a background and do not use the alpha channel as 
a background matte. You can do this by disabling the Background Matte In option in 
Ultimatte Software Control. 

TIP

  Still images used for holdout and garbage mattes need to be grayscale, 

single channel images.

Source

Supported formats

Background

TGA, TIFF, BMP, PNG, JPG

Background and Background Matte

TGA, TIFF, BMP

Layer

TGA, TIFF, BMP, PNG, JPG

Layer and Layer Matte

TGA, TIFF, BMP

Garbage Matte

TIFF, BMP, PNG, JPG

Holdout Matte

TIFF, BMP, PNG, JPG

31

Using the Media Pool

Summary of Contents for Ultimatte 12

Page 1: ...Ultimatte 12 Ultimatte 12 September 2022 Operations Manual...

Page 2: ...matte is much more than a keyer as it s really a real time advanced compositor for creating photorealistic virtual environments Ultimatte lets you move your talent to any location at the click of a bu...

Page 3: ...e Control and Auto Key 27 Groups 28 Functions 28 Status Bar 28 Monitor Out 29 Setting Controls 29 Using the Media Pool 30 Supported File Formats for Stills 31 Stills Background and Layer Options 31 Ul...

Page 4: ...rt Remote 4 73 Connecting Power 73 Connecting to Ultimatte 73 Turning on Smart Remote 4 74 Updating your Smart Remote 4 74 Uninstalling Software 74 Installing Ultimatte Smart Remote Setup 77 Connectin...

Page 5: ...d idea to look at the types of mattes you can use and how they are arranged in your composite A basic knowledge of matte types will let you jump right in and start refining your composite When a secti...

Page 6: ...tte lets you extract a section from the background and place it over the foreground For example you may have a virtual set as your background image that has a partition on one side Using a background...

Page 7: ...visible in the composited image In the matte fully opaque black means the corresponding areas in the fill image will be completely visible Shades of gray means partially transparent Garbage Matte A ga...

Page 8: ...out and reveal the background underneath A holdout matte can be created to exclude that particular area within the set which will prevent it from being keyed Layer Matte The layer matte lets you add...

Page 9: ...te models share similar features and the setup is exactly the same for their SDI connectors Plugging in Power To power your Ultimatte plug a standard IEC cable into your Ultimatte s power input on the...

Page 10: ...Ultimatte Software Control For more information refer to the using the media pool section BACKGROUND CAMERA FG PGM OUT PGM OUT MON OUT RETURN MON IN ETHERNET Generating an Auto Composite As you plug...

Page 11: ...multiple Ultimatte units via SDI so you can monitor the sources and outputs on all units via one single Ultimatte rather than connecting monitors to each unit individually For more information refer t...

Page 12: ...analog reference or to foreground sources that are locked together The Ultimatte units can then be daisy chained via their monitor inputs and outputs with the last unit plugged into a monitor Then wh...

Page 13: ...nd input to an uninterrupted power supply or UPS will instantly take over if the primary source fails 2 USB On larger Ultimatte units use the USB port on the rear panel to connect your Ultimatte to yo...

Page 14: ...TTE IN connector You can also select a still from the media pool to use as a garbage matte Camera Foreground Input Plug the foreground image you want to composite over the top of the background into t...

Page 15: ...needing to compensate for reversed camera left and right staging Refer to the settings talent mirror section for more information 8 Monitor Output Plug the monitor output into a monitor or recording...

Page 16: ...e current video format Program Output Displays the program output Name Displays the name of your Ultimatte If you have set a custom name it will appear here On Air Status A red on air indicator will b...

Page 17: ...ets section later in this manual Menu Press the menu button to open and close the settings menu Lock Press and hold the lock button for 1 second to lock the front panel This disables the buttons preve...

Page 18: ...y pressing the set button Press menu to return to the home screen Setup Settings The setup settings allow you to change your Ultimatte s language selection select the default video standard and change...

Page 19: ...duction facility Default Standard When set to auto the camera or source connected to your Ultimatte s foreground input will determine the video format for all other inputs and all outputs You can choo...

Page 20: ...P You can also enable DHCP instead of assigning an IP address manually DHCP is a service on network servers that finds your Ultimatte and assigns an IP address automatically DHCP makes it easy to conn...

Page 21: ...correctly and that the input format matches the foreground Reset Highlight factory reset in the setup menu to restore your Ultimatte to factory settings Once you press set you will be prompted to conf...

Page 22: ...a pool and control up to eight Ultimatte units over a network Ultimatte Software Control is compatible with Mac and Windows computers and Smart Remote 4 Controls and settings are changed using buttons...

Page 23: ...e install prompts and Mac OS X will automatically install the software A folder called Blackmagic Ultimatte will be created within your applications folder containing Ultimatte Software Control and Ul...

Page 24: ...gs refer to the connecting to a network section Assigning a Unit Number Once you have connected to a computer or Ethernet switch launch Ultimatte Software Control The software will automatically look...

Page 25: ...and select your Ultimatte unit TIP If you are connecting to an Ultimatte 12 click the add via IP button and enter the Ultimatte s IP address 2 Click save Ultimatte Software Control will now display t...

Page 26: ...ed to your computer or Smart Remote 4 but its unit indicator is not illuminated in the status bar check your IP settings are configured correctly Refer to the connecting to a network section for more...

Page 27: ...e Information File Control and Auto Key This section of the interface lets you save and access preset files set an auto composite and configure certain settings for your Ultimatte Click on folder icon...

Page 28: ...eground settings 2 Click on the Flare 1 button in the groups section to select the flare controls The flare controls will now be visible on each side of the panel and you can adjust them using the con...

Page 29: ...example if a specific control is currently locked and you need to enable another setting to access it the status bar will notify you Monitor Out The buttons in this section of the interface will sele...

Page 30: ...and choose the image you want to import 4 Your imported image will now appear in the device storage list Imported images will appear in the device storage list To delete an imported image simply sele...

Page 31: ...se many different file formats including TGA PNG BMP JPEG and TIFF Embedded alpha channels are supported in TGA TIFF and BMP file formats Stills Background and Layer Options Once you have assigned a s...

Page 32: ...from the quick preset menu Use the preset menu to save and load quick presets If your Ultimatte has numbered buttons on the control panel you can also use these to recall a quick preset On Smart Remo...

Page 33: ...l use to generate the matte Typically the color used for most screens for compositing is green and this is why green is the default backing color However there are occasions on set where red or blue m...

Page 34: ...elements in your scene so only the backing screen is visible 2 Select the matte settings from the main menu buttons 3 In the groups section select matte process 4 In the functions area click the scree...

Page 35: ...ailable and the order in which they are often used It s worth mentioning that when adjusting some controls the smallest change can make best results and you may need to make minor readjustments to som...

Page 36: ...layer input that is designed for a spotlight effect You can then blend that image into the foreground layer 7 Additional Matte Input Settings Add additional mattes to your composition for example a ga...

Page 37: ...tte density should now be almost or completely gone Black Gloss Sometimes there may be dark areas of your foreground that have bright highlights which are reflecting the backing color These highlights...

Page 38: ...e sure that you haven t eliminated too much of the fine detail The goal is to set these controls to the lowest possible value while ensuring the final picture is not missing subtle details such as fin...

Page 39: ...dow threshold setting is used to help separate unwanted dark screen areas from shadows Matte Process Screen Correction Depending on the conditions of your green screen the backing color may not be con...

Page 40: ...ingle sampling 1 Go to the screen sample settings in the matte menu 2 Click the wall cursor position button Your view will change to the foreground input and a small box cursor will appear on the scre...

Page 41: ...air When the green screen color is removed and replaced by a dark background a dark foreground object will show bright gray edges at the transitions The 4 2 2 correction feature eliminates or reduces...

Page 42: ...ras are mounted on robotics systems and could be programmed to go to the same starting position thus allowing the same exact sampling locations to be used again When you save a preset file cursor loca...

Page 43: ...ession in the holdout matte area would be the best choice When holdout matte flare is disabled spill suppression is not performed in the holdout matte region When enabled spill suppression is removed...

Page 44: ...r This setting adjusts the overall level of the ambiance that will influence the foreground color levels When adjusting this control the relative difference between the ambiance red green and blue com...

Page 45: ...eature an extended white range mode in this mode all signals exceeding 100 will pass through unclipped For more information on output range refer to the settings section Black Level Master The master...

Page 46: ...level without altering the overall gain TIP Any adjustments to color for the black and white level will only occur after the matte signal generation and will not affect the source Adjusting Color Con...

Page 47: ...s on the set as the lighting can spill onto the green backing affecting the strength of your key As a helpful and convincing alternative you can use the lighting feature to simulate lighting effects i...

Page 48: ...t accurate method of combining colored transparent and semi transparent layer elements as well as opaque layer elements with the foreground objects and the background scene NOTE When using a layer sou...

Page 49: ...they are fully faded out In an alternate process Blackmagic Ultimatte can gradually apply the garbage matte clean up function in the soft transition areas so that the foreground objects can still ent...

Page 50: ...ese knobs adjust the skew of the top bottom left and right edges of the window Window Skew Offset Top Bottom Left Right As it is dialed in the skewed window edge moves into the frame and goes all the...

Page 51: ...ollowed by the foreground source followed by the layer source then followed by the background source FG BG LY LY IN BG In this combination the foreground source is the top layer followed by the backgr...

Page 52: ...2020 color gamut for both HD and Ultra HD When Rec 2020 is selected all input signals must comply with Rec 2020 and all output signals will conform accordingly When your Ultimatte detects standard def...

Page 53: ...ative difference between U and V will be maintained The maximum range of adjustment is 2 pixels Outputs The output configuration settings let you customize the appearance of the outputs and route cert...

Page 54: ...al feedback when seeing themselves on the monitor Monitor to Talent When monitor to talent is enabled the talent output will show the same view selections made in the monitor output Disabling the moni...

Page 55: ...t of the second unit 3 Connect the monitor output of the second unit to the monitor input of the third unit 4 Connect the monitor output of the third unit to the monitor input of the fourth unit 5 Con...

Page 56: ...must be saved as part of that file When GPI out save is selected the instructions to trigger a GPI output will become part of the current workspace settings When the current workspace settings are sav...

Page 57: ...ues for each input The maximum delay is 120 Frames Close Selecting this button will close the window and exit the GPI setup menu Setting Up a GPI Event List To set up an event list preset files must b...

Page 58: ...ll be changed to return which you can click on to go back to the previous menu Monitor out settings configure the output from the monitor out connector Monitor Highlight Level Control This control adj...

Page 59: ...tte s monitor output These six soft buttons can be customized using the custom monitor out settings The first two soft buttons in the functions area of the interface are labeled standard and inputs Th...

Page 60: ...o quickly save and recall setup and composite settings for your Ultimatte Presets are interchangeable between all Ultimatte models with a built in LCD TIP When you save a preset your Ultimatte will al...

Page 61: ...button In the saved preset list active file will now appear next to the loaded preset Renaming a preset 1 Select the preset you want to rename from the saved presets list The current preset name will...

Page 62: ...across all the units To export a preset 1 Click on the folder icon in the files and information section of Ultimatte Software Control to open the presets window 2 Select the preset you want to export...

Page 63: ...een Ultimatte models Creating an Archive To create an archive click the folder symbol in the files and information section of Ultimatte Software Control this will open the preset and archive window 1...

Page 64: ...archive window click the restore all button 2 In the dialogue box navigate to the archive file that you want to restore Click open 3 Your Ultimatte will now start restoring the archive and a progress...

Page 65: ...tions to each control knob 1 From the knobs list scroll up and down the list of functions and select a function from the list 2 Click on the right arrow icon in the middle column that corresponds to t...

Page 66: ...nd camera 2 to input 2 HDMI is bidirectional so tally and camera control data is sent back to your camera using the same HDMI cable BACKGROUND CAMERA FG PGM OUT PGM OUT MON OUT RETURN MON IN ETHERNET...

Page 67: ...S SDI INPUTS 6 7 8 9 CUT 16 17 18 19 10 20 AUTO 1 2 3 4 5 11 12 13 14 15 LOCK MENU SET KEY 1 MIX DSK 1 MIX BARS MIX BLACK WIPE DSK2 MIX FTB MP 1 DIP MP 2 DVE PROD TALK ENG TALK CALL PGM MIX 5 Amphenol...

Page 68: ...t using the front panel LCD menu or Blackmagic Ultimatte Setup software For more information on using the front panel menu refer to the using the LCD menu section To download the latest Ultimatte Setu...

Page 69: ...gs 3 In the Ethernet related settings select change adapter options 4 Double tap on the Ultimatte network to open the Ultimatte status window 5 Tap on properties 6 In the properties window double tap...

Page 70: ...Click save to confirm your selection If you look at the status bar you will now see that unit number illuminated green This means the unit is online and ready to be controlled 70 Connecting to a Netwo...

Page 71: ...e circular setup icon or the image of your Ultimatte to open the setup page Setup Page If you have more than one Ultimatte you may wish to give each unit a discrete name to make them easy to identify...

Page 72: ...staller from www blackmagicdesign com support 2 Run the Blackmagic Ultimatte Setup installer on your computer and follow the onscreen instructions 3 After installation is complete connect your Ultimat...

Page 73: ...re the connector to the port TIP The power adapter s outside screw ring also serves as the negative contact with the positive contact being the center pin of the connector If you want to secure a grou...

Page 74: ...ll portable computer running the Windows operating system When the start up sequence is complete the Ultimatte Software Control will launch and the control panel will appear on the touchscreen Updatin...

Page 75: ...In the settings window select system from the menu and choose the apps features option 3 In the apps features window scroll through the list of apps and locate the Ultimatte SR4 software 4 Select the...

Page 76: ...nce application window select remove all components and tap next Select remove all components and tap next 4 The maintenance application will now let you know it is ready to uninstall Tap uninstall an...

Page 77: ...automatically read the USB drive and open the file explorer NOTE The portable storage drive used to install the software on your smart remote must be formatted as the master boot record using one sin...

Page 78: ...te to communicate over a network Select private networks such as my home or work network and tap allow access Connecting a USB Keyboard and Mouse If you want to control your Ultimatte Smart Remote 4 u...

Page 79: ...t contains the following items 2 x Front Rack Ears Attach the front rack ears to the outside front edge of the unit 2 x Rear Rack Ears Attach the rear rack ears to the outside rear edge of the unit 2...

Page 80: ...sing the supplied M4 countersunk screws Installing Rear Rack Ears Using a 3mm hex key attach the rear rack ears to Ultimatte 12 8K using the supplied M4 flathead screws Installing Chassis Bumpers Inst...

Page 81: ...Rack Shelf 1 x 1 6 rack width blanking panel Use the 1 6 blanking panel when mounting 1 2 rack width products with a 1 3 width unit or blanking panel 2 x 1 3 rack width blanking panel Use 1 3 width b...

Page 82: ...solo or with a 1 3 rack width product such as a Blackmagic Web Presenter Mount the panel to the side of the device towards the center of the rack to allow for airflow between units Remove the 5mm M3 s...

Page 83: ...ndows and enter Ultimatte control protocol commands These commands can be programmed into your application and triggered by related items on a custom user interface of your own design Below is a basic...

Page 84: ...a complete update of its status After the initial status transmission status updates are sent every time the Ultimatte device s status changes To be resilient to future protocol changes clients shoul...

Page 85: ...e Information The next block contains general information about the connected Ultimatte device DEVICE Video Format 1080p60 Reference Source Foreground FG In Locked BG In Locked MONITOR In Locked G MAT...

Page 86: ...Image List and Frame Buffer State CONTROL Matte Density 0 Red Density 0 Green Density 0 Full list in Controls section CONTROL DEFAULT Matte Density 0 Red Density 0 Green Density 0 Full list in Contro...

Page 87: ...uffer Index 0 HM Frame Buffer Enable off HM Frame Buffer Index 0 BG Frame Buffer Mix 0 LY Frame Buffer Mix 0 BG Transition Duration 0 LY Transition Duration 0 Frame Buffer 1 Image 1 Frame Buffer 2 Ima...

Page 88: ...ut leading to a response that is different to that expected In the absence of simultaneous updates a simple control change will result in the following protocol exchange CONTROL Matte Density 0 ACK CO...

Page 89: ...me In each case Ultimatte will respond with an ACK followed by a File List block or a Message block GPI Event List The client may request that Ultimatte add insert or remove an event to a GPI Event Li...

Page 90: ...enable command is required FRAME BUFFER BG 1 Frame Buffer Enable on NOTE The Telnet interface does not currently provide loading or removing images in the Media Pool This has to be done from either a...

Page 91: ...lue 0 10000 Veil Correct Horizontal Size 0 6 Veil Correct Vertical Size 0 61 Wall Color Red 0 10000 Wall Color Green 0 10000 Wall Color Blue 0 10000 Floor Color Red 0 10000 Floor Color Green 0 10000 F...

Page 92: ...ct Light Blue 0 10000 Direct Light Mix 0 10000 Vertical Blur 0 10000 FG Saturation Red 0 10000 FG Saturation Green 0 10000 FG Saturation Blue 0 10000 FG Saturation Master 0 10000 FG Contrast Red 0 100...

Page 93: ...000 BG Contrast Crossover 0 10000 BG Filter 0 10000 Test Signal Master 0 10000 Test Signal Red 0 10000 Test Signal Green 0 10000 Test Signal Blue 0 10000 LY Saturation Red 0 10000 LY Saturation Green...

Page 94: ...Based on Video Format Window Position Right 0 Based on Video Format Window Softness Top 0 10000 Window Softness Bottom 0 10000 Window Softness Left 0 10000 Window Softness Right 0 10000 Window Skew T...

Page 95: ...t U Position 0 10000 FG Input V Position 0 10000 FG Input UV Position 0 10000 Talent Highlight Level 0 10000 Monitor Highlight Level 0 10000 Matte Out Level 0 10000 Output Offset 1500 1500 GP Out Dela...

Page 96: ...e On Off Window LM Enable On Off Window Invert On Off Wall Cursor Position Enable On Off Floor Cursor Position Enable On Off Dual Cursor On Off Manual Color Enable On Off Custom Powerup deprecated On...

Page 97: ...Off Quickload 2 On Off Quickload 3 On Off Quickload 4 On Off Quickload 5 On Off Quicksave 1 On Off Quicksave 2 On Off Quicksave 3 On Off Quicksave 4 On Off Quicksave 5 On Off GP 1 Input Enable On Off...

Page 98: ...Layer Layer BG FG BG Layer BG BG Layer FG BG FG Layer BG Layer FG BG Video Format Auto Detect 525i59 94 NTSC 4 3 625i50 PAL 4 3 720p60 720p59 94 720p50 1080i60 1080i59 94 1080i50 1080p60 1080p59 94 10...

Page 99: ...matte inputs are available for Ultimatte 12 not Ultimatte 12 8K 4 Supported video formats are Ultimatte device dependent 4320p formats are available for Ultimatte 12 8K Ultimatte 12 HD Mini does not...

Page 100: ...ur local support team button on the support page and call your nearest Blackmagic Design support office Checking the version currently installed To check which version of Blackmagic Ultimatte Setup so...

Page 101: ...with the instructions may cause harmful interference to radio communications Operation of this product in a residential area is likely to cause harmful interference in which case the user will be req...

Page 102: ...resulting from attempts by personnel other than Blackmagic Design representatives to install repair or service the product b to repair damage resulting from improper use or connection to incompatible...

Reviews: