background image

8

GENERAL TIPS FOR   
USING THE PROCESSOR

• Organize processing tasks to avoid 
multiple cleanups of the bowl; process dry 
before wet.
• Do not process foods that are so frozen 
or hard that the tip of a knife cannot be 
inserted into the food.
• If a piece of hard food, such as a carrot, 
becomes wedged or stuck on the blade, 
stop the processor and unplug, then 
remove the blade. Gently remove food 
from the blade.
• Do not use the processor to:
  

-  Grind coffee beans, bones, grains or 

hard spices


- Slice or chop warm meat 
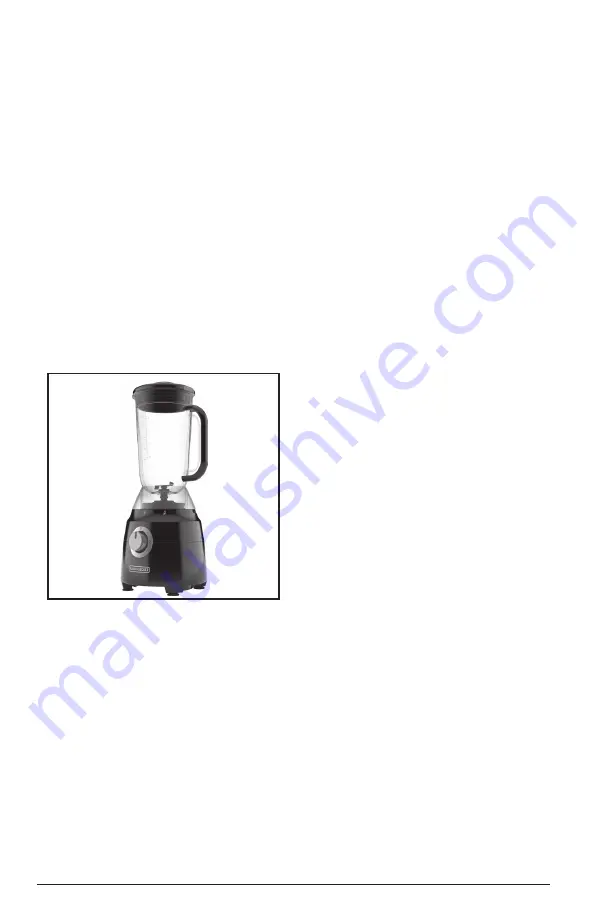
USING THE BLENDER

Important: Appliance should always 

have lid in place when in use.

Caution: Do not place blender jar onto 

base when motor is running.

1.  Place motor base on a flat stable 

surface 

2.  Lower the blender jar on to the motor 

unit, then turn the jar clockwise, to 

lock it in place. 

3.  Make sure blender is OFF and place 

ingredients to be blended into jar. For 

best results and the most efficient 

blend, place ingredients in the jar in 

the following order:

  a. Liquids

  b. Powders


c.  Soft foods


d.  Hard foods

  e. Ice 

4.  Place the lid on the jar: Align the pips 

on the cap with the slots in the hole in 

the lid, fit the cap, and turn it 

clockwise to lock it. 

5.  Plug power cord into outlet.

Note: When in use, do not leave blender 

unattended. When using hard foods, 

such as ice or cheese, keep one hand on 

the lid to keep blender in place.

6.  Select the speed that best suits your 

desired task. (See SPEED CHART)

7.  When blending thick mixtures such as 

smoothies and milkshakes, PULSE for 

several seconds, then release. Repeat 

until food has desired consistency. 

Note: Use PULSE for no more than five 

seconds at a time, allowing the blender 

to rest briefly between each pulse, 

no more than two minutes total. This 

helps break up the ice and distribute 
the ingredients.

8.  To add ingredients while the blender 

is working, remove the cap, pour the 

new ingredients through the hole, 

then replace the cap.

Important: Do not remove the lid while 

the blender is running.

9.  When finished, turn the control dial  

to OFF (0).  

10.  To remove the blender jar, turn the 

blender jar counter-clockwise, and lift 

it off the motor unit.

11.  Remove lid to pour.

12.  Always unplug the appliance when 

not in use.

Summary of Contents for FP5500BC

Page 1: ...2 IN 1 FOOD PROCESSOR AND BLENDING SYSTEM ROBOT CULINAIRE ET M LANGEUR 2 EN 1 FP5500BC...

Page 2: ...urn to the store Si vous avez des questions ou des pr occupations propos de votre nouveau produit veuillez communiquer avec notre Service la client le au 1 800 465 6070 tats Unis et Canada Veuillez ne...

Page 3: ...e This product is designed for household use only Do not open lid until blade or disc stops completely The maximum rated wattage for this product was obtained with the blender blade This appliance is...

Page 4: ...20102000000301 7 Workbowl part no 2050200023 8 Spindle part no 2050201211 9 Control dial 10 Motor unit 11 S blade part no 2050201221 12 Dough blade part no 20102000006601 13 Creamer part no 2010200001...

Page 5: ...and install the attachment you need 4 Hold the workbowl cover with the feed chute slightly behind the workbowl handle set it on the workbowl then turn it clockwise to lock the tab into the top of the...

Page 6: ...lock it then lift it off Caution The S blade attachment is very sharp Use caution when handling and storing Important Never use your fingers to direct food through the feed chute 7 Turn the control di...

Page 7: ...slicing round fruits and vegetables through the processor cut a thin slice from the bottom so food will be more stable Place food cut side down in the feed chute Always remove seeds core and pits bef...

Page 8: ...ders c Soft foods d Hard foods e Ice 4 Place the lid on the jar Align the pips on the cap with the slots in the hole in the lid fit the cap and turn it clockwise to lock it 5 Plug power cord into outl...

Page 9: ...To crush ice fill blending jar 1 3 full of ice cubes Cover Using quick pulses pulse 6 to 8 times Allow ice to fall back towards blades between pulses Run blender on Low for 5 to 6 seconds to finish c...

Page 10: ...d nonabrasive cleaner Do not immerse base in liquid All removable parts can be washed by hand in hot water with dish soap or in the dishwasher top rack only Hand washing of plastic parts will help to...

Page 11: ...ss on Low for about 30 seconds or until desired consistency is reached 3 Serve with tortilla chips Look for cans of diced tomatoes with green chilies in the Mexican or International section of the gro...

Page 12: ...3 Put the remaining ingredients and 1 3 4 cup of the shredded cheese into the bowl with the diced jalape o Process on High for about 30 seconds to reach a smooth consistency 4 Pour the mixture into an...

Page 13: ...ith a reasonably similar replacement product that is either new or factory refurbished How do you get support Save your receipt as proof of date of sale Visit the online service website at www prodpro...

Page 14: ...bien fix le bol en place S assurer que le couvercle est bien verrouill avant d utiliser l appareil Cet appareil est quip d un dispositif de protection L appareil ne fonctionnera pas si le bol ne repo...

Page 15: ...u personnel des centres de service autoris s CORDON D ALIMENTATION a Un cordon d alimentation court est fourni pour viter qu un cordon long s emm le ou fasse tr bucher b Des rallonges lectriques sont...

Page 16: ...Disque minceur d chiqueteur pi ce n 2050200024 6 Arbre d entra nement pi ce n 20102000000301 7 Bol pi ce n 2050200023 8 Tige pi ce n 2050201211 9 Cadran de r glage 10 Bloc moteur 11 Lame en S pi ce n...

Page 17: ...ssoire souhait 4 Maintenir le couvercle du bol auquel est rattach l orifice d alimentation l g rement derri re la poign e du bol le placer sur le bol puis le tourner en sens horaire pour verrouiller l...

Page 18: ...er le couvercle le tourner en sens antihoraire pour le d verrouiller puis le soulever Mise en garde La lame en S est tr s tranchante Faire preuve de prudence pendant sa manipulation et son rangement I...

Page 19: ...aire 7 Tourner le couvercle du bol en sens antihoraire pour le retirer 8 Retirer soigneusement le disque minceur d chiqueteur Retirer le bol du bloc moteur 9 D brancher l appareil quand il ne sert pas...

Page 20: ...treenplacelorsquel appareilfonctionne Mise en garde Ne pas d poser le r cipient sur le socle lorsque le moteur est en marche 1 Placer le socle moteur sur une surface stable et plane 2 Placer le r cip...

Page 21: ...etits morceaux de 2 cm po et moins avant de les mettre dans le m langeur Au cours de la pr paration d aliments n cessitant l ajout de plusieurs ingr dients diff rents s assurer de toujours verser les...

Page 22: ...5 minutes avant de verser dans le r cipient ENTRETIEN ET NETTOYAGE Cet appareil ne contient aucune pi ce r parable par l utilisateur Confier la r paration un technicien qualifi Important Toujours d br...

Page 23: ...llants ne fournissent pas de services de r paration CONSEILS POUR LE NETTOYAGE Pour effectuer un nettoyage rapide verser dans le bol du robot culinaire ou le r cipient du m langeur 250 ml 1 tasse d ea...

Page 24: ...nce d sir e 3 Servir avec des croustilles au ma s Vous trouverez des bo tes de tomates en d s avec piments verts dans le rayon des produits mexicains ou internationaux de l picerie Hummus aux haricots...

Page 25: ...omage r p aux jalapenos en d s dans le bol M langer vitesse lev e pendant environ 30 secondes pour obtenir une consistance lisse 4 Verser le m lange dans un plat allant au four et lisser Garnir avec l...

Page 26: ...du service Conserver son re u de caisse comme preuve de la date d achat Visiter notre site web au www prodprotect com blackanddecker ou composer sans frais le 1 800 465 6070 pour obtenir des renseigne...

Page 27: ...27...

Page 28: ...of The Black Decker Corporation used under license All rights reserved BLACK DECKER et les logos et noms de produits BLACK DECKER sont des marques de commerce de The Black Decker Corporation utilis es...

Reviews: