background image

E

N

G

L

IS

H

ENGLISH

7

8

10

9

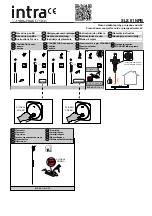
7  PULL-OUT HOSE CONNECTION

From underneath sink, push Quick Connect Housing (7A), located on the end 

of the Pull-out Hose (7B), fi rmly upward onto the receiving Tube (7C), until 

unable to push any further.  Pull down on the quick connect housing (7A).  If 

the housing and the Inner Collet (7D) separate slightly but do not pull off the 

receiving Tube (7C), quick connect is secure.

8  WEIGHT ATTACHMENT

Your faucet includes a Weight (8A) which is not required, but will help to retract 

the hose during pull-out operation.  Attach Weight (8A) to the Hose (8B) using 

Spring Clip (8C).  Position Weight (8A) at approximately the lowest point on 

the Hose (8B).

9  WATER SUPPLY CONNECTIONS

Connect water Supply Lines (9A) to Faucet Inlets (9B). Hot water supply 

lines go into left inlet. Cold water supply lines go into right inlet. (Supply lines 

are not included). Please follow manufacturer’s instructions when installing 

suppy lines.

10  POP-UP ROD CONNECTION

Insert Lift Rod (10A) into hole at the back of Spout (10B).  Gently, slide Lift Rod 

(10A) down the Hole in Spout Hub (10B).  Slightly bend the Receiving Tube 

(10C) to allow room for Lift Rod (10A).

3

ENGLISH

7B

7A

7C

7C

7B

7A

7D

7A

8A

8C

8B

10A

10B

10C

10A

HOT

COLD

9A

9B

9B

9A

Summary of Contents for Price Pfister Catalina 548 Series

Page 1: ...cto es el recurso exclusivo Para todo recurso con respecto a esta garantía Price Pfister deberá ser notificado con una descripción del problema Para notificar a Price Pfister y recibir ayuda o servicio bajo esta garantía el comprador original puede 1 llamar al 1 800 Pfaucet 1 800 732 8238 para hablar con un representante de servicio al cliente que lo pueda ayudar o 2 escribir al departamento de se...

Page 2: ...aucet from the sink and clean the sink surface thoroughly 3 TOOLS RECOMMENDED PTFE plumber s tape or thread sealant Plumber s putty Slotted screwdriver Philips head screwdriver Pliers Adjustable wrench Flashlight Cloth Your installation may require new supply lines and or shut off valves or other additional tools 4 CHECKING THE CONTENTS OF THE BOX Upon opening the box check to ensure that all of t...

Page 3: ... during pull out operation Attach Weight 8A to the Hose 8B using Spring Clip 8C Position Weight 8A at approximately the lowest point on the Hose 8B 9 WATER SUPPLY CONNECTIONS Connect water Supply Lines 9A to Faucet Inlets 9B Hot water supply lines go into left inlet Cold water supply lines go into right inlet Supply lines are not included Please follow manufacturer s instructions when installing s...

Page 4: ...n the Faucet Spout 14B To return to aeration mode rotate the Sprayhead in a counterclockwise direction 15 PULL OUT OPERATION This faucet features a pull out operation to spay water in any direction Pull the Sprayhead 15A down and forward to retract the Hose 15B from the Spout 15C DRAIN BODY INSTALLATION FAUCET FUNCTION 13 VALVE FUNCTION COLD valve close counterclockwise open clockwise HOT valve cl...

Page 5: ...r supplies and relieve pressure before working on your faucet Remove handles See step 18 unscrew Cartridge Assembly 19A and inspect Replace parts as necessary Reassemble parts by reversing steps 1 800 PFAUCET 1 800 732 8238 For Toll Free Pfaucet information call 1 800 PFAUCET 1 800 732 8238 or visit www pricepfister com Installation Support Care and Warranty Information CAUTION Maintenance DISASSE...

Page 6: ...MENDADAS Cinta para plomería PTFE o sello para roscas Masilla para plomería Destornillador recto Destornillador en cruz Tenazas Llave ajustable Linterna de mano Paño Para hacer la instalación podría ser necesario contar con nuevas tuberías de suministro válvulas de cierre o herramientas adicionales 4 REVISIÓN DEL CONTENIDO DE LA CAJA Luego de abrir la caja verifique que todos los artículos siguien...

Page 7: ...de resorte 8C Coloque la pesa 8A aproximadamente en el punto más bajo de la manguera 8B 9 CONEXIONES DE SUMINISTRO DE AGUA Conecte las líneas del suministro de agua 9A a las entradas del grifo 9B Las líneas de suministro de agua caliente se instalan en la entradada izqueierda Las líneas de suministro de agua fría se instalan en la entrada derecha Las líneas de suministro no son incluidas Siga por ...

Page 8: ...uede girarse alrededor cuerpo del grifo en cualquier dirección Nota Debe purgar el grifo antes de abrir las válvulas consulte al paso 17 14 FUNCIONAMIENTO DEL ROCÍO Este grifo de extracción cuenta con dos modos de funcionamiento modo de aereación y modo de rocío Para hacer funcionar el modo de rocío gire el cabezal para rocío 14A en el sentido de las agujas del reloj mientras el cabezal para rocío...

Page 9: ...grifo cierre los suministros de agua y elimine la presión Quite las manijas vea el paso 18 Desenrosque el conjunto del cartucho 19A e inspecciónelo Reemplace las piezas según sea necesario Vuelva a ensamblar las piezas efectuando los pasos al revés PRECAUCIÓN Mantenimiento CÓMO DESARMAR 1 El almacén donde compró su grifo podría tener repuestos disponibles 2 Cuando no hay repuestos disponibles sírv...

Page 10: ...poser de l évier et nettoyer soigneusement la surface de ce dernier 3 OUTILLAGE RECOMMANDÉ Ruban PTFE de plombier ou mastic d étanchéité de filetage Mastic de plombier Tournevis plat Tournevis cruciforme Pince Clé à molette Lampe de poche Chiffon L installation peut exiger des tuyaux d arrivée et ou des vannes d arrêt neufs ou d autres outils 4 VÉRIFICATION DU CONTENU DE LA BOÎTE Lors de l ouvertu...

Page 11: ... élastique 8C Positionner la masse 8A approximativement au point le plus bas du flexible 8B 9 RACCORDEMENTS DES ARRIVÉES D EAU Reliez l arrivée d eau 9A aux entrées du robinet 9B Les canalisations d alimentation d eau chavole entrent á l admission gauche Les canalisations d alimentation d eau froide entrent á l admission droite Tuyaux d arrivée d eau ne sont pas incluses Veuillez suivre les instru...

Page 12: ...te quel sens autour du corps du mitigeur Note Il doit purger le robinet avant d ouvrir les valves consultazau au pas 17 14 FONCTIONNEMENT DU MÉLANGEUR Le mélangeur à douchette incorporée peut fonctionner dans deux modes mode aérationetmodepulvérisation Pourpasserenmodepulvérisation tournerladouchette 14A dans le sens horaire lorsqu elle est en place dans le bec 14B du mélangeur Pour revenir en mod...

Page 13: ...er Remplacer les pièces qui doivent l être Remonter les pièces dans l ordre inverse du démontage ATTENTION entretien DÉMONTAGE 1 Il se peut que les pièces de rechange soient disponibles dans le magasin dans lequel le mélangeur a été acheté 2 Lorsque des pièces de rechange ne sont pas disponibles bien vouloir contacter le département du service après vente de Price Pfister par courrier ou par télép...

Page 14: ...signe La Fini La Lettre Designe La Fini A Polished Chrome Cromo Pulido Chrome Poli J Brushed Nickel PVD Niquel Cepillado PVD Nickel Brosse PVD 910 025 COLD FRÍO FROID 941 047 910 024 HOT CALIENTE CHAUD 941 044 971 702 940 049 950 098 940 103 951 063 931 960 950 097 941 049 Contains ASME A112 18 3 Certified check valves Contiene válvulas de chequeo certificadas por ASME A112 18 3 Contient des valve...

Reviews: