background image

6

• Place the tip of the Lift and Reach Head into the steam head (5) and push downward.

Ensure it is locked into place by gently pulling upwards on the handle.

NOTICE:


Do not store with a wet pad as this can damage your floor. Always place the

steam mop with the handle (4) in the upright position when stationary and make sure the 

steam mop is turned off when not in use.

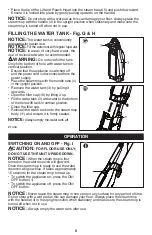
FILLING THE WATER TANK - Fig. G & H

NOTICE:

 The water tank is conveniently

removable for easier use.

NOTICE:

 Fill the water tank with regular tap water.

NOTICE:

 In areas of very hard water, the

use of de-ionized water is recommended.

WARNING:


Do not overfill the tank. 

Only fill to bottom of hole with water tank in 

vertical position.

Ensure that the appliance is switched off

and the power cord is disconnected from the

power supply.

Place the steam mop with the handle tube (4)

in the upright position.

Remove the water tank (3) by pulling it

upwards.

• Open the filler cap (18) by lifting it up.

Fill the water tank (3) with water to the bottom

of the hole with tank in vertical position.

Close the filler cap.

Reinstall the water tank onto the steam mop

body (11) and ensure it is firmly seated.

NOTICE: 

Always empty the water tank aft

er use.

OPERATION

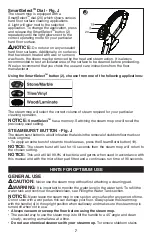
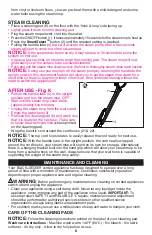
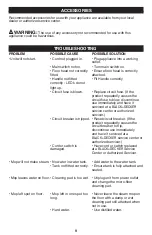
SWITCHING ON AND OFF - Fig. I

CAUTION: 

FOR FLOOR USE ONLY;

DO NOT USE THE UNIT UPSIDE DOWN.

NOTICE: 

When the steam mop is first

turned on the water reservoir will glow red. 

Once the steam mop is ready to use the water 

reservoir will glow blue. It takes approximately 

15 seconds for the steam mop to heat up.

• To switch the appliance on, press the ON/

OFF button (1).

• To switch the appliance off, press the ON/

OFF button.

NOTICE:


Never leave the steam mop in one spot on any surface for any period of time.

Do not store with a wet pad as this can damage your floor. Always place the steam mop 

with the handle (4) in the upright position when stationary and make sure the steam mop is 

turned off when not in use.

NOTICE:


Always empty the water tank after use.

G

I

H

Summary of Contents for BDH1765SM

Page 1: ...INSTRUCTION MANUAL STEAM MOP Thank you for choosing BLACK DECKER PLEASE READ BEFORE RETURNING THIS PRODUCT FOR ANY REASON SAVE THIS MANUAL FOR FUTURE REFERENCE CATALOG NUMBER BDH1765SM ...

Page 2: ... before using the appliance The intended use is described in this manual The use of any accessory or attachment or the performance of any operation with this appliance other than those recommended in this instruction manual may present a risk of personal injury Retain this manual for future reference USING YOUR APPLIANCE Do not direct steam at people animals electrical appliances or electrical out...

Page 3: ...pliance during use Care should be taken when using this appliance DO NOT touch any parts which may become hot during use AFTER USE Unplug the appliance and allow to cool down before cleaning When not in use the appliance should be stored in a dry place Do not store with wet pad Children should not have access to stored appliances INSPECTION AND REPAIRS Unplug the appliance and allow to cool down b...

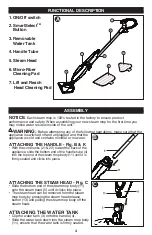
Page 4: ...liance is cold and contains minimal or no water ATTACHING THE HANDLE Fig B K With the cord hooks 21 22 toward the back of the appliance slide the bottom end of the handle tube 4 into the top end of the steam mop body 11 until it is firmly seated and clicks into place ATTACHING THE STEAM HEAD Fig C Slide the bottom end of the steam mop body 11 onto the steam head 5 until it clicks into place The st...

Page 5: ...e handle 4 in the upright position when stationary and make sure the steam mop is turned off when not in use THE LIFT AND REACH HEAD Fig F This Steam Mop incorporates a built in Lift and Reach Head which enables you to access tight corners and narrow gaps CAUTION Always wear suitable shoes when accessing the Lift and Reach Head 16 on your steam mop Do not wear slippers or open toed footwear TO ACC...

Page 6: ...ater tank 3 by pulling it upwards Open the filler cap 18 by lifting it up Fill the water tank 3 with water to the bottom of the hole with tank in vertical position Close the filler cap Reinstall the water tank onto the steam mop body 11 and ensure it is firmly seated NOTICE Always empty the water tank aft er use OPERATION SWITCHING ON AND OFF Fig I CAUTION FOR FLOOR USE ONLY DO NOT USE THE UNIT UP...

Page 7: ...rst button is a built in feature that aids in the removal of stubborn floor marks or stuck on grime To apply an extra burst of steam to trouble areas press the Steam Burst button 19 NOTICE The steam burst will last for 10 seconds then the steam mop will return to the chosen setting NOTICE This unit will kill 99 9 of bacteria and germs when used in accordance with this manual and with the micro fib...

Page 8: ... so that it is ready for the next use Take care to follow the wash care instructions printed on the cleaning pad Wrap the electric cord around the cord hooks 21 22 NOTICE The top cord hook rotates to easily release the cord ready for next use NOTICE With the handle tube in the upright position the cord neatly wrapped around the cord hooks your steam mop will stand on its own for storage Alternativ...

Page 9: ...immediately and have it serviced at a BLACK DECKER service center or authorized servicer Circuit breaker is tripped Reset circuit breaker If the product repeatedly causes the circuit breaker to trip discontinue use immediately and have it serviced at a BLACK DECKER service center or authorized servicer Cord or switch is Have cord or switch replaced damaged at a BLACK DECKER Service Center or Autho...

Reviews: