background image

How to Use

This appliance is for household use only. It is specially designed with a 2-tank™ system. 
Tank 1 is for use with water only, for steam. Tank 2 is for use with Downy Wrinkle
Releaser® liquid for spray_to smooth away the wrinkles as you iron. (The iron does not
require distilled or treated water for steam or spray.)

GETTING STARTED
Important:

For warranty verification, do not remove line cord sticker.

Remove any labels, stickers or tags attached to the body or soleplate of the iron. Note: Use
ordinary tap water for ironing. Do not use water processed through a home softening
system.

Important:

For optimum performance, let the iron stand for 90 seconds before beginning 

to iron.

FOR STEAM IRONING 
Filling Tank 1 with Water

1. Open the water-fill cover (A).
2. Tilt the iron and using a clean measuring cup, pour water into

opening until the water reaches the MAX level mark on the
water tank (B). Do not overfill.

Important: 

• Do not pour any Downy Wrinkle Releaser® liquid, into 

Tank 1 as it will damage your iron and potentially stain 
your clothes once the fluid is heated.

• If you accidentally pour this liquid into Tank 1, empty the 

tank (refer to Empting Water Tank instructions) then refill the
tank with regular water. 

• Use the self-cleaning feature; see Self-Cleaning instructions.
3. Close the water-fill cover.
4. Plug in the iron. The temperature-ready light glows green (C).

Tip:

If unsure of a garment’s fiber, test a small area (on an inside

seam or hem) before ironing.
5. Move the selector to the desired steam level (D).
6. Turn the fabric-select dial to appropriate setting (between 4 and

6) for your fabric (E). See fabric guide on the heel rest and read
garment’s label to help you determine fabric type.

• The temperature-ready light glows green until it reaches the

appropriate temperature.

• It then glows on and off during ironing. This is normal.
7. When finished ironing, turn the fabric-select dial to lowest heat

setting, move the dry/steam selector to      and unplug the iron.

FOR DRY IRONING 

Make sure selector is set to 

. If you want to empty the water,

see instructions under “Emptying Tank 1 after Ironing – Optional”.
1. Turn the fabric-select dial to the appropriate setting for your

fabric. See fabric guide on the heel rest and read garment’s label
to help you determine fabric type.

• The temperature-ready light glows green until it reaches the

appropriate temperature. 

• It then glows on and off during ironing. This is normal.

3. When finished, unplug the iron and place it on its heel rest.

4

3

Product may vary slightly from what is illustrated.

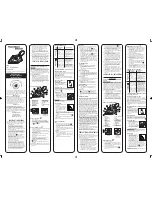
1. Spray nozzle
2. Tank 1 for water only
3. Tank 1 water-fill cover
4. Dry/steam and self-cleaning selector
5. Dual tank spray button 
6. Surge-of-steam button
7. Temperature-ready and auto shutoff light
8. Comfort Grip™ handle
9. 360° pivoting cord

10. Heel rest

11. Fabric guide

12. Fabric-select dial
13. Tank 2 for Downy Wrinkle Releaser® liquid or water
14. Tank 2 Downy Wrinkle Releaser® liquid or water-fill cap 
15. Soleplate


A

B

C

D

E

Self-cleaning

Dry

Steam

for use with Tank 1

Spray

for use with Tank 2

Symbols

AS182Pub1000002000R1  8/3/05  2:29 PM  Page 4

Summary of Contents for AS182

Page 1: ...RVER CE GUIDE D ENTRETIEN ET D UTILISATION Professional 2 Tank Iron Plancha Fer Model Modelo Modèle AS182 USA Canada 1 800 231 9786 Mexico 01 800 714 2503 www blackanddecker com Accessories Parts USA Canada 1 800 738 0245 Accesorios Partes EE UU Canadá Accessoires Pièces É U Canada AS182Pub1000002000R1 8 3 05 2 29 PM Page 1 ...

Page 2: ...EASER LIQUID INSTRUCTIONS 1 The physiological effects of the operation of the Downy Wrinkle Releaser liquid beneficial or otherwise have not been investigated by Underwriters Laboratories Inc 2 First aid measures a Eye Contact Immediately flush eyes with plenty of water for at least 15 minutes If irritation occurs or persists have eyes examined or treated by medical personnel b Skin Contact Remove...

Page 3: ... or hem before ironing 5 Move the selector to the desired steam level D 6 Turn the fabric select dial to appropriate setting between 4 and 6 for your fabric E See fabric guide on the heel rest and read garment s label to help you determine fabric type The temperature ready light glows green until it reaches the appropriate temperature It then glows on and off during ironing This is normal 7 When f...

Page 4: ... serviceable parts Refer service to qualified service personnel CLEANING OUTSIDE SURFACES 1 Make sure iron is unplugged and has cooled completely 2 Wipe the soleplate and outer surfaces with a soft cloth dampened with water and a mild household detergent Never use abrasives heavy duty cleansers vinegar or scouring pads that may scratch or discolor the iron 3 After cleaning steam iron over an old c...

Page 5: ...RELEASER LIQUID 1 Los efectos fisiológicos debido al uso del suavizador de arrugas Downy así fueren estos beneficiosos o de otra manera no han sido investigados por Underwriters Laboratories Inc 2 Medidas de primeros auxilios a Contacto con la vista Enjuagar los ojos inmediatamente con suficiente agua por un mínimo de 15 minutos Si persiste la irritación acudir a personal médico para un examen o t...

Page 6: ... automática 3 Cierre la tapa del orificio de llenado 4 Enchufe la plancha La luz indicadora de temperatura se ilumina C Consejo Si no conoce la fibra del tejido a planchar antes de planchar la prenda ensaye sobre una superficie pequeña costura o ruedo interior 5 Ajuste el selector de vapor al nivel deseado D 6 Gire el selector de tejidos al nivel apropiado según el tejido a planchar entre el 4 y e...

Page 7: ...rior 2 Utilice una taza de medir limpia y llene el tanque 2 con agua K 3 Presione el botón para rociar la prenda al planchar 4 Si la emisión de rocío es débil bombee el botón unas cuantas veces COMO VACIAR EL TANQUE 1 DESPUÉS DE PLANCHAR OPCIONAL 1 Gire el selector de tejidos a la posición Min Desconecte la plancha y permita que se enfríe 2 Abra la tapa del orificio de llenado 3 Vacíe el tanque su...

Page 8: ... ranger Ne pas utiliser le fer si le cordon est endommagé si le fer est tombé ou a été endommagé Afin d éviter les risques de chocs électriques ne pas démonter le fer En confier l entretien et la réparation au personnel d un centre d entretien autorisé Ou composer le numéro sans frais approprié indiqué sur la page couverture du présent guide Assemblage incorrect présente des risques de chocs élect...

Page 9: ...ée une lame plus large que l autre Ce genre de fiche n entre que d une façon dans une prise polarisée afin de minimiser les risques de secousses électriques Lorsqu on ne peut insérer la fiche à fond dans la prise il faut tenter de le faire après avoir inversé les lames de côté Si la fiche n entre toujours pas dans la prise il faut communiquer avec un électricien certifié Il ne faut pas modifier la...

Page 10: ...l 7 À la fin du repassage remettre le cadran au réglage minimal et déplacer le sélecteur à la position Puis débrancher le fer 18 17 REPASSAGE À SEC S assurer que le sélecteur se trouve à la position On peut alors vider le fer voir la rubrique sur le vidage facultatif du réservoir 1 après le repassage 1 Régler le cadran au réglage approprié au tissu Consulter le guide pour les tissus sur le talon d...

Page 11: ...le fer reposer sur son talon d appui Le laisser réchauffer jusqu à ce que le témoin d arrêt automatique s éteigne et se rallume 4 Régler le cadran à la position minimale Min débrancher le fer et le placer au dessus d un évier avec la semelle vers le bas 5 Déplacer le sélecteur à la position d autonettoyage Prendre garde car de l eau chaude et de la vapeur continuent de sortir des évents M Mainteni...

Page 12: ...pt as proof of the date of sale Check our on line service site at www prodprotect com applica or call our toll free number 1 800 231 9786 for general warranty service If you need parts or accessories please call 1 800 738 0245 What does your warranty not cover Damage from commercial use Damage from misuse abuse or neglect Products that have been modified in any way Products used or serviced outsid...

Page 13: ...u remplacement du produit Des dommages indirects il faut toutefois prendre note que certains états ne permettent pas l exclusion ni la limitation des dommages indirects Quelles lois régissent la garantie Les modalités de la présente garantie donnent des droits légaux spécifiques L utilisateur peut également se prévaloir d autres droits selon l état ou la province qu il habite NECESITA AYUDA Para s...

Page 14: ...olombia Tel 57 1 610 1604 533 4680 Costa Rica Aplicaciones Electromecanicas S A Calle 26 Bis y Ave 3 San Jose Costa Rica Tel 506 257 5716 223 0136 Ecuador Castelcorp Km 2 1 2 Avenida Juan T Marengo junto Dicentro Guayaquil Ecuador Tel 5934 224 7878 224 1767 El Salvador Sedeblack Calle A San Antonio Abad y Av Lisboa Edif Lisboa Local 21 San Salvador El Salvador Tel 503 274 1179 274 0279 Guatemala M...

Page 15: ...on Towson Maryland E U Marque de commerce déposée de la société The Black Decker Corporation Towson Maryland É U Downy and its logos are trademarks of The Procter Gamble Company used under license by Changing Paradigms Downy y todos sus logotipos son marcas comerciales de la sociedad The Procter Gamble Company empleados bajo autorización de Changing Paradigms Downy et ses logos sont des marques de...

Reviews: