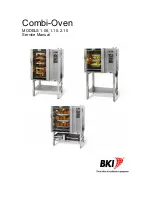


Combi-Oven
Installation
13
With (22), you enter a start text for each program. However, this is usually not necessary, as the
showdisplay is ready for use on delivery.
If you have deleted or ruined a program, press (9) and select the program you have just ruined and then
to enter the start text again.
Note that there should be at least 20 characters in the program on the showdisplay in order for the
start text to be transferred.
Note!
When the showdisplay is active, the printer cannot be used.
Printer
Press (17), until the display shows 0. The printer output is thus activated.
Press (18) to enter the start-up menu.
Press (20) for 5 seconds. The time display now shows PR*nt, “Yes” in the temperature display and “No” in
the display for core temperature probe.
Press (6).
The printer output is now activated.
To switch off the printer output, press (9)
.
Note!
When the showdisplay is active, the printer cannot be used.
U5: Selecting Phase Sequence Test And Reversing
Phase sequence test
Phase sequence test is usually always active.
This alarm can be deactivated in the case of installation for demonstration purposes in order to avoid
error code 15.
The temperature display shows either ON or OFF. ON and OFF are selected by pressing (6).
Reversing
In the reversing function, it is possible to set the time before reversing as well as the time of the interval.
Change between 0, 1 and 2 by pressing (17).
0 = “Reversing” is switched off and the time is not shown (standard)
1 = “Reversing” is switched on and error code 5 “Fan too hot” works reversely because the thermo-switch
of the motor used is open and closes when the temperature is too high.
2 = “Reversing” is switched off and error code 5 “Fan too hot” works as usual, i.e. the thermo-switch is
closed and opens when the temperature is too high.
The time during which the fan is running is shown in the time display (1) and is set between 10 and 99
with the arrow keys (4, 11). Each step corresponds to 2 seconds, it is therefore possible to set the time of
the intervals between 20 and 198 seconds (standard is 50 = 100 seconds). The time of the interval is
shown in the core temperature display (8) and is set with the core temperature key (9) and the core
temperature ON/OFF key (10).
The time can be set between 1 and 30 seconds (standard = 10 seconds).
Summary of Contents for 1.06
Page 1: ...Combi Oven MODELS 1 06 1 10 2 10 Service Manual ...
Page 30: ...Combi Oven Replacement Parts 28 Drip Tray ...
Page 32: ...Combi Oven Replacement Parts 30 Front ...
Page 34: ...Combi Oven Replacement Parts 32 Heating Elements Model 1 06 ...
Page 36: ...Combi Oven Replacement Parts 34 Heating Elements Model 1 10 ...
Page 38: ...Combi Oven Replacement Parts 36 Heating Elements Model 2 10 ...
Page 40: ...Combi Oven Replacement Parts 38 Motor ...
Page 42: ...Combi Oven Replacement Parts 40 Solenoid Valve ...
Page 44: ...Combi Oven Replacement Parts 42 Condensation Drain ...
Page 46: ...Combi Oven Replacement Parts 44 Exhaust Vent ...
Page 48: ...Combi Oven Replacement Parts 46 Computer Controller ...
Page 50: ...Combi Oven Replacement Parts 48 Wiring Harness ...
Page 52: ...Combi Oven Replacement Parts 50 Interior Light ...
Page 54: ...Combi Oven Replacement Parts 52 Hand Shower and Probe ...
Page 59: ...Combi Oven Notes 57 Notes ...