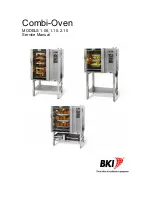
Combi-Oven
Installation
11
Start-Up Window
When the computer is switched on, it checks all control lamps and segments to make sure that they work.
Figures appear in the displays:
•
The time display shows how U1 is set.
•
The temperature display shows the current EPROM version.
•
The display for core temperature shows whether the computer includes CombiClean (0 = without
CC, 1= with CC).
Accessing the Set-Up Mode
Select the set-up mode by pressing key (4) and key (2) simultaneously for 5 sec. U1 appears in the time
display. Shift to the next setting (max. U5) by pressing key (2). The set-up mode can be
interrupted/closed any time by pressing key (18).
U1: Selecting Automatic Restart, Oven Model And Voltage
Automatic restart
1 or 0 is shown in the time display (1).
0 = The oven will not restart a program that has been interrupted because of power cut.
1 = The oven will restart a program that has been interrupted because of power cut.
Shift by pressing key (3).
Oven model
A digit between 1 and 6 is shown in the program display (17).
1 = CM, 2 = CV, 3 = BM, 4 = ST, 5=S, 6=VS
Shift by pressing (17).
Voltage
1 or 2 is shown in the core temperature display (8).
1 = Voltage with 0
2 = Voltage without 0
Shift by pressing the core temperature key (9).
U2: Selecting Interior Light
When the program display (17) shows 5, the interior light is automatically switched off after 5 min.
When the program display (17) shows 0, the interior light will shine continuously.
When the program display (17) shows 6, the interior light is automatically switched off after 5 min. In
addition, the light in the oven door is switched off after 3 sec. when the door is opened.
When the program display (17) shows 1, the oven light will shine continuously. In addition, the light in the
oven door is turned off after 3 sec. when the door is opened.
Settings 1 and 6 are very useful on ovens with oven light in the door in order to avoid blinding while the
door is open.
Shift by pressing (17).
Summary of Contents for 1.06
Page 1: ...Combi Oven MODELS 1 06 1 10 2 10 Service Manual ...
Page 30: ...Combi Oven Replacement Parts 28 Drip Tray ...
Page 32: ...Combi Oven Replacement Parts 30 Front ...
Page 34: ...Combi Oven Replacement Parts 32 Heating Elements Model 1 06 ...
Page 36: ...Combi Oven Replacement Parts 34 Heating Elements Model 1 10 ...
Page 38: ...Combi Oven Replacement Parts 36 Heating Elements Model 2 10 ...
Page 40: ...Combi Oven Replacement Parts 38 Motor ...
Page 42: ...Combi Oven Replacement Parts 40 Solenoid Valve ...
Page 44: ...Combi Oven Replacement Parts 42 Condensation Drain ...
Page 46: ...Combi Oven Replacement Parts 44 Exhaust Vent ...
Page 48: ...Combi Oven Replacement Parts 46 Computer Controller ...
Page 50: ...Combi Oven Replacement Parts 48 Wiring Harness ...
Page 52: ...Combi Oven Replacement Parts 50 Interior Light ...
Page 54: ...Combi Oven Replacement Parts 52 Hand Shower and Probe ...
Page 59: ...Combi Oven Notes 57 Notes ...


