background image

22

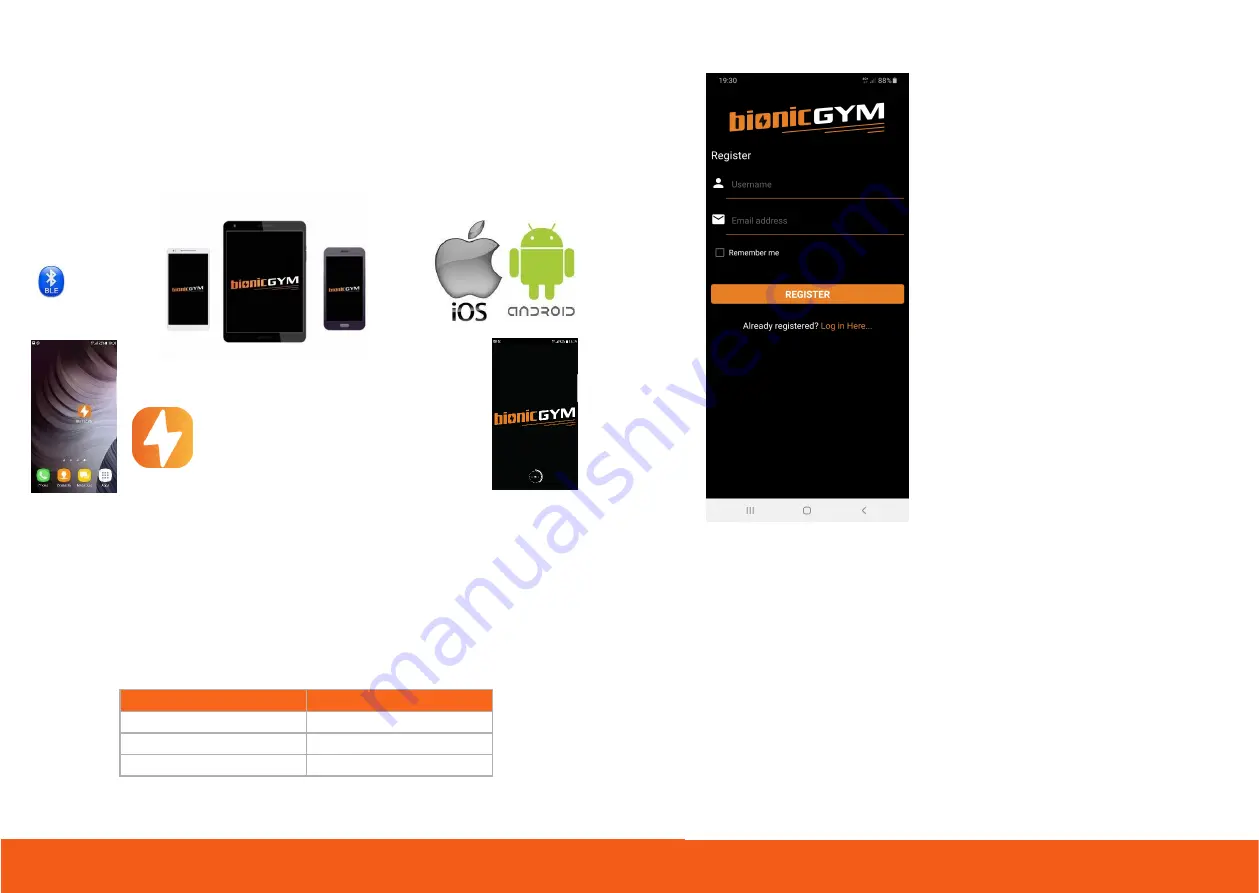
9. Download and install the App

Using your smartphone /pad find “BionicGym” in the Apple Store / Play Store.  There is 

ONE app for the Standard and the PRO-HIIT versions.  You may have received an email 

from us with the  App links and the upgrade code if you ordered the PRO-HIIT.  

The App uses BLE – Bluetooth Low Energy to communicate with the unit. The App will be 

updated occasionally.  The screens may vary from what is printed here. 

Download and install the App. 

Click on the BionicGym icon to open it. 

App Compatibility


The  App  is  compatible  with  modern  iOS  /’Apple’  and  Android  /’google’  smart phones 

[less than 4 years old and many older models, see below].  

If you have an old phone / 

pad you may need to update your software/operating system.  The pad/phone 

must  be  able  to  support  Bluetooth  Low  Energy  (BLE).   

Typically, these  and 

more recent operating systems will be fine:


iOS / Apple


Android / Google


iOS 8 

Lollipop 5.0 – 5.1.1 

iOS 9 

Marshmallow 6.0 – 6.01 

iOS 10+ 

Nougat 7.0 – 7.1.1 + 


23

Registering the device 

To  register  you  will  need  your  phone/pad 

connected to the internet. 

You will be asked to enter your name and 

email.   

Select "Remember me" option so you will not 

have to login every time.

If  you  ordered  BionicGym  PRO-HIIT  you 

will  enter  the  code  in  the  main  Settings 

menu.  The code will be in the post-purchase 

email  that  you  received.    If  you  cannot  find 

this  check  your  Spam  folder  and  contact 

Support via the website. 

You can purchase Upgrade codes to PRO-HIIT 

from www.BionicGym.com too. 

OPT-Ins 

Once  registered  you’ll  then  be  brought 

to  an  Opt-In  screen.    You’ll  need  to 

tick  you  have  read  the Precautions  and 

accept the Terms and Conditions. 

You can now watch the in-app 

videos

!  

Short

 videos on how to set up, safety messages 

for exercise, what to expect [First Time Use] and top Tips in getting the most benefits 

from your workouts.


These  can  be  accessed  in  several  places  including  the  Devices  page  and  the  FAQ  & 

Tutorials page. 

22

23

Summary of Contents for BG-300-02

Page 1: ...This page is not for printing USER MANUAL Draft v 0 87_LC_EA_MB_HC_25 01 2019 User Manual Rev03...

Page 2: ...ce 10 6 In the BionicGym box 11 7 Getting Started 14 8 Setup and First Use 15 9 Download and install the App 22 10 Auto Stop 29 11 Workout Sessions 29 12 Standard Workout Programs 29 13 Zones 31 14 Bi...

Page 3: ...uccess Sincerely Dr Louis Crowe Inventor CEO 2 3 3 2 Overview Exercise happily safely and comfortably Congratulations You are one of the first owners of BionicGym a wearable exercise machine EXERCISE...

Page 4: ...or Stop a session via the app In an emergency you could also remove the control unit from the pocket Use the app to unpause or double press the orange button 4 5 5 3 Tips to get the most out of Bioni...

Page 5: ...including clots DVTs You should ask your doctor if it is safe for you to exercise any exercise including BionicGym especially if you are injured over 40 smoke are obese or diabetic have heart disease...

Page 6: ...inery or during any activity in which involuntary muscle contractions may put the user at undue risk of injury 8 9 Adverse Reactions Skin irritation and burns beneath the electrodes have been reported...

Page 7: ...th the European Space Agency I ve suffered for and been elated with the science Please visit our website and read the peer reviewed scientific publications 10 11 6 In the BionicGym box DEVICE ACCESSOR...

Page 8: ...ps to the end of the control unit with magnets If not pre attached the charger plugs into the bottom of the cradle Charger Adaptor The charger is supplied with an adaptor for your country Align and tw...

Page 9: ...ully charged 14 15 8 Setup and First Use Have you 1 Reviewed the safety information And checked with your Doctor if you have any doubts or medical issues 2 Watch the training videos first time use vid...

Page 10: ...on the leg FRONT VIEW ELECTRODES IN THE MID LINE 16 17 REAR VIEW ELECTRODES ALSO MID LINE This is where the electrodes should end up MID LINE You will stick them onto the wraps so that they will be c...

Page 11: ...t the wrap on and check the electrode position s Reposition the electrode s if required Note you can also stretch the wrap as you put it on to make small adjustments For larger legs both small and lar...

Page 12: ...n facing out 21 The wire auxiliary cable connects the right and left wraps Push it in firmly into the sockets on both side The jack sockets are located in pockets You can keep the wire tidy by running...

Page 13: ...iOS Apple Android Google iOS 8 Lollipop 5 0 5 1 1 iOS 9 Marshmallow 6 0 6 01 iOS 10 Nougat 7 0 7 1 1 23 Registering the device To register you will need your phone pad connected to the internet You w...

Page 14: ...d itself OFF if it was not paired within a couple of minutes Make sure the unit is ON LED is flashes Blue if trying to pair to the app and CHARGED the LED may be flashing Red or not switched on if the...

Page 15: ...r resume it on the App The circle changes from white to orange as you progress through the session If the unit loses connection with the App it may need to reconnect follow the app instructions Even w...

Page 16: ...ess you interact with the App your phone device every few minutes Note this is not available in all Apps 11 Workout Sessions These may be updated from time to time From June 2021 programs will be desc...

Page 17: ...n out in public places You may not be able to reach the same intensities as the other programs and may find it more fatiguing For most the measured cardio aerobic effect will be lower than our standar...

Page 18: ...who want to train hard As with the Standard programs it is important to find which works best for you As a general rule the higher the intensity you can go on a program the better it will be for you I...

Page 19: ...before use Sometimes if you leave the wraps on for a while before starting the stimulation the gel surface dries out and you need to wet the skin before continuing If you have a small cut or blemish t...

Page 20: ...from the grid side of the electrodes Are the wraps on the legs and all the wiring firmly connected and the unit cleanly docked in the pocket Switch unit on and off Is the battery charging full If it...

Page 21: ...s not working correctly Do not use in the meantime 38 Understanding the LED Lights LED Light State Blue Flashing Bluetooth trying to pair with the app Bluetooth connection lost during workout for a pe...

Page 22: ...n objects 12 5 mm Keep the unit dry at all times Neurostimulation All electrical specifications are supplied for a load impedance from 500 to 1 000 Typical session duration per workout program 1 hour...

Page 23: ...nterference and 2 this device must accept any interference received including interference that may cause undesired operation FCC ID 2ARJQBG01 Radiated output power RF 2 4 GHz 3 mW Max Recommended Sep...

Page 24: ...aution and Precaution to note CE Mark Federal Communications Commission Manufactured By Use By Batch Number Serial Number EC Authorized Representative Temperature Range Humidity Range Type BF Applied...

Page 25: ...the BionicGym name logos etc are trademarks of Medical Currents Ltd The terms of use specify that no attempt to be made to reverse engineer or copy any aspect of the device outputs or associated app...

Page 26: ...nterest in BionicGym especially to our backers on Indiegogo that have made this possible TOP TIP Make BionicGym a habit Always use it say after lunch standing at your desk for an hour or watching your...

Page 27: ...www BionicGym com...

Reviews: