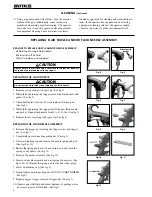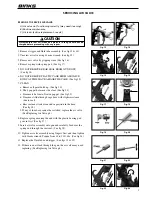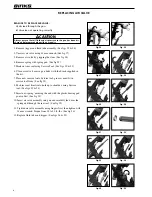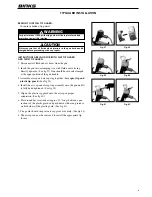
5
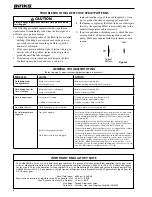
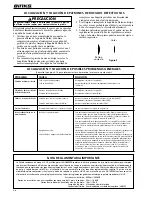
PRoBLEM
caUSE
actIon
fluttering Spray Pattern
Insufficient fluid supply.
Adjust fluid regulator or fill fluid supply
tanks.
Air in paint supply line.
Check and tighten pump siphon hose con-
nections, bleed air from paint line.
Attempting to “feather” (Partially
Cannot feather with an AA4400M gun.
trigger gun).
Striping Spray – fingers
Carbide tip partially plugged.
Clean or replace carbide tip assembly.
Irregular Pattern
Fluid builds up on carbide tip, or tip
Clean carbide tip.
partially plugged.
On defective side of pattern, air horn
Clean air horn holes with solvent and
holes are plugged.
a soft brush.
Pattern pushed to one side, same
On defective side of pattern, air horn
Clean air horn holes with solvent and
side of air cap gets dirty
holes are plugged.
a soft brush or toothpick.
SPRaY PattERn tRoUBLESHootInG
aIR-aSSISt aIRLESS SPRaY GUn MaIntEnancE anD cLEanInG
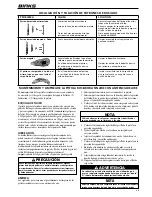
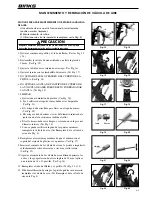
Maintenance of air-assist airless spray guns includes (1)
fluid tip wear and replacement; (2) lubrication; and (3)
cleaning of the gun.
fLUID tIP
Operating an air-assist airless spray gun with a worn fluid
tip will result in increased usage of spraying material and
therefore, HAP emissions. For example, an increase in
the diameter of a tip from 0.015 inch to 0.021 inch due to
wear can result in up to a 100 percent increase in material
consumption and cost. To prevent waste in spraying mate-
rial and non-value-adding costs, a maintenance schedule
that includes fluid tip inspection and replacement must be
established.
LUBRIcatIon
Proper lubrication is essential for optimum spray gun per-
formance. Lubrication allows the equipment to operate
easily and correctly. The spray gun should be lubricated
after each cleaning. The points that need lubrication dur-
ing the maintenance of air-assist airless spray guns
include the fluid needle packing and trigger pivot point.
Gun lube is used to lubricate the fluid needle packing and
trigger pivot point.
cLEanInG
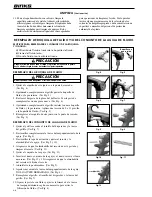
The following steps summarize the procedure for clean-
ing air-assist airless spray guns:
1. Turn off the atomizing air supply to the gun.
2. Turn off air supply to the pump and relieve fluid pres-
sure. This may be accomplished by opening the
bypass/priming valve, if so equipped.
3.
Place the siphon (suction) tube into a solvent container.
If pump is directly immersed in material, remove the
pump and immerse it in a solvent container.
4. Place the gun trigger safety switch in the locked posi-
tion.
5. Remove the fluid tip and place it in a closed solvent
container.
6. Adjust the pump air supply regulator to its lowest
level (counter-clockwise).
7. Place the gun trigger safety switch in the unlocked
position.
8. Turn on the air supply to the pump and close the
bypass/priming valve, if so equipped.
9. Slowly adjust the pump air supply regulator until the
pump begins to cycle.
10. Trigger the gun into a closed container until the fluid
runs clear.
CAutIon
never immerse the entire gun in solvent or thinners. Some
gun parts will lose their lubricative film and wear more
quickly. additionally, solvents may carry impurities
throughout the gun body and allow them to clog small air
and fluid passages.
!
notE
Use only compatible solvents that are identified as approved
for cleaning and wash-off use.
WARnInG
failure to reduce pump air supply pressure or to use a
closed container can result in material “bounce-back”.
Material “bounce back” can cause injury and damage.
!
notE
During cleaning, the gun may only be sprayed into a closed
container, never flush the gun into the air or spray booth.


