Register your product warranty online at: www.BHFitnessUSA.com
Questions regarding warranty and parts call: 636.634.2217
36
37
Register your product warranty online at: www.BHFitnessUSA.com
Questions regarding warranty and parts call: 636.634.2217
Program Profi le for the H.R.C.(55%, 75%, 90%, Tag) Program
HRC (55%)
HRC (75%)
HRC (90%)
HRC (Tag)
7. RANDOM PROGRAM
Once selected the RANDOM program will create a unique
random workout. You can set the TIME, DISTANCE and
CALORIES. Use the UP/DOWN arrow keys to adjust the values
and press ENTER to confi rm the values. (See setting up Goals/
Values on pg. 27 for more detailed instruction). Press START to
begin workout.
Item
Windows
Display Range
Default
Stored
1
SEX
MALE/ FEM
Male
Yes
2
AGE
10 - 100
30
Yes
3
WEIGHT
20 - 330(Lb)
150
Yes
10 - 150(KG)
70
4
HEIGHT
36 - 84(INCH)
70
Yes
90 – 210(CM)
175
5
TIME
0:00 - 99:59
0: 00
No
6
DISTANCE
0.0 - 99.99
0.0
No
7
CALORIES
0 - 999
0
No
8
SPEED
0.0 - 99.9
0.0
No
9
PULSE
30 - 200 bpm
0
No
10
RPM
0 - 250 rpm
0
No
11
BRAKE RESISTANCE
LEVEL
L1 - L24
L1
No
12
USER
U0-U4
U0
Yes
8. FUNCTION STATISTICS AND RANGES
CONSOLE OPERATIONS
PROGRAMS
(continued)
DOWNLOADING APPS AND PAIRING YOUR DEVICE WITH YOUR EQUIPMENT
DOWNLOADING THE SOFTWARE
Connect the Apple device with the App Store (iTunes) or your Android Device with Google Play,
search for "Pafers", then read the APP introductions and Download the APPs with bicycle/elliptical
machine functions to your device. Note: if you download an APP for a treadmill and pair it with an
Elliptical it will not work.
• The App uses bluetooth mode, so please make sure the machine and device you are using has
the optional DUALKIT installed. See BH DualKit installation on this page.
• The App contains the following functions, the user must open a 3G network or wi-fi network:
(a) Managing Data - After completing the registration in the "Pafers" App, log on to your personal
account. Now that you have registered you can record all of your workout data and save it to your
device.
(b) Some APPs need connection to Google maps in order to function correctly.
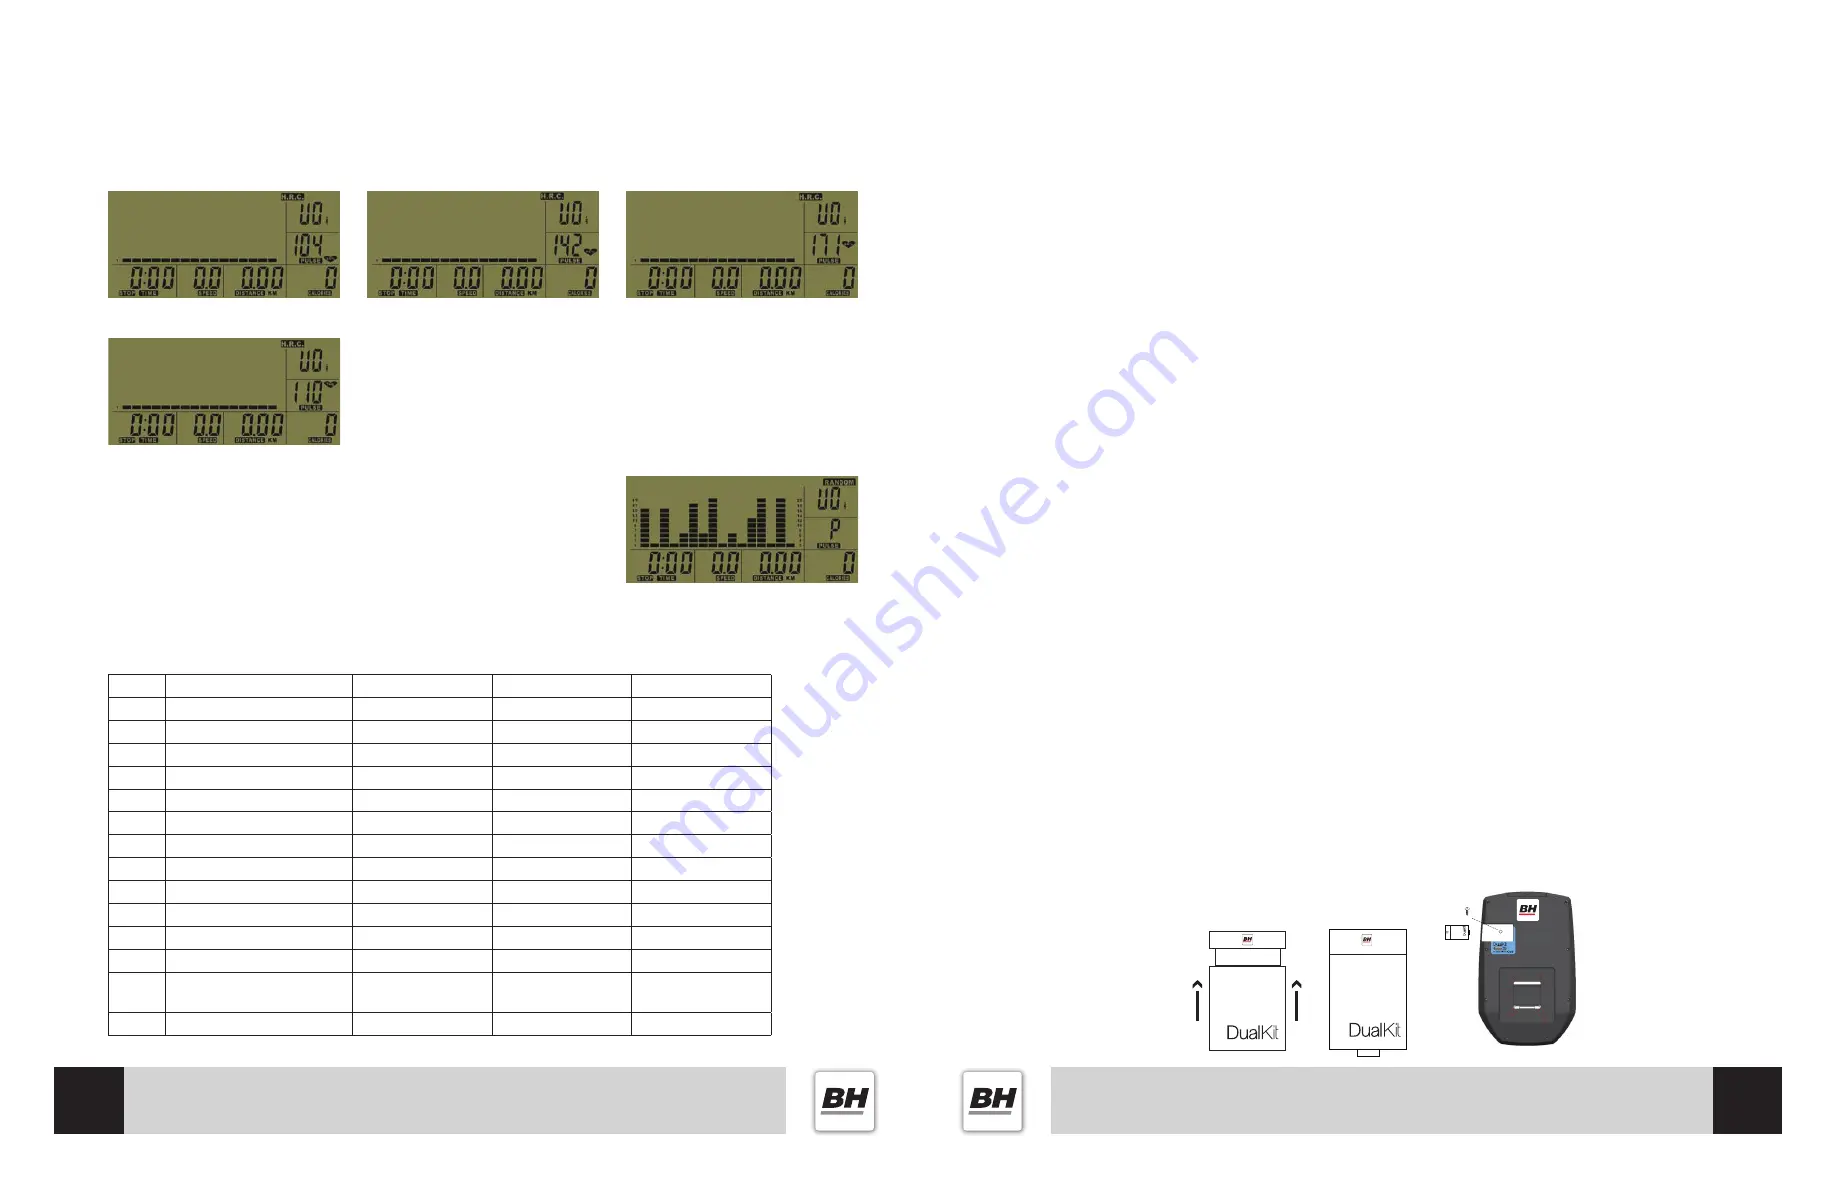
BH DUALKIT INSTALLATION
To Access iConcept compatible apps, an optional (purchased separately) BH DualKit Module is
required.
INSTALLATION:
1.) Take out the Phillips Locking Screw from the slot on the back of the console and set aside.
2.) Select the appropriate BH DualKit Module. On the front of the module, it will say the machine
type and on the back of the module it will say if it is a SMART or CLASSIC type. There are 3 types
of modules:
a.) Bike & Elliptical - Classic
b.) Treadmill - Classic
c.) BH DualKit - Works for all machine types
3.) Make sure the USB part is extended from the module.
- Push up on the sides of the DualKit Module (Fig. 1)
- The USB Port should extend out of the bottom of the module (Fig. 2)
4.) Push the module in the slot at the back of the console (Fig. 3)
5.) Once the module is plugged in, take the Phillips Locking Screw previously set aside and screw it
in behind the module to secure.
Fig. 3
Fig. 1
Fig. 2
CONSOLE OPERATIONS


