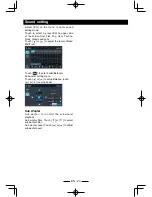
background image

EN - 10

Radio Operations

Select [Radio] on the main menu to enter 

radio mode.

1

2

3

5

4

6

7

8

9

1.  Return to home menu

2.  Preset stations list

3.  Current frequency

4.  Preset stations of current band

  Touch 1~6 to listen to preset station.

5.  Show more control buttons

6.  Tune backward

  Auto tune backward. (long press)

7.   Search and store preset stations 

automatically

8.  Tune forward

  Auto tune forward. (long press)

9.  Band switch

10

11

12

13

14

10.  Hide the second line of control buttons

11.  Save stations manually

12.  To receive local / distant radio stations

13.  Goto station by inputting frequency

14.  Enter EQ menu

Select one radio band

Touch the [   ] button to select one radio 

band among FM1, FM2, FM3, AM1 and AM2.

Manual tuning

During manual tuning, the frequency will be 

changed in steps.

Touch the [   ] or [   ] button on the 

operation bar to tune in a lower/higher station.

Auto tuning

Hold the [   ] or [   ] button on the operation 

bar for more than 2 seconds 

to seek a lower/

higher station.

To stop searching, repeat the operation above 

or press other buttons having radio functions.

Note:

When a station is received, searching stops 
and the station is played.

Auto store

Only stations with sufficient signal strength will 

be detected and stored in the memory.

To start automatic station search, touch the  

 ] button on the operation bar.

To stop auto store, press other buttons having 

radio functions.

Note:

After auto store, the previous stored stations 
will be overwritten.

Manual store

1.   When one expected radio station has 

been detected, touch [ 

 ] button on the 

operation bar to show the preset station 

store list.

2.   Touch to select an item on the list to store 

the current station in the memory.

3.  Touch top left of the screen to exit.

Summary of Contents for BT5000

Page 1: ...BT5000 2 DIN DVD MULTIMEDIA STATION BUILT IN Navigation BLUETOOTH OPERATING INSTRUCTION...

Page 2: ...liar smell Only connect the unit to a 12 volt power supply with negative grounding MUTE OK MUTE OK Never install this unit where the operation and condition for driving safely is compromised MUTE OK M...

Page 3: ...nt can be used 3 When playing a new disc New disc may have some rough spots around the inner and outer edges If such a disc is used remove these rough spots with a pencil or ball point pen etc Precaut...

Page 4: ...n Power off long press 6 Reset Load factory settings 7 AUX in Jack 8 USB Connector 9 SD Card Slot 10 Map Card Slot 11 Disc Slot Insert the disc with label side facing up 12 Microphone 13 Eject Eject d...

Page 5: ...sor up down left right Up down Manual tuning 14 Numeric keys 15 Mute the volume 16 Unit power 17 Select DVD subtitle language 18 Select DVD angle 19 Show exit home menu 20 Return to previous display 2...

Page 6: ...ition If the remote control doesn t work please change the battery 5 Use button shaped lithium battery CR2025 3V only 6 DO NOT recharge disassemble heat or expose the battery in fire 7 Insert the batt...

Page 7: ...d the unit automatically switches to CAMERA source during reverse driving The unit returns to the previous source after the vehicle has been taken out of reverse When parking brake applied 1 If PRK SW...

Page 8: ...ouch button on the panel to exit Disc Operation Insert a disc Insert a disc into the slot and the unit will change to disc mode automatically Notes Please confirm whether there is a disc in the unit b...

Page 9: ...will need to choose Music Video Photo for playback 1 2 3 4 5 6 1 Return to home menu 2 Show more control buttons 3 Previous track Fast backward long press 4 Play Pause 5 Next track Fast forward long...

Page 10: ...te If you do not select Repeat on when the entire disc or TITLE playback has finished the system will stop If no other control after 5 minutes the unit will turn into standby mode Random track playbac...

Page 11: ...will be changed in steps Touch the or button on the operation bar to tune in a lower higher station Auto tuning Hold the or button on the operation bar for more than 2 seconds to seek a lower higher...

Page 12: ...y Touch to clear all the digits SD USB Operations Using an SD Card 1 Open the card slot cap insert an SD card into the corresponding slot the unit will load the files automatically 2 To remove the car...

Page 13: ...versing Press and hold or button to fast backward forward Select Music by Artist 1 Touch Artists on the left of the screen 2 Touch an artist shown on the list 3 Select a song to play Select Music by A...

Page 14: ...ut from the unit and may be dangerous Do not use unauthorized products Using an Android mobile phone as an USB storage device If you want to use your Android mobile phone as an USB storage device 1 Co...

Page 15: ...lephone call Touch BT Phone on the main menu to enter Bluetooth Phone mode 1 If the Bluetooth function of the unit is off the unit will ask you to turn it on Default setting is on 2 Turn on Bluetooth...

Page 16: ...y and listen to the tracks through the car s speakers Please consult your nearest dealer for more information on the product of wireless audio streaming transmitter offered CAUTION Please avoid operat...

Page 17: ...ble Touch iPod on the main menu to enter iPod menu If iPod isn t on the current menu slide the bottom bar left or right to find it Pausing play 1 Touch the button on the bottom of the screen to pause...

Page 18: ...bile network to enter the Mobile network settings 5 Click the Access Point Names 6 Press MENU button on the front panel then click the New APN Internet 7 Need to setup following options Name APN MCC M...

Page 19: ...op right corner of the screen Now you can access internet Create Wi Fi Hotspot User can use the unit to create a personal Wi Fi hotspot All your other Wi Fi enabled devices will then be able to connec...

Page 20: ...IN 2 to enter rear auxiliary device Steering Wheel Control Select SWC on the main menu to enter SWC setting menu 1 Touch number button to select a SWC button 2 Select a function 3 Press each individua...

Page 21: ...als will be transferred to the phone The phone will process the data and search the relative information on local memory or the internet then transfer the result back to the unit Other Mode Google cal...

Page 22: ...d the arrangements You can select a date to view the details To add a new event touch the icon on the top right corner or touch icon on the blank area Delete Gmail Account 1 Touch icon on the main men...

Page 23: ...le Choose DVD subtitle language Disc menu Choose DVD menu language Set password To set password for rating Input 4 digit password touch to confirm touch DEL to delete a number inputted Touch X to exit...

Page 24: ...Classic and Jazz Touch or to adjust the level of Bass Mid Treb Touch to enter Fader Balance Subwoofer setting menu Touch or to setup Balance touch or to setup Fader Sub Woofer Sub woofer Turn on off t...

Page 25: ...rd through the installation hole into the engine compartment and connect to the car battery Otherwise a high possibility of serious short circuit to the electrical system may occur If you need to repl...

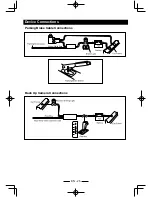
Page 26: ...EN 25 Parking Brake Cable Connections Back Up Camera Connections Device Connections Green White Wire...

Page 27: ...5 Front L 6 Front L 7 Rear L 8 Rear L AUX IN Red Red R Blue Yellow Yellow Yellow White L Red R White L Red R White L Green White FRONT OUT GPS ANTENNA Black MICROPHONE RADIO ANT Black Black Black 3G W...

Page 28: ...sc Sound skips due to vibration Mounting angle is over 30 Mounting is unstable Adjust mounting angle to less than 30 Mount the unit securely with the supplied parts TUNER mode Unable to receive statio...

Page 29: ...00cd m2 DVD Player Signal Noise Ratio 70dB Dynamic Range 70dB Distortion line out 0 8 Frequency Response 3dB 20Hz 20KHz Maximum Output Power 4 50W Load Impedance 4 AUX IN Distortion 0 8 Frequency Resp...

Page 30: ...2 DIN DVD MULTIMEDIA CON NAVEGACION BLUETOOTH MANUAL DE OPERACIONES BT5000...

Page 31: ...e nicamente la unidad a una fuente de 12 voltios con polo a tierra negativo MUTE OK MUTE OK Nunca instale esta unidad donde la operaci n y condiciones reduzcan una conducci n del veh culo con segurida...

Page 32: ...n no peligrosa con protecci n Para reducir el riesgo de corto circuito e interferencia no deseada use nicamente los componentes incluidos con este producto Precauci n uso de disco 1 NO USE discos de...

Page 33: ...la tarjeta SD 12 Uso de un dispositivo USB 12 Reproducci n de m sica 12 Reproducir pause 13 Pista anterior siguiente 13 Avance r pido o retroceso r pido 13 Seleccionar m sica por artista 13 Seleccione...

Page 34: ...ga oprimido 6 Reset Volver a la configuraci n de f brica 7 Entrada de AUX 8 USB conector 9 Ranura de SD 10 Ranura del mapa 11 Ranura de CD Inserte el CD con la cara hacia arriba 12 Micr fono 13 Expuls...

Page 35: ...abajo sintonizaci n manual 14 Teclas num ricas 15 Silencio 16 Encender 17 Seleccionar DVD subtitulo y lenguaje 18 Seleccionar DVD Angulo 19 Mostrar salir men 20 Volver a la pantalla anterior 21 Borrar...

Page 36: ...Si el control remoto no puede ser usado por favor reemplace la bater a 5 Utilice bater as de litio CR2025 de 3V nicamente en forma de bot n moneda 6 NO recargue desmantele caliente ni exponga la bater...

Page 37: ...aplicaciones Cuando el veh culo es puesto en reversa Si la c mara de reversa est conectada la unidad autom ticamente mostrara la c mara cuando la reversa entre a funcionar La unidad retornara a su tra...

Page 38: ...erior izquierda para mostrar los botones de control 1 2 3 4 5 6 7 1 Regresar al men de inicio 2 Mostrar m s botones de control 3 Detener la reproducci n 4 Capitulo anterior Retroceso hacia atr s r pid...

Page 39: ...de im genes 1 2 3 4 5 6 1 Regresa al men de inicio 2 Muestra m s botones de control 3 Pista anterior Retroceso r pido mantener presionado 4 Reproducir pausar 5 Pista siguiente Avance r pido hacia ade...

Page 40: ...elecciona activar la funci n de repetir cuando el disco vaya a terminar el sistema se detendr Si no recibe mando alguno despu s de 5 minutos la unidad pasara a modo de espera standby Reproducci n de l...

Page 41: ...a banda entre FM1 FM2 FM3 AM1 y AM2 Selecci n de banda manual Para cambiar de frecuencias manualmente presione el o para sintonizar una estaci n de alta baja Sincronizaci n autom tica Mantenga presion...

Page 42: ...iento SD USB Uso de la tarjeta SD 1 Abra la tapa de la ranura de la tarjeta insertar la tarjeta SD en la ranura correspondiente la unidad la leer autom ticamente Usted podr elegir M sica Video Im gene...

Page 43: ...nto SD USB Seleccionar m sica por artista 1 Pulse Artistas en la parte superior de la pantalla 2 Seleccione un artistas que aparece en la lista 3 Seleccione una canci n para reproducir Seleccione m si...

Page 44: ...oso No utilizar productos no autorizados Funcionamiento SD USB El uso de un tel fono m vil Android como un dispositivo de memoria USB Si desea utilizar su tel fono m vil Android como un dispositivo de...

Page 45: ...da telef nica Esto podr a causar problemas si un nivel extremo de volumen se establece durante la llamada telef nica Presione BT Phone en el men principal para ingresar al modo Bluetooth 1 Si la funci...

Page 46: ...l equipo est reo del veh culo de forma inal mbrica y escuchar las pistas a trav s de los parlantes del veh culo Por favor consulte a su distribuidor m s cercano para obtener m s informaci n sobre el p...

Page 47: ...d Si iPod no est en el men actual deslice la barra de abajo a la izquierda o a la derecha para encontrarlo Pausar la reproducci n 1 Toque el bot n en la parte inferior de la pantalla para pausar la re...

Page 48: ...vil para ingresar a la configuraci n de la red m vil 5 Clic el nombre del punto de acceso 6 Presione el bot n MENU en el panel frontal a continuaci n de clic en Nuevo APN Internet 7 Debe configurar la...

Page 49: ...erior derecha de la pantalla Ahora se puede acceder a Internet Crear Wi Fi Hotspot El usuario puede utilizar la unidad para crear un punto personal de acceso Wi Fi Todos sus otros dispositivos con Wi...

Page 50: ...Si el indicador de se al en la parte superior de la barra de tareas se vuelve gris la red no est disponible compruebe los ajustes de conexi n de su modem 3G y la configuraci n 3G 3 Aseg rese de intro...

Page 51: ...tel fono procesara los datos y la b squeda de la informaci n relativa en la memoria local o internet a continuaci n transferir el resultado a la unidad OTROS MODOS Configuraci n calendario de Google...

Page 52: ...seleccionar una fecha para ver los detalles Eliminar cuenta Gmail 1 Toque el icono en el men principal para acceder al men de configuraci n deslice hacia abajo la pantalla para encontrar Google 2 Toqu...

Page 53: ...del DVD Subt tulos DVD Seleccione el idioma de subt tulos del DVD Men disco Seleccione el idioma del men Configurar contrase a para establecer una contrase a para la clasificaci n Ingrese 4 digitos d...

Page 54: ...ock Cl sica y Jazz Toque o para ajustar el nivel de graves Medio agudos Presione para ingresar al men de configuraci n fader balance sub Presione o para configurar balance Presione o para configurar f...

Page 55: ...miento del motor para conectar a la bater a del veh culo En caso contrario habr una alta posibilidad de que ocurra un cortocircuito grave para el sistema el ctrico Remplace un nuevo fusible con una cl...

Page 56: ...e la c mara de reversa Conexiones de dispositivos Green White Wire Cable del freno de parqueo Cable verde blanco Bater a Luz de freno Marco del veh culo Interruptor del freno Marco del veh culo Luz de...

Page 57: ...ront R 5 Front L 6 Front L 7 Rear L 8 Rear L AUX IN Red Red R Blue Yellow Yellow Yellow White L Red R White L Red R White L Green White FRONT OUT GPS ANTENNA Black MICROPHONE RADIO ANT Black Black Bla...

Page 58: ...sonido salta debido a vibraciones El ngulo de montaje es de m s de 30 grados El montaje es inestable Ajuste el ngulo de montaje menos de 30 grados Monte la unidad de forma segura con las partes provi...

Page 59: ...Din mico 70dB Distorsi n salida de l nea 0 8 Respuesta de frecuencia 3 dB 20Hz 20KHz Potencia m xima de salida 4 50W Impedansa de carga 4 Impedansa de carga Distorsi n 0 8 Respuesta de frecuencia 3 dB...

Page 60: ...lida la garant a Por un a o a partir de la fecha original de compra C mo se puede obtener servicio Conserve la factura original de compra Por favor llame al centro de servicio autorizado Esta garant a...

Page 61: ...rovide you with a reasonably similar replacement product that is either new or factory refurbished How do you get service Save your receipt as proof of the date of sale Call our number for general war...

Page 62: ...ettercaraudio com para ubicar el centro de Servicio Autorizado m s cercano a su domicilio en donde usted podr encontrar partes componentes consumibles y accesorios Procedimiento para hacer v lida la g...

Page 63: ...CLASS 1 LASER PRODUCT P N 127075005960...

Reviews: