43
82493 - ALTO
- When filling the tank for the last time, add only the amount of water and chemical necessary to spray the
remaining area.
LAST FILLING OPERATION
- It is important to rinse the outside of the spray as well as the tractor. This cleaning operation should be repeated
during the day between applications of different products.
PROCEDURE
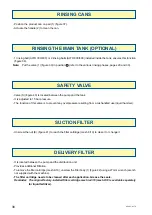
- Remove the filters.
- Fill the tank to 20 % full with water and add detergent (
ALL CLEAR
reference 771.053, 1-litre can or 778.886,
5-litre can).
- Operate the sprayer for a short period.
- Rock the sprayer by moving the tractor forward and backward with a view to agitation water into the tank.
- Leave mixture to act for 12 - 24 hours.
- Start the agitation and move the tractor forward and backward several times, then drain using the drain valve.
- Put some clean water in tank.
- Unscrew a nozzle (remove insert and plug) at the end of each boom element.
- Rinse with clean water.
- Remove all nozzles and filters, and clean them.
- Reassemble.
- See chapter "Servicing the boom".
- The sprayer should be wintered in a clean condition
(see above)
.
- Rinse the circuit completely (with a cleaning product).
- Drain the tank.
- Rinse with clear water.
- Completely drain the liquid circuit, making sure that the pump is not operated too long without water (2 minutes
maximum).
- Protect against the frost, using sufficient antifreeze into the tank (glycol or coolant).
- Start the pump slowly.
- Operate all the valves so as to protect the pump, valves, control valve, filters and pipes.
- Start spraying so as to supply antifreeze onto the boom. When the antifreeze reaches the nozzles, stop the
spraying and disengage the power take-off.
- Grease all mechanical parts that can be rust.
- Deoxidize the contacts on the power plugs (BERTHOUD reference 765.065 the KF F2 aerosol).
- Clean the outside of the machine. Paint the mechanical parts exposed (BERTHOUD reference 769.077 for
the blue paint aerosol or 778.890 for the green paint aerosol).
- Garage the machine out of the sunlight and protected against inclement weather and on flat, load-bearing
ground.
MAINTENANCE AFTER OPERATION
WINTER STORAGE
Summary of Contents for ALTO 300
Page 2: ...2 82493 ALTO...
Page 4: ...4 82493 ALTO...
Page 14: ...14 82493 ALTO...
Page 17: ...17 82493 ALTO 5 6 4 3 V4 V1 1 1 2 3 4 2 3 V2...
Page 19: ...19 82493 ALTO 7 8 1 1 2 3 4 V2 V2...
Page 21: ...21 82493 ALTO 9 10 1 V1 V2...
Page 22: ...22 82493 ALTO...
Page 25: ...25 82493 ALTO 11 12 13 1 3 2 V 1 1 3 2 V2 4...
Page 27: ...27 82493 ALTO 16 17 19 18 14 V4 V1 15 1 2 3 1 V2 V3 V2...
Page 29: ...29 82493 ALTO ON OFF 20 21 24 23 D P Elec 2 4 1 1 1 V V 22 V2 V2 1 2 3...
Page 31: ...31 82493 ALTO 27 D P Elec 1 ON OFF 28 2 4 1 1 V 26 25 V4 V1 1 2 V2 V V2 3...
Page 32: ...32 82493 ALTO...
Page 33: ...33 82493 ALTO OTHER SPRAYER FUNCTIONS...
Page 35: ...35 82493 ALTO a b a a b b 31 30 32 1 2 3 4 5 6 2 3 29 1 33 1 2 V2 V V2...
Page 37: ...37 82493 ALTO 35 36 34 V4 Alto 300 400 Alto 300 400 Alto 600 800 Alto 600 800 1 1 3 2 2 2 3 2...
Page 39: ...39 82493 ALTO 37 41 40 38 39 1 42 1 S 1 2 E...
Page 40: ...40 82493 ALTO...
Page 46: ...46 82493 ALTO...
Page 47: ...47 82493 ALTO MAINTENANCE DIAGRAM SPRAYING CIRCUIT...
Page 49: ...49 82493 ALTO 1 2 3 7 4 9 6 5 8 10 17 12 13 14 16 15 ON OFF 11...


