English
21
Installation
Caution:
To avoid damaging the DLP chips, never aim a high-power laser beam into the projection lens.
Installing removing the optional lens
Caution:
•
Do not shake or place excessive pressure on the projector or the lens components as the projector and lens
components contain precision parts.
•
Before removing or installing the lens, be sure to turn off the projector, wait until the cooling fans stop, and turn off
the main power switch.
•
Do not touch the lens surface when removing or installing the lens.
• Keep fingerprints, dust or oil off the lens surface. Do not scratch the lens surface.
•
Work on a level surface with a soft cloth under it to avoid scratching.
•
If you remove and store the lens, attach the lens cap to the projector to keep off dust and dirt.
Installing the new lens
Remove both end caps from the lens.
Note:
Removal of the plastic body cap before inserting a lens for the first time.
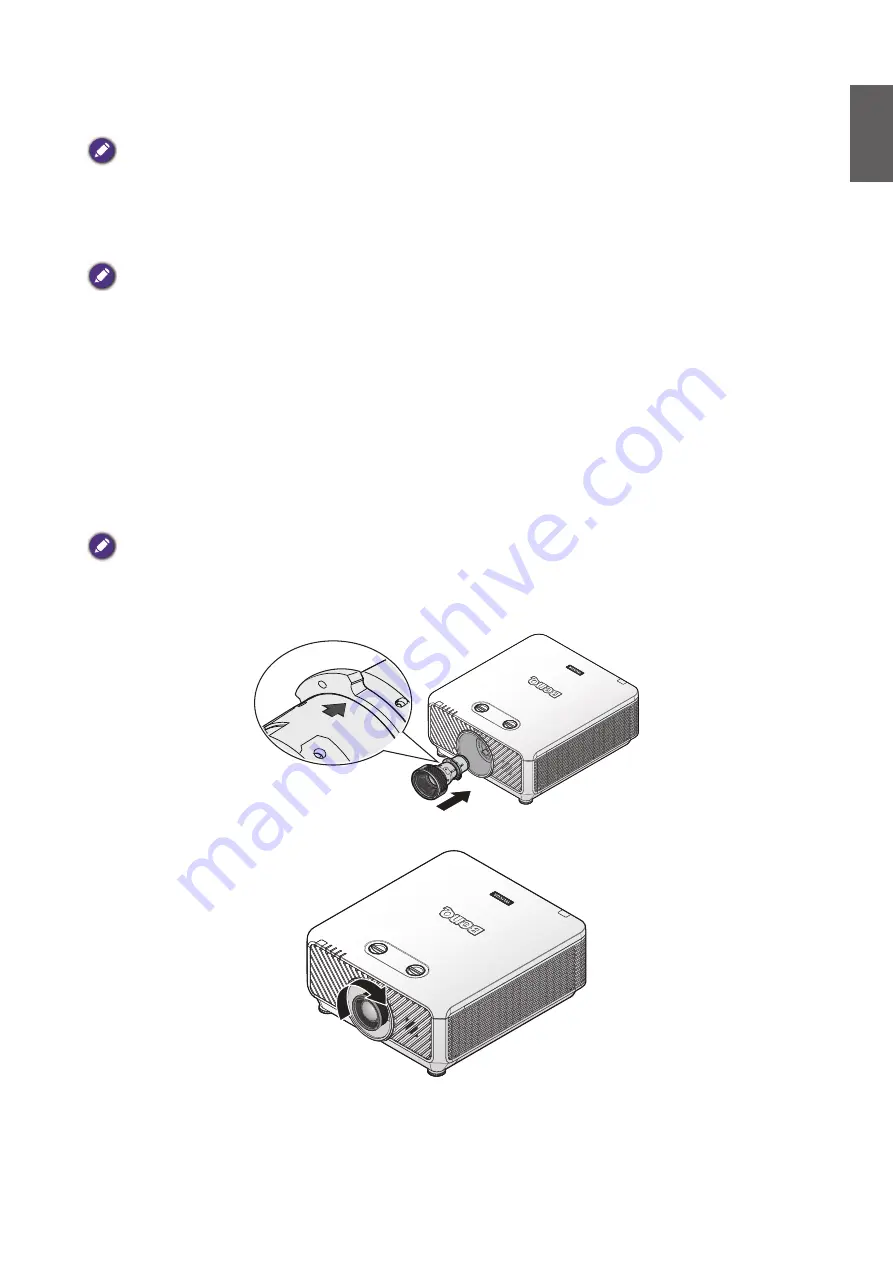
1. Orient the lens so that the arrow on the label pasted on its side is facing upward and push the
lens into the lens mount of the unit as far as it will go.
2. Rotate the lens clockwise until you feel it click into place.


