21
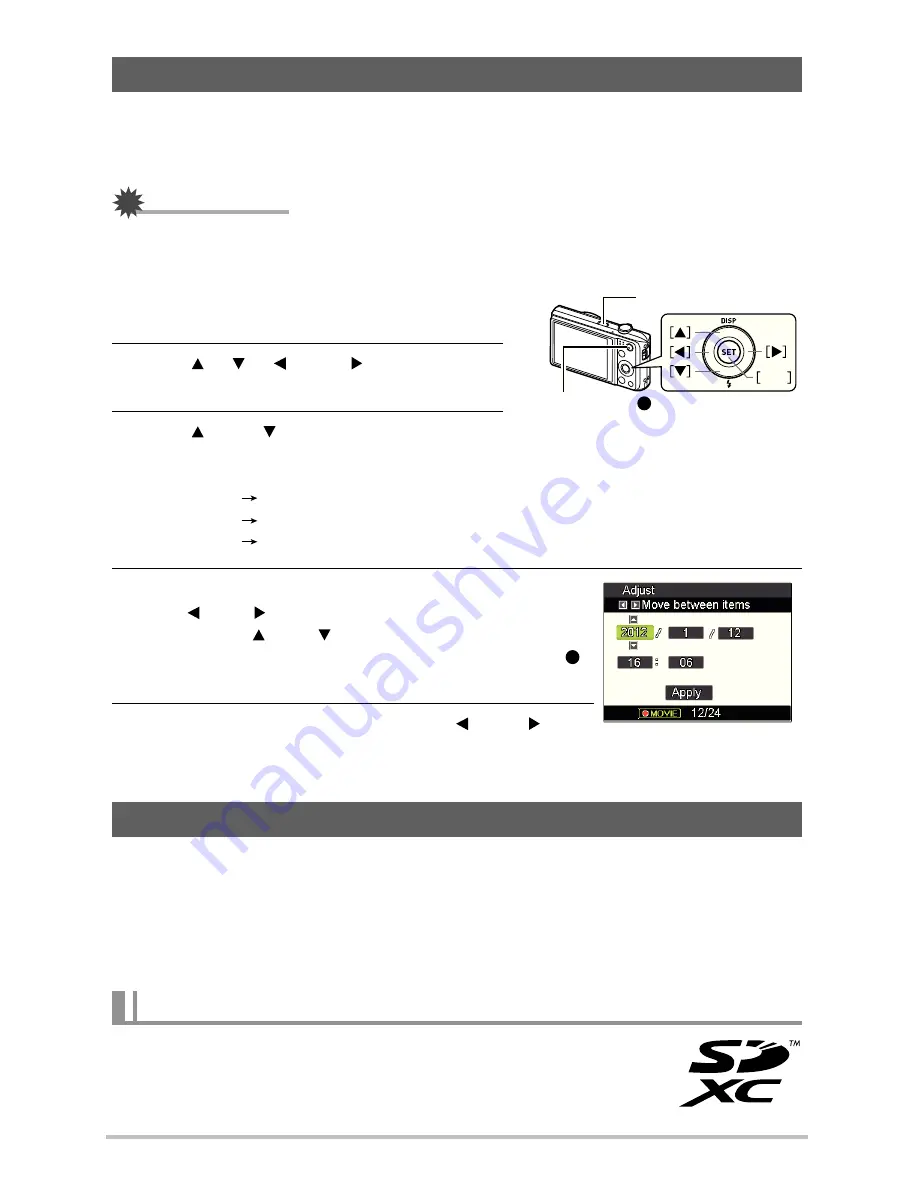
The first time you load a battery into the camera, a screen appears for configuring the display
language, date, and time settings. Failure to set the date and time correctly will cause the
wrong date and time data to be recorded with images.
IMPORTANT!
•
Camera models sold in certain geographic areas may not support display language
selection.
1.
Press [ON/OFF] (Power) to turn on the
camera.
2.
Use [ ], [ ], [ ], and [ ] to select the
language you want and then press [SET].
3.
Use [ ] and [ ] to select a date format
and then press [SET].
Example: July, 10, 2012
YY/MM/DD
12/7/10
DD/MM/YY
10/7/12
MM/DD/YY
7/10/12
4.
Set the date and the time.
Use [ ] and [ ] to select the setting you want to change
and then use [ ] and [ ] to change it.
To switch between 12-hour and 24-hour format, press [
]
(Movie).
5.
After setting the date and time, use [ ] and [ ] to
select “Apply” and then press [SET].
•
Though the camera has built-in memory that can be used to store images and movies, you
probably will want to purchase a commercially available memory card for greater capacity.
The camera does not come with a memory card. Images recorded while a memory card is
loaded are saved to the memory card. When no memory card is loaded, images are saved to
built-in memory.
–
SD Memory Card (Up to 2GB)
–
SDHC Memory Card (2GB to 32GB)
–
SDXC Memory Card (32GB to 2TB)
Configuring Basic Settings the First Time You Turn On the Camera
Preparing a Memory Card
Supported Memory Cards
SET
[ON/OFF] (Power)
[
] (Movie)
GH200_205 UM EN - New Fonts.book Page 21 Tuesday, February 14, 2012 5:32 PM


