BenQ DC 5530 User’s Manual
Using the DC E63+
7
Eng
lish
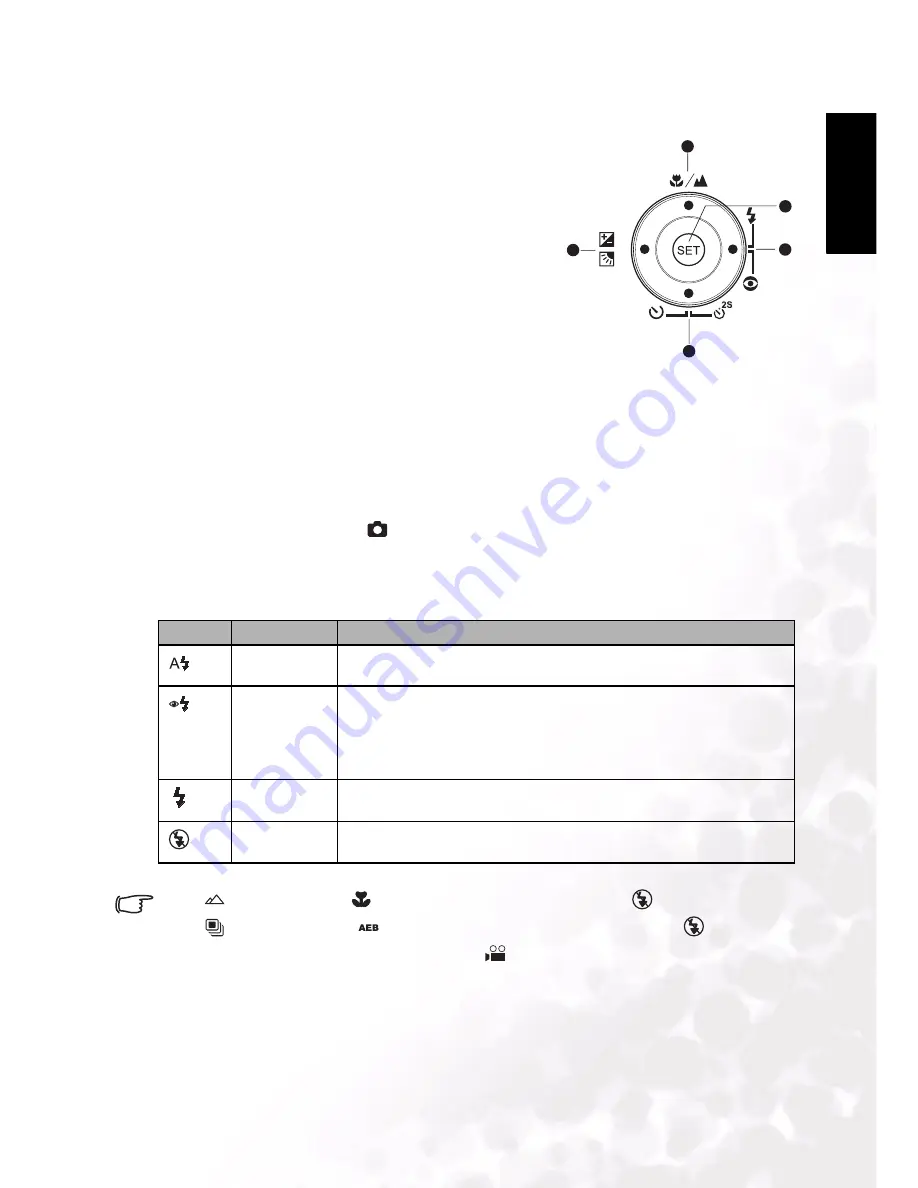
3.1.2 Changing Camera Settings
Camera settings can be changed with the five-way
button.
1. Right/Flash: Scrolls right in menus and enables you
to choose the appropriate flash setting.
2. Left/Exposure Compensation: Scrolls left in menus
and enables you to set the exposure compensation
and backlight correction.
3. Up/Macro: Scrolls upwards in menus and toggles the
macro settings.
4. Down/Self-Timer: Scrolls downwards in menus and
cycles through the self-timer settings.
5. SET: Enters the menu page and confirms the chosen
setting.
3.1.2.1
Using the Flash
The flash is designed to function automatically when lighting conditions warrant the use of
flash. You can capture an image using a flash mode suitable to your circumstances.
1. Press the
POWER
button to turn on the camera.
2. Slide the mode switch to [
].
3. Press the Right/Flash button to cycle through the flash modes.
4. Compose your scene and press the shutter button.
The table below will help you choose the appropriate flash mode:
• In [
] landscape and [
] macro modes, the flash is fixed at [
].
• In [
] continuous and [
] AEB capture modes, the flash is fixed at [
].
• The flash cannot be used in video capture [
] mode.
Icon
Scene Mode
Description
AUTO FLASH
The flash fires automatically according to the photographic conditions.
ANTI RED-
EYE FLASH
Use this mode to reduce the red-eye phenomenon when you want to cap-
ture natural-looking images of people and animals in low-light conditions.
When capturing images, the red-eye phenomenon can be reduced by asking
the subject (person) to look at the camera lens or get as close to the camera
as possible.
FORCED
FLASH
The flash will always fire regardless of the surrounding brightness. Select
this mode for recording images with high backlighting and deep shadows.
NO FLASH
Use this mode in environment where flash use is prohibited or if the dis-
tance to the subject is too far away for the flash to have any effect.
1
2
3
4
5


