14
Enhanced Wireless Modem Router
sections
table of contents
1
2
3
5
6
7
8
9
10
4
ConnECTIng and ConfIgURIng yoUR ModEM RoUTER
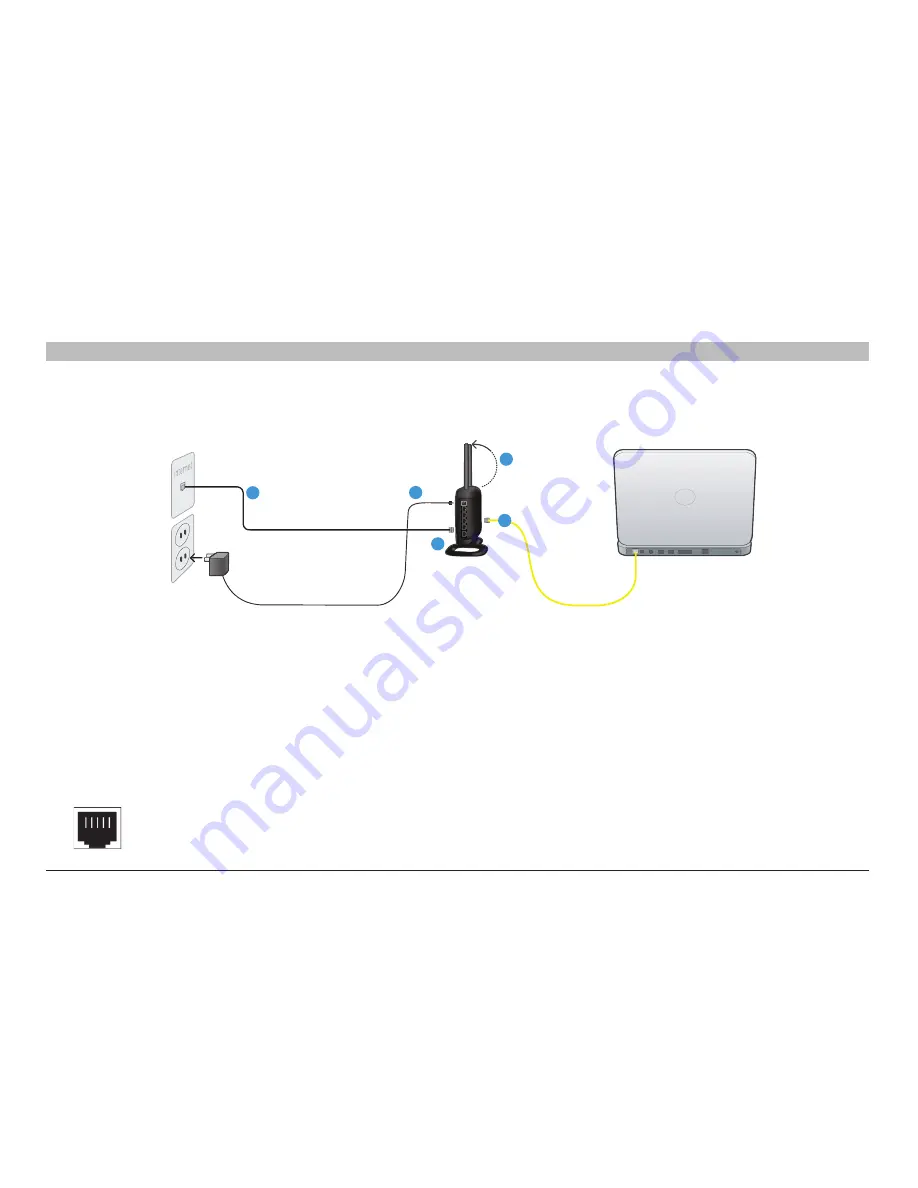
step 1: Hardware Connections
1�1 brand-new setup
Follow these steps if you are not replacing an existing modem� If you are
replacing an existing modem, skip to the next section, “Replacing an
Existing Modem or Modem Router”, starting on page 15�
1�
Unpack your new Router from the box and place it next to your
computer� Raise the Router’s antennas�
2�
Retrieve the yellow RJ45 cable that was included with your Router�
First, connect one end to any yellow port labeled “Wired” on the
back of your Router� Then, connect the other end to the networking
port on the back of your computer�
Setup CD
4
1
5
3
2
3�
Retrieve the included gray RJ11 phone cord� Connect one end to
the gray port labeled “ADSL line” on the back of your Router� Then
connect the other end to your ADSL connection (either a wall jack
or an ADSL splitter)�
note:
Some ADSL connections require a micro filter� Your ADSL
provider can tell you if you need one� Belkin includes a micro filter
in regions known to use them� You may or may not have received
one in your box�
4�
Plug your Router’s power supply into the black port labeled
“Power” on the back of your Router
5�
Wait 20 seconds for the Router to start up� Look at the display on
the front of the Router� Make sure the “Wired” and “Router” icons
are lit up in green� If they are not, recheck your connections�


