Door PC Operating System Upgrade Manual
Configure the Windows 7 Door PC
Issue 1 Rev 3
Page 19
© 2019 Grass Valley
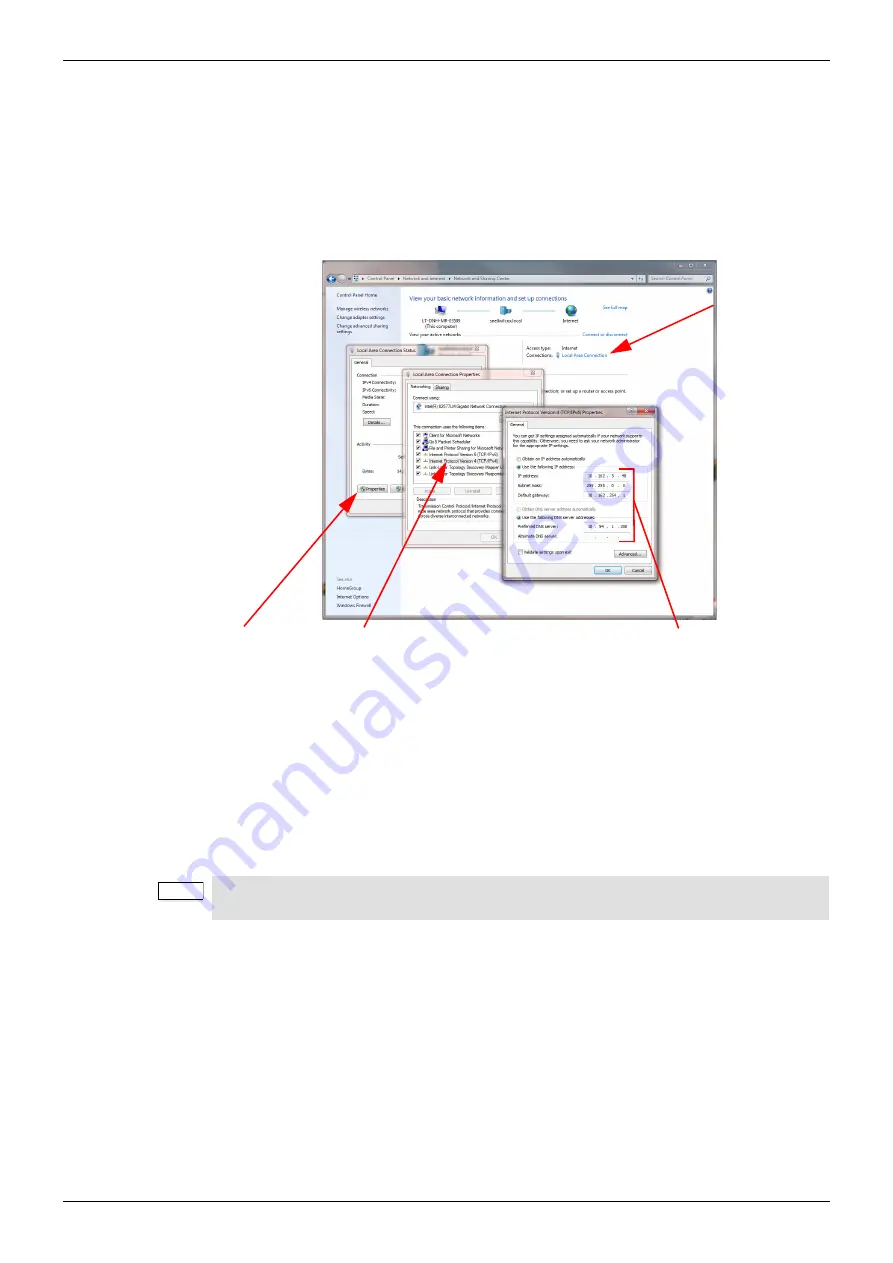
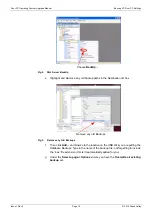
6.8 Set the IP Address
1.
Type
Network and Sharing
in the control panel search box and select the
Network
and Sharing Center
option, see Fig 16.
2.
Click on the
Local Area Connection
in the
View your active networks section
,
see Fig 16.
3.
Click on the
Properties
button of the
Local Area Connection Status
dialog.
4.
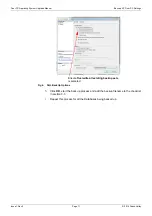
From the
Local Area Connection Properties
dialog highlight the
Internet Protocol
Version 4 (TCP/IPv4)
entry by clicking on it (do not Untick this option).
The
Properties
button will now be active, click on the
Properties
button.
5.
From the
Internet Protocol Version 4 (TCP/IPv4) Properties
dialog select the
Use the following IP address
radio button so that the IP address details and DNS
details can be added.
6.
Enter the Door PC IP address and DNS details as noted down in the checklist in
section 3.3.
7.
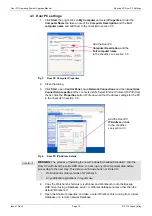
Click on the
OK
button to save the settings.
8.
You be asked for a Network location/type, set this to
Work
.
9.
Close the dialog boxes.
Fig 16. Door PC IP and DNS Address Setting
Note:
•
When highlighting the
Internet Protocol Version 4 (TCP/IPv4)
option make sure
that you don’t accidentally Untick it.
2. Click on the
Local Area
connection
shown here
5. Select the
Use the following
IP address
option and
then enter the Door PC
IP address and DNS
details from the checklist
Properties
button
Internet Protocol Version 4
(TCP/IPv4)
entry and then click on the
Properties
button


