GUIDE TO INSTALLATION AND OPERATION
HCO-1822 |
23
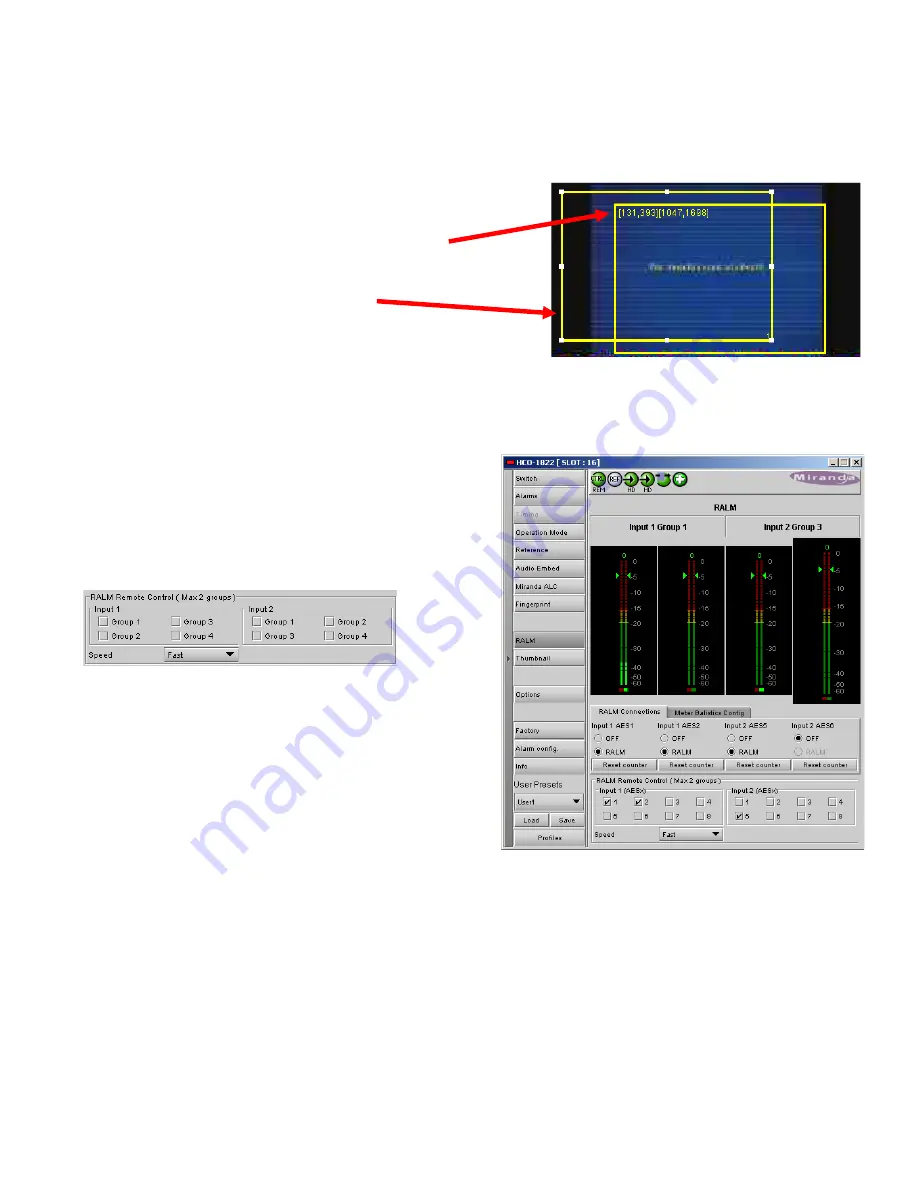
Use a mouse to resize
– you may also use your mouse to move and resize the window. Click within the blue frame
and it will turn yellow and display control handles. Mouse over a handle until the cursor switches to an arrow icon, and
then drag the handle to resize the window. When you are not over a handle, the 4-arrow cursor allows you to drag the
window to a new location
•
While you are resizing with the mouse, the start and stop line
and pixel are shown in the top left of the frame area, in this
format:
[start line, start pixel][stop line, stop pixel]
•
The original position of the frame remains visible, so the
amount of change can easily be seen
3.4.10 The RALM panel
The Remote Audio Level Meter (RALM) panel displays audio
level meters that can be assigned to audio arriving at both
inputs of the HCO-1822.
Use the checkboxes in the RALM Remote Control section at
the bottom of the panel to select the audio to be displayed on
the meters.
The display window is divided into two sections of two meter-
pairs each.
•
The left-hand section displays the audio associated
with the first group selected using the checkboxes in
the RALM Remote Control section of the panel (as
indicated in the label above the meters)
•
The right-hand section displays the audio associated
with the second group selected using the checkboxes
in the RALM Remote Control section of the panel (as
indicated in the label above the meters)
You may select any of the eight groups available in inputs 1 and 2; there is no need to select one from input 1 and
one from input 2.
•
A maximum of two groups can be selected at any time
•
You must deselect one of the inputs before you can select another one to replace it.
Once the groups are selected, use the controls in the RALM Connections tab to turn individual meter-pairs on and off.
Speed –
select the meter response from the pull-down list, options are [fast, medium, slow]
Figure 3.28 RALM Panel


