background image

STARTING

Final Check

Before you start using the refrigerator check that:

1. The feet have been adjusted for perfect levelling.
2. The interior is dry and air can circulate freely.
3. Clean the interior as recommended under "CLEANING AND CARE."
4. Insert the plug into the wall socket and switch on the electricity supply.

    When the door is open the interior light will come on.
5. You will hear a noise as the compressor starts up. The liquid and gases sealed

    within the refrigeration system may also give rise to noise, whether the

    compressor is running or not which is quite normal.
6. Slight undulation of the top of the cabinet is quite normal due to the

    manufacturing process used, so do not worry, it is not a defect.
7. We recommend that you set the thermostat knob at 3 (three) and monitor the

    temperature to ensure the appliance maintains desired storage temperatures

    (See section Temperature Control and Adjustment).
8. Do not load the appliance immediately it is switched on. Wait until the correct

    storage temperature has been reached. We recommend that you check the

    temperature with an accurate thermometer (see; Temperature Control and

    Adjustment).

Important Note :

Ice formation at the back is normal, do not worry. (See Defrosting)

DEFROSTING

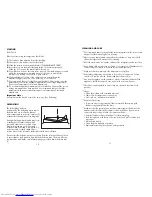
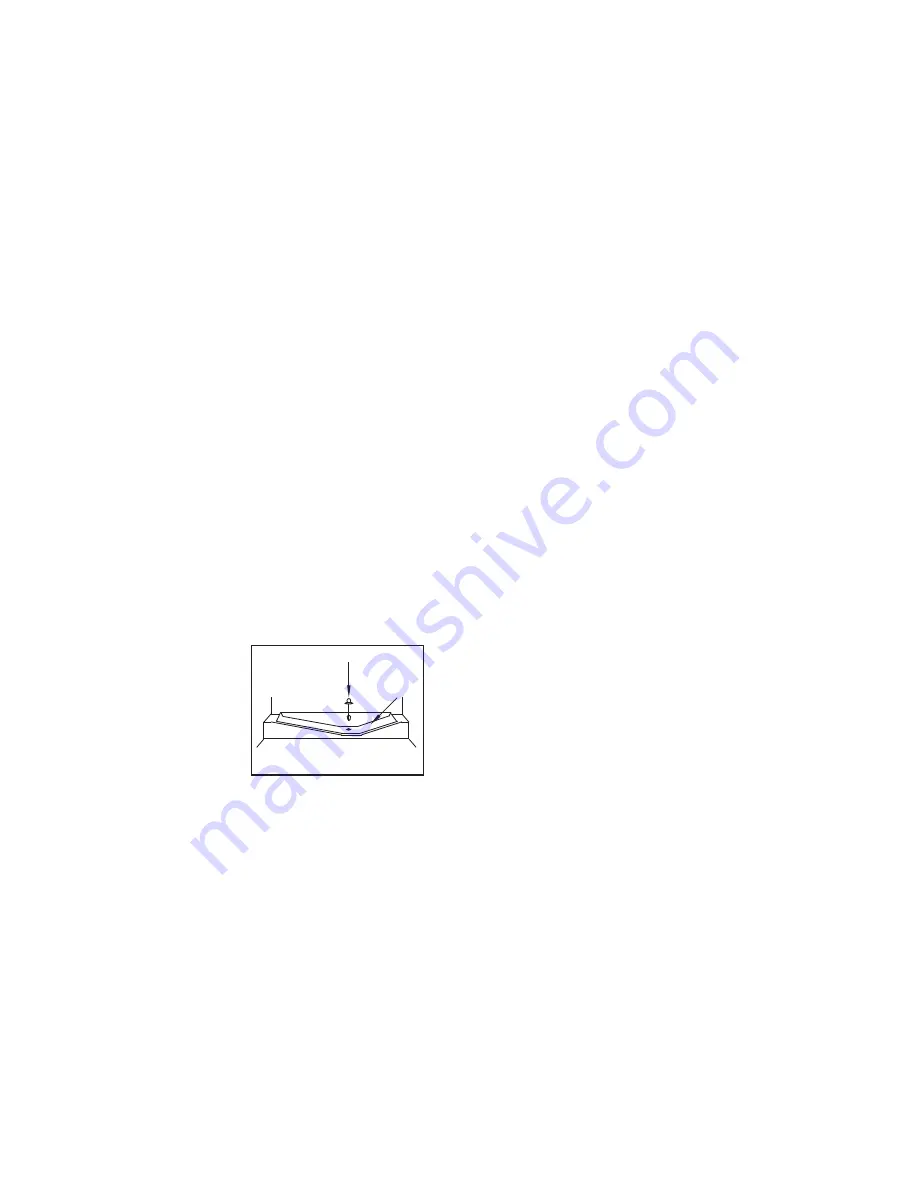
The larder fridge defrosts

automatically. The defrosting water runs to

the drain tube via a collection channel

and is evaporated in a special container (1)

at the back of the appliance (see diagram).

During defrosting water droplets may form

at the back of the larder fridge where

concealed evaporator is located. Some

droplets may remain on the liner and

refreeze when defrosting is completed. Do

not use pointed or sharp edged objects

such as knives, forks to remove the droplets which have refreezed.

If at any time the defrost water does not drain from the collection channel, check

to ensure that no food particles have blocked the drain tube. The drain tube can

be cleared by pushing the special plastic plunger provided down the drain tube

(2).

1

2

10

CLEANING AND CARE

** We recommend that you switch off the larder refrigerator at the socket outlet

    and pull out the mains plug before cleaning.

** Never use any sharp instruments or abrasive substances, soap, household

    cleaner, detergent and wax polish for cleaning.

** Use luke warm water to clean the cabinet of the refrigerator and wipe it dry.

** Use a damp cloth wrung out in a solution of one teaspoon of bicarbonate of

    soda to one pint of water to clean the interior and wipe it dry.

** Make sure that no water enters the temperature control box.

** If the larder refrigerator is not going to be used for a long period of time

    switch it off, remove all food, clean it and leave the door ajar.

** Any dust that gathers on the condenser, which is located at the back of the

    appliance, should be removed once a year with a vacuum cleaner.

** Check door seals regularly to ensure they are clean and free from food

    particles.

** Never :

    • Clean the worktop with unsuitable material;

    • Subject it to hot temperatures in any way,

    • Scour, rub etc., with abrasive material.

** Removal of door tray :
    • To remove a door tray, remove all the contents and then simply push

       the door tray upwards from the base.

** Make sure that the special plastic container (drain tray) at the back of the

    appliance which collects defrost water is clean at all times. If you want to

    remove the tray to clean it follow the instructions below :

    • Switch off at the socket outlet and pull out the mains plug

    • Push the lug down with the tip of a screw driver and pull out with a jerk

       movement

    • Lift the drain tray up

    • Clean the drain tray and wipe it dry

    • Reassemble reversing the sequence and operations

11

Summary of Contents for LA 120

Page 1: ...A 120 4 8 cu ft Larder Fridges Printed in Turkey Part no 48 3199 00 02 BEKO plc Beko House Caxton Way Watford Hertfordshire WD18 8UF Tel 0845 6004911 Fax 0845 6004922 e mail service beko co uk website www beko co uk ...

Page 2: ...pose the appliance to fire potential ignition source and immediately ventilate the room where the appliance is situated We suggest you contact your local authority for disposal information and facilities available We do not recommend use of this appliance in an unheated cold room E g garage conservatory annex shed out house etc See item 6 on Page 5 To obtain the best possible performance and troub...

Page 3: ... as a plug with bared cord could cause a shock hazard if inserted into a socket elsewhere in the house The moulded plug on this appliance incorporates a 13 A fuse Should the fuse need to be replaced an ASTABEAB approved BS 1362 fuse of the same rating must be used Do not forget to refit the fuse cover In the event of losing the fuse cover the plug must not be used until a replacement fuse cover ha...

Page 4: ...for long periods If installed next to a source of heat or refrigerator maintain the following minimum side clearances 2 No gap is required at sides and top See item 3 below to ensure a gap is obtained at the rear of the appliance If a gap is available on side and top retain it if possible as it would improve the air circulation around the appliance 3 Fit the two plastic wall spacers supplied with ...

Page 5: ...ing plug on the opposite side and stand the door safely 5 You may find it easier to remove the bushing and the plug with the tip of a small screwdriver Take care not to mark the door 8 Reposition the top hinge on the opposite side 6 and 7 9 To refit the door locate the top hinge in the door attach to the cabinet and hold the door 8 10 Fit the bottom hinge 9 If necessary adjust and then tighten the...

Page 6: ...e first time the thermostat should be adjusted so that after 24 hours the average fridge temperature is no higher than 5 C 41 F We recommend you set the thermostat half way between the 1 and 5 setting and monitor to obtain the desired temperature i e towards 5 you will obtain a colder fridge temperature and vice versa Some sections of the fridge may be cooler or warmer such as the salad crisper an...

Page 7: ... droplets which have refreezed If at any time the defrost water does not drain from the collection channel check to ensure that no food particles have blocked the drain tube The drain tube can be cleared by pushing the special plastic plunger provided down the drain tube 2 1 2 10 CLEANING AND CARE We recommend that you switch off the larder refrigerator at the socket outlet and pull out the mains ...

Page 8: ... container They should be packaged and stored separately Don t Let defrosting food or food juices drip onto food in your larder refrigerator PROBLEM SOLVING TROUBLE SHOOTING If the appliance does not operate when switched on check The plug is inserted properly in the socket and that the power supply is on To check the power supply to the socket plug in another appliance The fuse has blown circuit ...

Page 9: ...ct is resold Beko disclaims any liability for incidental or consequential damages The guarantee does not in anyway diminish your statutory or legal rights HOW TO OBTAIN SERVICE Please keep your purchase receipt or other proof of purchase in a safe place you will need to have it should the product require attention under guarantee You should also complete the details below it will help us assist yo...

Reviews: