background image

6

7

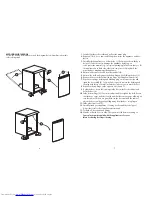
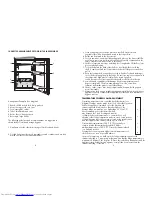
REPOSITIONING THE DOOR

Follow the step by step instructions and the diagram below. Numbers in brackets 

refer to diagrams.


1. 

Switch off at the socket outlet and pull out the mains plug.


2.

 Remove all food, loose items and fittings from inside the appliance and door 

      shelves.
  

3.

 Carefully tilt the appliance on its back side. (1) (You may need somebody to

       help you.) Take care not to damage the appliance by laying  on
       some protective material (e.g. its original packaging). Make sure that you tilt
       the appliance on its back side, otherwise compressor oil may block the
       pipes and you may damage the appliance.
  

4. 

Unscrew and remove the LHS front feet and bolt (2).


5. 

Unscrew the bolts and remove the bottom hinge while holding the door (3).


6.

 Remove the door carefully from the top hinge by sliding down wards (4).


7. 

Reposition top hinge bushing and blanking plug on the opposite side and

       stand the door safely (5). You may find it easier to remove the bushing and 
       the plug with the tip of a small screwdriver. Take care not to mark the door.

  8. 

Reposition the top hinge on the opposite side (6 and 7).

  9.

 To refit the door, locate the top hinge in the door, attach to the cabinet and

       hold the door (8).

10.

 Fit the bottom hinge (9). If necessary adjust and then tighten the bolts. Ensure,

       that the door opens and closes easily and that there are no gaps allowing air
       into the cabinet. If there are gaps between the door seal and the cabinet,
       adjust the door seal by gently pulling away from the door using fingers.

11.

 Fit the other front feet (10).

12.

 Carefully stand your appliance. (You may need somebody to help you.)

       Adjust the front feet (See Installation Instructions)

13.

 Put back all, loose items and fittings.

14. 

Wait for at least 4 hours to allow the system to settle before switching on.


Spare plastic parts supplied with the appliance are for your

      future use during door repositioning.

1

60°

10

6

2

3

4

5

8

7

9

Summary of Contents for LA 120

Page 1: ...A 120 4 8 cu ft Larder Fridges Printed in Turkey Part no 48 3199 00 02 BEKO plc Beko House Caxton Way Watford Hertfordshire WD18 8UF Tel 0845 6004911 Fax 0845 6004922 e mail service beko co uk website www beko co uk ...

Page 2: ...pose the appliance to fire potential ignition source and immediately ventilate the room where the appliance is situated We suggest you contact your local authority for disposal information and facilities available We do not recommend use of this appliance in an unheated cold room E g garage conservatory annex shed out house etc See item 6 on Page 5 To obtain the best possible performance and troub...

Page 3: ... as a plug with bared cord could cause a shock hazard if inserted into a socket elsewhere in the house The moulded plug on this appliance incorporates a 13 A fuse Should the fuse need to be replaced an ASTABEAB approved BS 1362 fuse of the same rating must be used Do not forget to refit the fuse cover In the event of losing the fuse cover the plug must not be used until a replacement fuse cover ha...

Page 4: ...for long periods If installed next to a source of heat or refrigerator maintain the following minimum side clearances 2 No gap is required at sides and top See item 3 below to ensure a gap is obtained at the rear of the appliance If a gap is available on side and top retain it if possible as it would improve the air circulation around the appliance 3 Fit the two plastic wall spacers supplied with ...

Page 5: ...ing plug on the opposite side and stand the door safely 5 You may find it easier to remove the bushing and the plug with the tip of a small screwdriver Take care not to mark the door 8 Reposition the top hinge on the opposite side 6 and 7 9 To refit the door locate the top hinge in the door attach to the cabinet and hold the door 8 10 Fit the bottom hinge 9 If necessary adjust and then tighten the...

Page 6: ...e first time the thermostat should be adjusted so that after 24 hours the average fridge temperature is no higher than 5 C 41 F We recommend you set the thermostat half way between the 1 and 5 setting and monitor to obtain the desired temperature i e towards 5 you will obtain a colder fridge temperature and vice versa Some sections of the fridge may be cooler or warmer such as the salad crisper an...

Page 7: ... droplets which have refreezed If at any time the defrost water does not drain from the collection channel check to ensure that no food particles have blocked the drain tube The drain tube can be cleared by pushing the special plastic plunger provided down the drain tube 2 1 2 10 CLEANING AND CARE We recommend that you switch off the larder refrigerator at the socket outlet and pull out the mains ...

Page 8: ... container They should be packaged and stored separately Don t Let defrosting food or food juices drip onto food in your larder refrigerator PROBLEM SOLVING TROUBLE SHOOTING If the appliance does not operate when switched on check The plug is inserted properly in the socket and that the power supply is on To check the power supply to the socket plug in another appliance The fuse has blown circuit ...

Page 9: ...ct is resold Beko disclaims any liability for incidental or consequential damages The guarantee does not in anyway diminish your statutory or legal rights HOW TO OBTAIN SERVICE Please keep your purchase receipt or other proof of purchase in a safe place you will need to have it should the product require attention under guarantee You should also complete the details below it will help us assist yo...

Reviews: