


OPERATING MODE – SHOWROOM
The “Showroom” function can be activated both in “Power Supply” mode and in “Battery Charger” mode:
In Power Supply mode, as soon as the device is turned on or the current is restored, it checks
whether there is a connection to the battery. If this check detects a connected battery, BC X-PRO
130 automatically starts the power supply, keeping the battery voltage at the set value.
In Battery Charger mode, as soon as the device is turned on or the current is restored, it checks
whether there is a connection to the battery. If this check detects a connected battery, BC X-PRO
130 automatically starts recharging the battery, restarting from the situation reached (Ah provided
to the battery and elapsed time) before the mains supply was interrupted.
Example of use
: the charging of a 120 Ah battery in a workshop is interrupted after charging 50 Ah in 5h10’,
to switch off the mains supply at the end of the day. When the power is restored the following morning, BC
X-PRO 130 will resume charging from the point reached, showing on the display the same data (Ah and
charging time) that were indicated at the time of interruption.
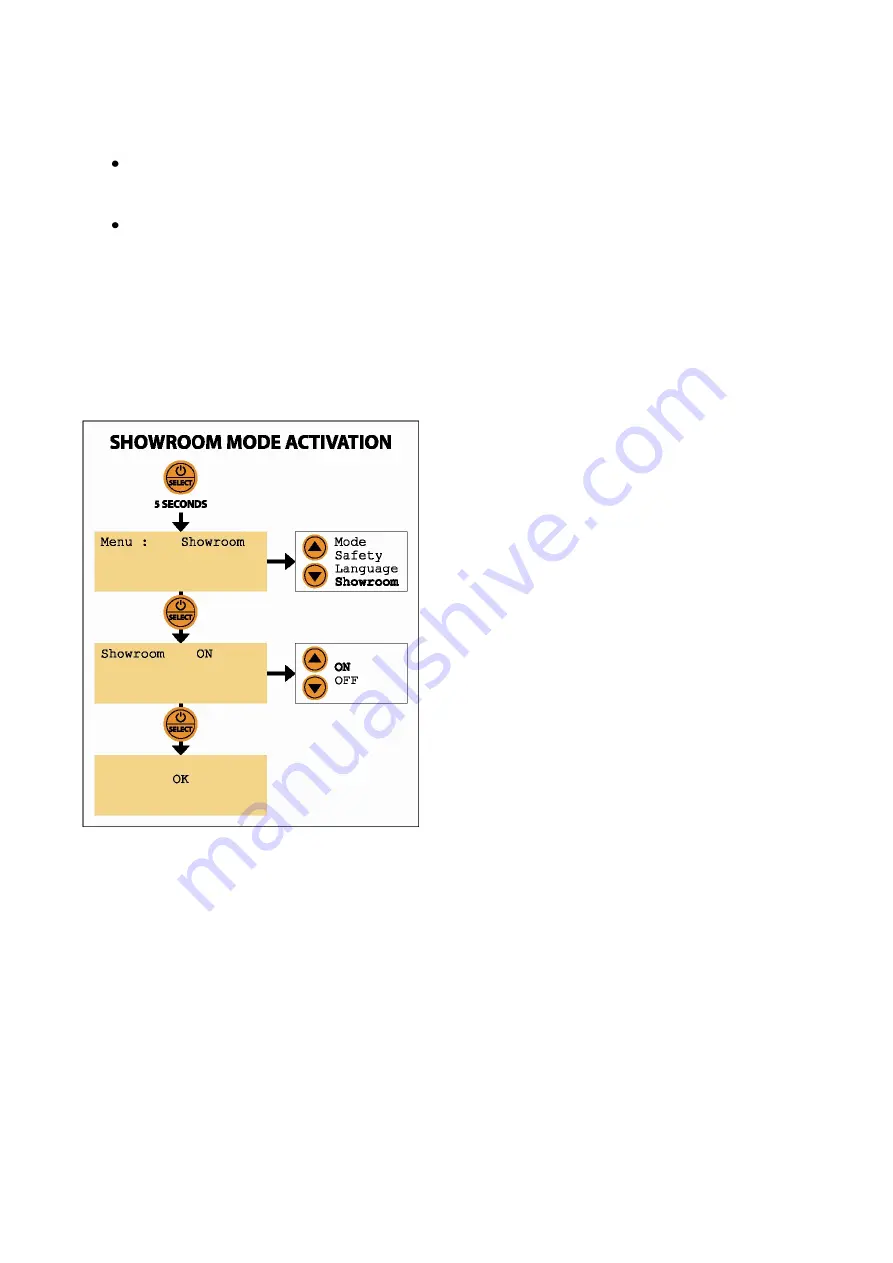
To select the “SHOWROOM” mode of BC X-PRO 130, please proceed as follows:
1.
Press and hold the “ON/OFF - SELECT” button for 5
seconds to access the menu.
2.
Press the arrow keys until you reach Menu:
SHOWROOM
. Press “ON/OFF - SELECT” to confirm.
3.
To activate the SHOWROOM mode, select
ON
with
the arrow keys. Press the “ON/OFF - SELECT” button
to confirm the choice.
The display indicates “OK”. BC X-PRO 130 restarts with
the last used configuration, and with SHOWROOM
mode active. In the event of a power failure (for
example, when the power is turned off in the
showroom in the evening), the device is now ready to
restart as soon as the power is restored.
When BC X-PRO 130 is connected to a battery in
BATTERY CHARGER mode or to a vehicle in POWER
SUPPLY mode, the second row always shows whether
the SHOWROOM mode is enabled (ON) or disabled
(OFF).
WARNING: it is necessary to set the desired charging or
power supply parameters before connecting the device
to the battery or vehicle. Proceed according to the
instructions in the previous sections of this manual.
The SHOWROOM mode cannot be enabled when the
device is set in POWER SUPPLY mode with a voltage of 12.8V (Memory Saver Mode)
.
OPERATING MODE – MEMORY SAVER FOR BATTERY REPLACEMENT
To use BC X-PRO 130 as a memory saver while replacing a vehicle’s battery, please proceed as follows:
1.
Press and hold the “ON/OFF - SELECT” button for 5 seconds to access the menu.
2.
Press the arrow keys until you reach Menu:
MODE
. Press “ON/OFF - SELECT” to confirm.
3.
Select the operating mode
SUPPLY
with the arrow keys.
4.
Press the “ON/OFF - SELECT” button to confirm the choice.
5.
Select the voltage to stabilize with the arrow keys:
12.8V
.
6.
Press the “ON/OFF - SELECT” button to confirm the choice.
7.
Select the maximum power supply current with the arrow keys, between 1 A and 130 A.
8.
Press the “ON/OFF - SELECT” button to confirm the choice.
The display indicates “OK”. BC X-PRO 130 restarts and the first row of the display shows the chosen
parameters. The second row shows: “Load not connected!”.