background image

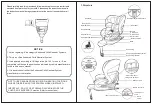
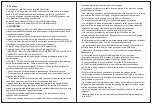
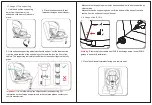
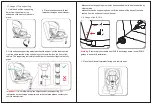
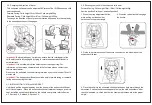
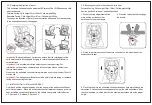
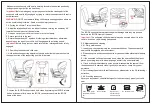
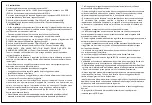
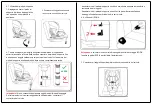
5.0. Changing the direction of travel 
This enhanced child seat can be adjusted 360°rotation.The i-SIZE enhanced child 
seat can be used: 

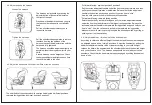
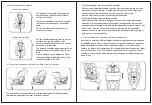
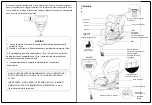
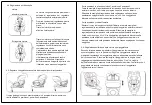
5.2. Securing your child in the enhanced child seat 
Forward Facing: Child height 76cm-105cm/ Child weight≤22kg; 

Recline position Positions 1,position2,position3 

Forward Facing: Child height 76cm-105cm/ Child weight≤22kg; 
Rearward Facing: Child height 40cm-87cm/ Child weight ≤22kg; 
To change the direction of travel, press the rotation button and turn the seat body 
to the desired direction until it engages. 

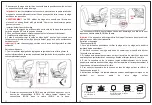
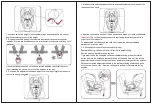
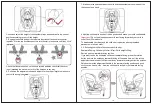
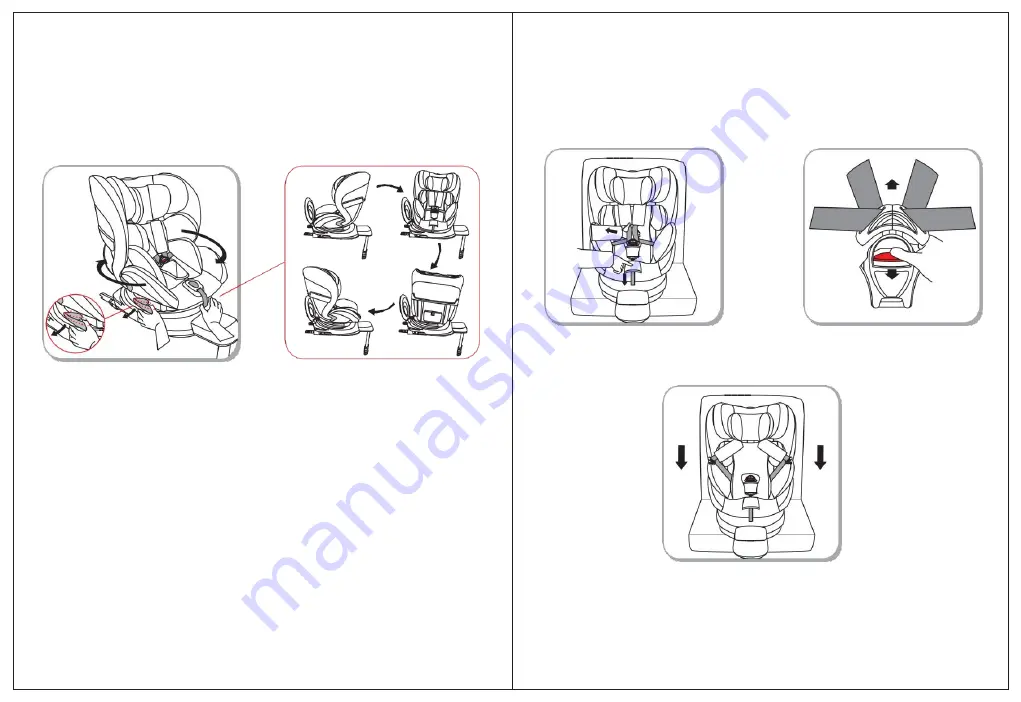
1. Press the strap adjustment button, 
while pulling out the shoulder 
harnesses to the proper length. 

2. Press the red button to disengage 

the buckle. 


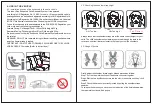
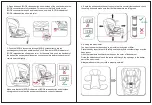
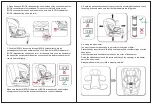
Important ! 

Before making any car journey, ensure that the rotating part of the 

child safety seat is fully engaged by trying to rotate the enhanced child seat in 
both directions. 

Important ! 

It is not allowed to place objects under the support leg. For 

information on the storage compartments in the foot area please contact your 
vehicle manufacturer. 
Do not use the enhanced child seat facing forwards if your child is under 76cm/15 
months old. 

Important ! 

The enhanced child seat should be only in forward facing or rearward 

facing direction during the travel. 


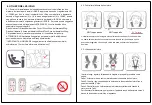
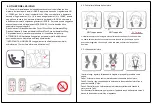
5.1. INSTALLATION THE i-Size CHILD SEAT 
Unfold and pull the support leg away from the bottom of the enhanced child seat 

until it locks in place . Place the enhanced child seat forwarder facing on a vehicle 
seat. Install the enhanced child seat on the vehicle seat ,please refer to Section 

4.7 ,Section 4.8 , Section4.9, Section 5.0. 


3. Fix the two metal sections of the buckle connector on the both sides of the 
enhanced child seat 


4. Place the child into the enhanced child seat and pass both arms through the 
harnesses. Position the harness straps at or below the child’s shoulders. After 
the child is seated, re-check whether the shoulder harnesses are at the proper 
height. 


Summary of Contents for HB909

Page 1: ...TION A 360 NORME ECE R129 02 Face la route Taille de l enfant 76cm 105cm Poids de l enfant 22 kg Dos la route Taille de l enfant 40cm 87cm Poids de l enfant 22 kg BB Boom by Mon Mobilier Design Lieu d...

Page 2: ...e indiqu sur les papiers du v hicule 4 Si vous avez un doute merci de contacter BB Boom NE PAS UTILISER FACE A LA ROUTE EN POSITION ASSISE O IL Y A UN AIRBAG FRONTAL ACTIF D INSTALL IMPORTANT NE PAS U...

Page 3: ...e indiqu sur les papiers du v hicule 4 Si vous avez un doute merci de contacter BB Boom NE PAS UTILISER FACE A LA ROUTE EN POSITION ASSISE O IL Y A UN AIRBAG FRONTAL ACTIF D INSTALL IMPORTANT NE PAS U...

Page 4: ...points autres que ceux d crits dans la notice et inscrits sur le si ge auto 3 Des bagages ou autres objets pouvant causer des blessures lors d une ventuelle collision doivent tre correctement s curis...

Page 5: ...points autres que ceux d crits dans la notice et inscrits sur le si ge auto 3 Des bagages ou autres objets pouvant causer des blessures lors d une ventuelle collision doivent tre correctement s curis...

Page 6: ...l sous risque de d c s ou blessures graves IMPORTANT NE PAS UTILISER FACE LA ROUTE AVANT LES 15 MOIS DE L ENFANT Se r f rer la notice V rifier la hauteur des bretelles NON Trop bas NON Trop haut OUI C...

Page 7: ...l sous risque de d c s ou blessures graves IMPORTANT NE PAS UTILISER FACE LA ROUTE AVANT LES 15 MOIS DE L ENFANT Se r f rer la notice V rifier la hauteur des bretelles NON Trop bas NON Trop haut OUI C...

Page 8: ...est install dos la route faites tourner le si ge vers l arri re et tirer la poign e de r glage de l inclinaison situ e l avant sous le si ge vers l avant jusqu la position la plus inclin e Rel cher la...

Page 9: ...est install dos la route faites tourner le si ge vers l arri re et tirer la poign e de r glage de l inclinaison situ e l avant sous le si ge vers l avant jusqu la position la plus inclin e Rel cher la...

Page 10: ...OFIX 3 Tenir et tirer le bouton d ajustement de la jambe de force et faire sortir la section basse de la jambe de force jusqu ce qu elle repose fermement sur le sol du v hicule L indicateur de la jamb...

Page 11: ...OFIX 3 Tenir et tirer le bouton d ajustement de la jambe de force et faire sortir la section basse de la jambe de force jusqu ce qu elle repose fermement sur le sol du v hicule L indicateur de la jamb...

Page 12: ...tendiez un clic Les deux indicateurs ISOFIX du bouton de d verrouillage ISOFIX sont alors de couleur verte En m me temps pousser le si ge auto vers le dossier du si ge du v hicule et v rifier qu il so...

Page 13: ...tendiez un clic Les deux indicateurs ISOFIX du bouton de d verrouillage ISOFIX sont alors de couleur verte En m me temps pousser le si ge auto vers le dossier du si ge du v hicule et v rifier qu il so...

Page 14: ...er le si ge auto dans diff rentes positions Important Il est interdit de placer des objets sous la jambe de force Pour plus d informations sur le compartiment de stockage situ au niveau des pieds cont...

Page 15: ...er le si ge auto dans diff rentes positions Important Il est interdit de placer des objets sous la jambe de force Pour plus d informations sur le compartiment de stockage situ au niveau des pieds cont...

Page 16: ...de la position d inclinaison souhait e et mettez votre enfant l aise Important N utilisez pas le si ge auto tourn vers l avant si votre enfant a moins de 15 mois ou mesure moins de 76 cm Pour d monter...

Page 17: ...de la position d inclinaison souhait e et mettez votre enfant l aise Important N utilisez pas le si ge auto tourn vers l avant si votre enfant a moins de 15 mois ou mesure moins de 76 cm Pour d monter...

Page 18: ...es connecteurs ISOFIX sont prot g s contre tout dommage une fois qu ils sont repouss s dans le cadre ISOFIX de la base Important Le si ge auto doit toujours tre fix lorsqu il se trouve dans le v hicul...

Page 19: ...es connecteurs ISOFIX sont prot g s contre tout dommage une fois qu ils sont repouss s dans le cadre ISOFIX de la base Important Le si ge auto doit toujours tre fix lorsqu il se trouve dans le v hicul...

Page 20: ...60 ROTATION ECE R129 02 Forward Facing Child height 76cm 105cm Child weight 22 kg Rearward Facing Child height 40cm 87cm Child weight 22 kg BB Boom by Mon Mobilier Design Lieu dit L Usine 42 430 Saint...

Page 21: ...Size Enhanced Child Restraint System 3 It is approved according to UN Regulation No 129 for use in i Size compatible vehicle seating positions as indicated by vehicle manufacturers in the vehicle use...

Page 22: ...Size Enhanced Child Restraint System 3 It is approved according to UN Regulation No 129 for use in i Size compatible vehicle seating positions as indicated by vehicle manufacturers in the vehicle use...

Page 23: ...not use any load bearing contact points other than those described in the instruction manual and marked in the child restraint Any luggage or other objects liable to cause injuries in the event of ac...

Page 24: ...not use any load bearing contact points other than those described in the instruction manual and marked in the child restraint Any luggage or other objects liable to cause injuries in the event of ac...

Page 25: ...iler WARNING DO NOT use rearward facing child seat in seating positions where an active frontal airbag installed IMPORTANT DO NOT USE FORWARD FACING BEFORE THE CHILD S AGE EXCEEDS 15 months Refer to i...

Page 26: ...iler WARNING DO NOT use rearward facing child seat in seating positions where an active frontal airbag installed IMPORTANT DO NOT USE FORWARD FACING BEFORE THE CHILD S AGE EXCEEDS 15 months Refer to i...

Page 27: ...ne position For rearward facing rearward facing position Rotate the seat body rearward facing and pull the recline adjustment handle under the front seat body forward to the largest recline position R...

Page 28: ...ne position For rearward facing rearward facing position Rotate the seat body rearward facing and pull the recline adjustment handle under the front seat body forward to the largest recline position R...

Page 29: ...4 8 Usage of the ISOFIX 3 Hold and push support leg adjustment handle and pull out the lower section from the upper section of the support leg until it rests firmly on the floor of the vehicle The su...

Page 30: ...4 8 Usage of the ISOFIX 3 Hold and push support leg adjustment handle and pull out the lower section from the upper section of the support leg until it rests firmly on the floor of the vehicle The su...

Page 31: ...icator of ISOFIX release button show green color At the same time push the backrest of the base of the enhanced child seat as soon as possible toward the backrest of vehicle seat until tightly 4 9 Usi...

Page 32: ...icator of ISOFIX release button show green color At the same time push the backrest of the base of the enhanced child seat as soon as possible toward the backrest of vehicle seat until tightly 4 9 Usi...

Page 33: ...tions Important It is not allowed to place objects under the support leg For information on the storage compartments in the foot area please contact your vehicle manufacturer Do not use the enhanced c...

Page 34: ...tions Important It is not allowed to place objects under the support leg For information on the storage compartments in the foot area please contact your vehicle manufacturer Do not use the enhanced c...

Page 35: ...the child seat to desire of incline position and make your child comfortable Important Do not use the enhanced child seat facing forwards if your child is under 76cm 15months old To disassemble your b...

Page 36: ...the child seat to desire of incline position and make your child comfortable Important Do not use the enhanced child seat facing forwards if your child is under 76cm 15months old To disassemble your b...

Page 37: ...ed The ISOFIX connectors are protected against damage once they are pushed back into the ISOFIX frame of the base Important The enhanced child seat must always be secured when it is in the vehicle eve...

Page 38: ...ed The ISOFIX connectors are protected against damage once they are pushed back into the ISOFIX frame of the base Important The enhanced child seat must always be secured when it is in the vehicle eve...

Page 39: ...R129 02 Rivolto in avanti Altezza bambino 76cm 105cm Peso bambino 22 kg Rivolto all indietro Altezza bambino 40cm 87cm Peso bambino 22 kg BB BOOM by Mon Mobilier Design Lieu dit L Usine 42430 Saint Ju...

Page 40: ...BAMBINO SIA INFERIORE A 15 mesi fare riferimento alle istruzioni Poggiatesta Inserto per bambini Spallacci Cinture del seggiolino Pulsante di regolazione Maniglia di posizione reclinabile Pulsante di...

Page 41: ...BAMBINO SIA INFERIORE A 15 mesi fare riferimento alle istruzioni Poggiatesta Inserto per bambini Spallacci Cinture del seggiolino Pulsante di regolazione Maniglia di posizione reclinabile Pulsante di...

Page 42: ...carico diversi da quelli descritti nel manuale di istruzioni e contrassegnati nel sistema di ritenuta per bambini Tutti i bagagli o altri oggetti che possono causare lesioni in caso di collisione devo...

Page 43: ...carico diversi da quelli descritti nel manuale di istruzioni e contrassegnati nel sistema di ritenuta per bambini Tutti i bagagli o altri oggetti che possono causare lesioni in caso di collisione devo...

Page 44: ...ivolto all indietro nei posti a sedere dove installato un airbag frontale attivo IMPORTANTE NON USARE il seggiolino rivolto all indietro per bambini di et inferiore a 15 mesi fare riferimento alle ist...

Page 45: ...ivolto all indietro nei posti a sedere dove installato un airbag frontale attivo IMPORTANTE NON USARE il seggiolino rivolto all indietro per bambini di et inferiore a 15 mesi fare riferimento alle ist...

Page 46: ...a Per la posizione rivolta all indietro Ruotare il corpo del seggiolino rivolto all indietro e tirare la maniglia di regolazione della reclinazione sotto il corpo del seggiolino anteriore in avanti fi...

Page 47: ...a Per la posizione rivolta all indietro Ruotare il corpo del seggiolino rivolto all indietro e tirare la maniglia di regolazione della reclinazione sotto il corpo del seggiolino anteriore in avanti fi...

Page 48: ...enere e spingere la maniglia di regolazione del piede di supporto ed estrarre la sezione inferiore dalla sezione superiore del piede di supporto fino a quando non poggia saldamente sul pavimento del v...

Page 49: ...enere e spingere la maniglia di regolazione del piede di supporto ed estrarre la sezione inferiore dalla sezione superiore del piede di supporto fino a quando non poggia saldamente sul pavimento del v...

Page 50: ...lic VERDE Assicurarsi che entrambi gli indicatori ISOFIX del pulsante di rilascio ISOFIX su entrambi i lati mostrino il colore verde in modo che il seggiolino per bambini sia fissato correttamente 4 S...

Page 51: ...lic VERDE Assicurarsi che entrambi gli indicatori ISOFIX del pulsante di rilascio ISOFIX su entrambi i lati mostrino il colore verde in modo che il seggiolino per bambini sia fissato correttamente 4 S...

Page 52: ...nso di marcia o nel senso contrario al senso di marcia durante il viaggio 5 1 INSTALLAZIONE DEL SEGGIOLINO PER BAMBINI i Size Dispiegare e tirare il piede di supporto dalla parte inferiore del seggiol...

Page 53: ...nso di marcia o nel senso contrario al senso di marcia durante il viaggio 5 1 INSTALLAZIONE DEL SEGGIOLINO PER BAMBINI i Size Dispiegare e tirare il piede di supporto dalla parte inferiore del seggiol...

Page 54: ...clinata desiderata e rendere il vostro bambino confortevole Importante Non usate il seggiolino migliorato rivolto in avanti se l altezza del vostro bambino inferiore a 76cm 15mesi Per rimuovere il vos...

Page 55: ...clinata desiderata e rendere il vostro bambino confortevole Importante Non usate il seggiolino migliorato rivolto in avanti se l altezza del vostro bambino inferiore a 76cm 15mesi Per rimuovere il vos...

Page 56: ...FIX non possono danneggiarsi una volta che sono spinti all interno del telaio ISOFIX della base Importante Il seggiolino deve essere sempre fissato quando nel veicolo anche se non viene trasportato ne...

Page 57: ...FIX non possono danneggiarsi una volta che sono spinti all interno del telaio ISOFIX della base Importante Il seggiolino deve essere sempre fissato quando nel veicolo anche se non viene trasportato ne...

Page 58: ...TACION A 360 NORMATIVA ECE R129 02 Cara a la marcha Altura del ni o 76cm 105cm Peso del ni o 22 kg Contramarcha Altura del ni o 40cm 87cm Peso del ni o 22 kg BB Boom by Mon Mobilier Design Lieu dit L...

Page 59: ...para ser utilizado en veh culos compatibles con el asiento i Size como mencionado en los papeles del veh culo 4 Si tiene una duda gracias por contactar BB Boom NO USAR CARA A LA MARCHA EN POSICION SEN...

Page 60: ...para ser utilizado en veh culos compatibles con el asiento i Size como mencionado en los papeles del veh culo 4 Si tiene una duda gracias por contactar BB Boom NO USAR CARA A LA MARCHA EN POSICION SEN...

Page 61: ...ensas No utilice cargas en contacto con puntos distintos a los descritos en las instrucciones y marcados en la silla de auto 3 El equipaje u otros objetos que puedan causar lesiones en caso de colisi...

Page 62: ...ensas No utilice cargas en contacto con puntos distintos a los descritos en las instrucciones y marcados en la silla de auto 3 El equipaje u otros objetos que puedan causar lesiones en caso de colisi...

Page 63: ...rte o lesiones graves IMPORTANTE NO UTILICE CARA A LA CARRETERA ANTES DE QUE EL NI O TENGA 15 MESES DE EDAD Consulte las instrucciones Compruebe la altura de las correas NO Demasiado bajo NO Demasiado...

Page 64: ...rte o lesiones graves IMPORTANTE NO UTILICE CARA A LA CARRETERA ANTES DE QUE EL NI O TENGA 15 MESES DE EDAD Consulte las instrucciones Compruebe la altura de las correas NO Demasiado bajo NO Demasiado...

Page 65: ...stala contramarcha g rela hacia atr s y tire la manilla de ajuste de la reclinaci n situada en la parte delantera de la silla hacia delante hasta la posici n m s reclinada Suelte la manilla de ajuste...

Page 66: ...stala contramarcha g rela hacia atr s y tire la manilla de ajuste de la reclinaci n situada en la parte delantera de la silla hacia delante hasta la posici n m s reclinada Suelte la manilla de ajuste...

Page 67: ...ISOFIX 3 Sujete y tire el pomo de ajuste de la pata de soporte y extienda la secci n inferior de la pata de soporte hasta que se apoye firmemente en el suelo del veh culo El indicador de la pata de so...

Page 68: ...ISOFIX 3 Sujete y tire el pomo de ajuste de la pata de soporte y extienda la secci n inferior de la pata de soporte hasta que se apoye firmemente en el suelo del veh culo El indicador de la pata de so...

Page 69: ...clic Los dos indicadores Isofix del bot n de liberaci n Isofix se pondr n en verde Al mismo tiempo empuje la silla de auto hacia el respaldo de la silla de coche del veh culo y compruebe que est bien...

Page 70: ...clic Los dos indicadores Isofix del bot n de liberaci n Isofix se pondr n en verde Al mismo tiempo empuje la silla de auto hacia el respaldo de la silla de coche del veh culo y compruebe que est bien...

Page 71: ...Est prohibido poner objetos debajo de la pata de soporte Para tener informaciones sobre las cajas situadas cerca de los pies gracias por contactar el productor de su veh culo No usar la silla de coche...

Page 72: ...Est prohibido poner objetos debajo de la pata de soporte Para tener informaciones sobre las cajas situadas cerca de los pies gracias por contactar el productor de su veh culo No usar la silla de coche...

Page 73: ...la posici n de reclinaci n deseada y haga que su hijo se sienta c modo Importante No utilice la silla de auto orientada hacia delante si su hijo tiene menos de 15 meses o mide menos de 76 cm Para ret...

Page 74: ...la posici n de reclinaci n deseada y haga que su hijo se sienta c modo Importante No utilice la silla de auto orientada hacia delante si su hijo tiene menos de 15 meses o mide menos de 76 cm Para ret...

Page 75: ...una vez que se introducen en el marco ISOFIX de la base Importante La silla de auto debe estar siempre asegurada cuando se encuentre en el veh culo incluso si no se transporta ning n ni o Mantenimien...

Page 76: ...una vez que se introducen en el marco ISOFIX de la base Importante La silla de auto debe estar siempre asegurada cuando se encuentre en el veh culo incluso si no se transporta ning n ni o Mantenimien...

Page 77: ...2 Face la route Taille de l enfant 76cm 105cm Poids de l enfant 22 kg Dos la route Taille de l enfant 40cm 87cm Poids de l enfant 22 kg BB Boom by Mon Mobilier Design Lieu dit L Usine 42 430 Saint Jus...

Reviews: