31
HOW TO: ACCESS DISPLAY
14
Remove the 4 screws from the front of the game.
Remove the 4 screws from the back of the game.
They are #2 square head.
Open the left rear access door, and
push the front vacuum form toward the front
of the game while sliding the wood display mount from the notches in the back wood.
The wood mount holding the display can now be removed from the left rear access door. Carefully moving the
cables to avoid pinching.
Open front door and reach up and feel for bottom of stop button.
Carefully twist switch housing 1/8 turn, and remove switch housing.
The plastic nut can then be spun of and button removed.
The light bulb wiring is easiest to access and inspect from the front of
the game. The wiring diagrams are also drawn with a view from of the
front of the game.
The front panels are held in place with plastic pop rivets.
Open rear access door and push on the edge of a panel and the rivet
will pop out.
Move around edge of the panel and push the next one out, and the
next one out, and so on.
Once one panel is removed, you can go to the front of the game and
work out the next panel and so on.
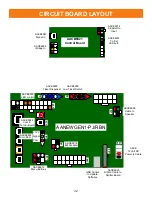
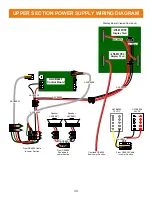
Refer to wiring diagram to trace cable issues.
HOW TO: REPLACE STOP BUTTON
HOW TO: ACCESS LIGHT BULB WIRING


