Supplied By www.heating spares.co Tel. 0161 620 6677
Installation Instructions – Page 4
GAS SUPPLY
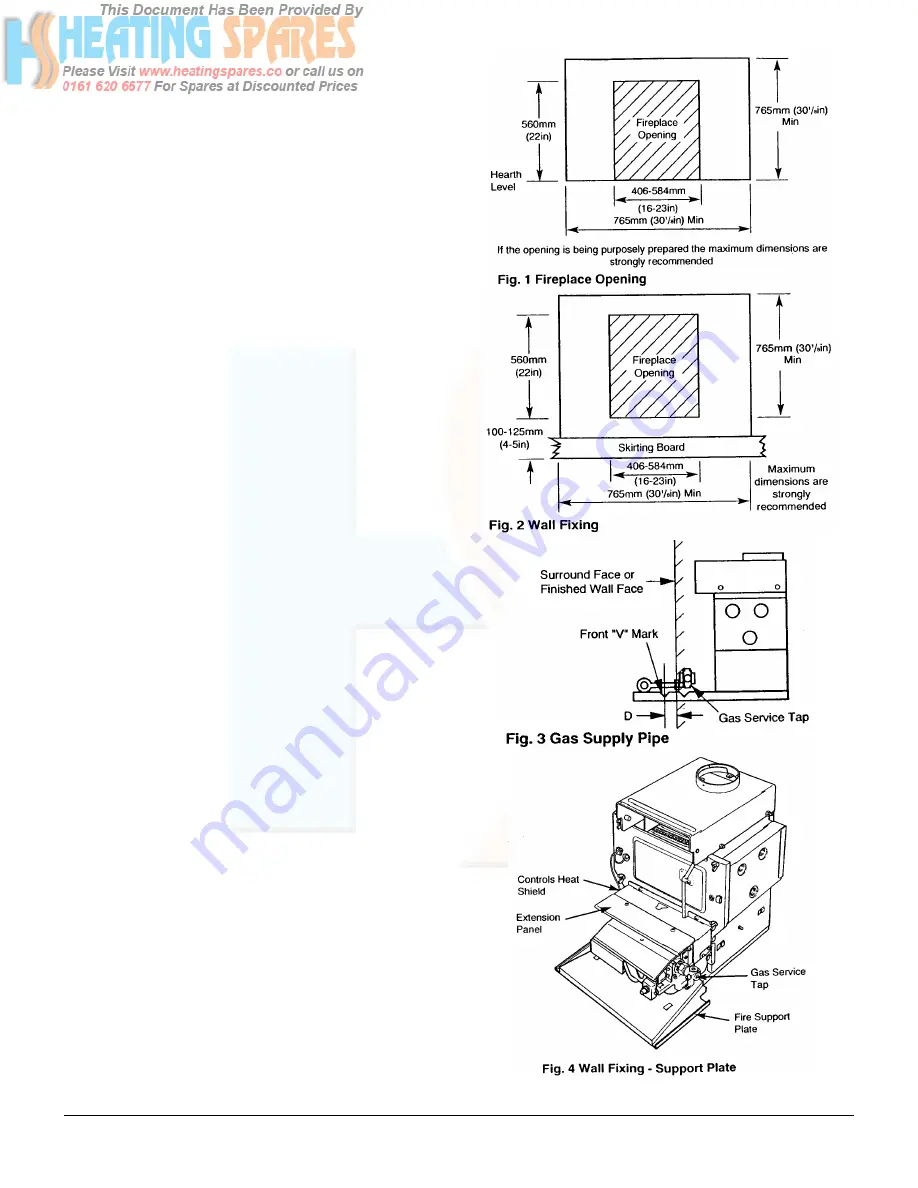
1. The gas supply is provided from the service tap on the boiler
unit. A supply pipe is provided with the fire. This pipe has one
flared end for connection to the fire and a plain end which is
connected to the service tap by a nut and olive.
2. Dependent upon the position of the boiler relevant to the
surround or wall finish face, it may be necessary to shorten the
supply pipe. IF THE PIPE HAS TO BE SHORTENED CARE
MUST BE TAKEN. The length of the supply pipe is determined
as follows:
(a)
Measure the distance ‘D’ from the centre of the front
positioning ‘V mark on the boiler tray, back to the
surround face or finished wall face (Fig.3).
(b)
FROM THE PLAIN END of the supply pipe cut off a
length of pipe equal to the distance ‘D’ measured
above. Take care to ensure that the cut is square
and the pipe is free from burrs and swarf.
ALTERNATIVELY
(c)
The amount of pipe required to be cut off can be
determined by holding the PLAIN END of the pipe
against the surround or finished wall face, marking
the pipe at the position of the centre of the front
positioning ‘V mark on the boiler tray.
3. After threading the steel flare nut on the above pipe, connect
the plain end to the service tap with the remaining nut and olive.
It is important to ensure that the flared end of the pipe:
(a)
Faces to the right.
(b)
Is parallel with the hearth or floor.
4. It is necessary to unscrew and remove the extension plate
from the boiler controls heat shield. Once removed this item can
be discarded (Fig.4).
Fitting the Fire
HEARTH FIXING
1. Fit the fire backing plate to the fire using the M5 x 8mm
thread forming screws provided (Fig.5).
2. Locate the fire spigot into the draught diverter on the boiler.
Push the fire backwards until the backing plate touches the
surround or finished wall face. Adjust the feet to level the fire
(Fig.6).
3. Mark the position of the most suitable pair of securing holes
in the fire backing plate (Fig.5) and remove the fire. Drill and
plug the wall with suitable plugs. Replace the fire and secure to
the wall with suitable fixing screws.
4. Connect the supply pipe to the fire inlet connection.
WALL FIXING
1. Slide the fire support plate over the overhanging boiler base
(Fig.4). Using the screws provided, loosely attach the plate
using the slots at each side.
2. On electronic control boilers it will be necessary to remove
the input plug from the controls. Push the support plate
backwards until it touches the wall surface and tighten the
screws to lock the frame in position. Locate the fire spigot into
the draught diverter on the boiler. Push the fire backwards until
the backing plate touches the finished wall face. Adjust the feet
to level the fire (Fig.6).
3. Mark the position of the most suitable pair of securing holes
in the fire backing plate (Fig.5) and remove the fire. Drill and
plug the wall. Replace the fire and secure to the wall with the
two fixing screws provided.
4.Connect the gas supply pipe to the fire inlet connection.


